
|
 November 17th, 2009, 12:15 AM
|
#1 |
|
Join Date: Nov 2008 Posts: Too much.
|
DIY- Applying Vinyl Graphics
I've been doing some cosmetic work on the bike lately and one of the things done was to change the graphics on the Lime Green 250r from black to white. I've always wanted to do this since purchasing the bike, but the clear coated lettering on the tank stopped me. Well, Kevin came up with a great overlay for the tank lettering that enabled me to do that, so lately I've been changing all off the bike's graphics to white.
In doing so, I realized there was not a DIY on how to apply these decals. This is the way I've worked out and results in an amateur like myself obtaining excellent results. There are 3 basic steps that you need to experiment with to end up with whatever it is you want to apply to your baby. The first is positioning, the second is cleaning and the third is the application of the decal itself. To make the application process more forgiving, I use a wet and slippery method when applying the decal. Total application time will be longer, but allows you some leeway in positioning the decal exactly in case you screw up when laying down the decal. 1. Positioning First, decide where you want the decal located. I use some small bits of masking tape on the corners of the decal and stick it to different places on the bike where you think it will look good.  Here I've decided on the spacing from the lower fairing bolt by using a piece of tape as a guide and have taped the decal up to position it where I would like it to be.  2. Cleaning Next, clean the portion that you want the decal to stick to. Wax, oils, dirt, bug guts will inhibit the decal from sticking and result in a lumpy result. I used Simple Green at a 10:1 ratio to clean off any wax, dust or bugs on the fairing. The bike was already fairly clean, so if yours is really dirty beforehand, I suggest washing the bike before thinking of putting on decals.   You want the surface to be clean of contaminants. I used some Griot's hand polish after wiping down with the simple green to insure the paint was absolutely clean.  I then positioned the decal once again exactly where I wanted it to go.  Once satisfied, I used a second piece of masking tape as a guide so that when I applied the decal, all I would need to do is line it up exactly as planned.  3. Application Next it's time for the application of the decal to the bike. The spray bottle has water mixed with about 3-4 drops of Dawn dish washing detergent. By using a soap mixture, it allows you to "float" the decal into position instead of having it stick immediately like a dry application would. Be gentle with the decal even when wet and don't push down on it as it will stick if you do so. Liberal spraying of the soapy solution is recommended.  Carefully separate the decal backing paper from the thin "carrier" paper. once separated, spray the decal down with the soapy solution.   Next, position the decal exactly where you taped off the guides. here is where using the wet, slippery method has it's advantages. If you need to position the decal a bit after you get it down on the plastic, you can do so by sliding it into position or if it is stuck, lift the decal back off. If you had done this step w/o the soap solution, the decal would be stuck and possibly ruined if you attempted to remove it to reposition.  Spray the decal down thoroughly again with the solution making it look like a wet T-shirt contest.   Once in position, begin gently drying the decal by blotting the water using a dry rag. I did this a number of times, each time working water out from beneath the carrier paper out towards the edges to be absorbed by the rag.   After working the water out from the decal (I worked on drying it about 1/2 hr), slowly (and I mean slowly) start lifting the carrier paper from the decal. If, when lifting, the decal sticks to the paper instead of the bike, gently put the carrier paper back and continue drying with the dry rag.   You can also help the carrier paper separate from the decal by spraying more soapy solution between the decal and paper. Work slowly and pull very gently.  ... until the carrier paper is completely separated from the decal.  The end result.  I followed these 3 basic steps when applying the other decals as well...  And a picture of the completed graphics color switch on my bike.  Feel free to add any other tips you have about decal installation if you think you have a better/simpler way of doing this. |

|

|
|
November 17th, 2009, 12:26 AM
|
#2 |
|
ninjette.org certified postwhore
Name: zartan
Location: spam la
Join Date: Oct 2008 Motorcycle(s): 08 250 R Posts: A lot.
|
I just learned the soapy water trick this year. Felt like a kid at disney on ice. The absolute magic of it
 OOH! I am Likin' the white on green!!! Nice job
__________________________________________________
"Don't let adverse facts stand in the way of a good decision" Colin Powell |
|
|
|
|
November 17th, 2009, 12:39 AM
|
#3 |
|
Join Date: Nov 2008 Posts: Too much.
|
Cool trick, huh?
 I learned that way back when I was in high school working in a paint shop. They used to use the soapy water trick when applying the fake vinyl wood paneling that were on the sides of station wagons back then.  
|
|
|
|
|
November 17th, 2009, 12:45 AM
|
#4 |
|
ninjette.org dude
Name: 1 guess :-)
Location: SF Bay Area
Join Date: Jun 2008 Motorcycle(s): '13 Ninja 300 (white, the fastest color!), '13 R1200RT, '14 CRF250L, '12 TT-R125LE Posts: Too much.
Blog Entries: 7
|
Nice work. Added to the DIY sticky...
__________________________________________________
Montgomery Street Motorcycle Club / cal24.com / crf250l.org / ninjette.org ninjette.org Terms of Service Shopping for motorcycle parts or equipment? Come here first. The friendliest Ninja 250R/300/400 forum on the internet! (especially Unregistered) |
|
|
|
|
November 17th, 2009, 12:49 AM
|
#5 |
|
The Sportisi Master
Name: Matt
Location: Chico
Join Date: May 2009 Motorcycle(s): 2008 Ninja 250 Posts: A lot.
|
Kelly your spot on. The way you did it is the easiest way for someone who knows nothing about vinyl laying or just doesn't have the steadiest of hands to do it properly without messing up.
__________________________________________________
Sportisimoto USA is born. |
|
|
|
|
November 17th, 2009, 04:40 AM
|
#6 |
|
ninjette.org certified postwhore
Name: Sam
Location: Northern Virginia
Join Date: Nov 2008 Motorcycle(s): Ninja 250R 2009 Posts: A lot.
|
That's also the ONLY way to apply window tint! The only difference is you use a squeege, after the tint is in place.
Excellent DIY, kkim. 
|
|
|
|
|
November 17th, 2009, 06:53 AM
|
#7 |
|
ninjette.org certified postwhore
Name: Rick
Location: Alexandria, Louisiana
Join Date: Jan 2009 Motorcycle(s): 05 Blue Ninja 250 Posts: Too much.
MOTY - 2017, MOTM - Jan '19, Oct '16, May '14
|
Great DIY KKim. Thank you.
|
|
|
|
|
November 20th, 2009, 08:31 AM
|
#8 |
|
ninjette.org certified postwhore
Name: Dave
Location: Michigan
Join Date: May 2009 Motorcycle(s): 2009 Kawasaki Ninja 650RTE & 2009 Kawasaki Ninja 250R (SOLD) Posts: A lot.
|
nice DIY kkim!
ill add this, well not yet - but soon, im still looking into what designs/etc to put onto my ninja... vinyl decals/stickers, is easy to apply on FLAT or near FLAT surfaces. vinyl decals adhisive is PRESSURE SENSITIVE! the harder you press, the better itll adhere overall! Creases and Curves of the fairings will be a pain for me once im rdy to apply my reflective tribal designs onto my bike next spring! - vinyl is user friendly and soft to work with, ive put decals on afew Cars of mine back in the day (hood, door, decklid, rear quarter panels/etc) - REFLECTIVE VINYL is thicker, bulkier then reg vinyl! just to point out for those of you, like me, might be looking to apply reflective vinyl designs to your bike! heh, wetworking decals was perfected for me when i was 10-12 yrs old. when building plastic model cars,planes,boats as a hobby! were as using a BOWL (if large enuff to use with your decals) to soak the whole decal until ready to be applied! vs a spray bottle, though some wetness might be needed to be layed down before removing the BOWL soaked decal. |
|
|
|
|
November 20th, 2009, 11:57 AM
|
#9 | |
|
Join Date: Nov 2008 Posts: Too much.
|
Quote:
|
|
|
|
|
|
November 23rd, 2009, 06:59 AM
|
#10 |
|
ninjette.org guru
Name: Deb
Location: Philly
Join Date: Dec 2008 Motorcycle(s): '09 ninja 250 (blue) Posts: 295
|
kkim,
Great DIY! I am putting on decals in pretty much the exact location. The first one, I placed free-hand and did NOT use this method (wish I had). The next one, however, is the one located on the kickstand side of the bike (much more difficult to access). Therefore, I think I should remove the fairing to apply that one (didn't for the first one). Q: Does the entire fairing get removed?? I read the fairing removal DIY. Do I follow the directions for "lower fairing removal"? thanks
__________________________________________________
A woman is like a teabag; you never know how strong she is until she's in hot water! |
|
|
|
|
November 23rd, 2009, 10:21 AM
|
#11 |
|
Join Date: Nov 2008 Posts: Too much.
|
I did remove the fairing, only because it was difficult to work in that area unless you lay the bike over on it's side to make sure everything is straight.
Following the DIY on plastic removal should work to get that piece off to work on. gl...
|
|
|
|
|
November 23rd, 2009, 10:24 AM
|
#12 |
|
ninjette.org guru
Name: Deb
Location: Philly
Join Date: Dec 2008 Motorcycle(s): '09 ninja 250 (blue) Posts: 295
|
AARGHHHHH; thanks kkim. I really didn't want to remove the entire fairing just to put on a small graphic. Oh well, I'll chalk it up as a good learning experience.
thanks again Kelly.
__________________________________________________
A woman is like a teabag; you never know how strong she is until she's in hot water! |
|
|
|
|
November 23rd, 2009, 10:33 AM
|
#13 |
|
Join Date: Nov 2008 Posts: Too much.
|
Deb,
well, how small of a graphic are we talking about? If you can live w/ it not being absolutely perfect, go for it w/o taking off the fairing. It all depends on how anal one is and knowing myself, I couldn't live with crooked graphics that I put on. Try using the wet technique... it will afford you some leeway when placing the decal. Just remember to use a lot of light soap solution on both the fairing surface and the decal and don't press down on the decal when applying to keep it from sticking before you get it exactly in place. pictures after you're done?
|
|
|
|
|
November 23rd, 2009, 11:20 AM
|
#14 |
|
ninjette.org guru
Name: Deb
Location: Philly
Join Date: Dec 2008 Motorcycle(s): '09 ninja 250 (blue) Posts: 295
|
Hmmmm; I will try to remove the fairing because the first one I put on is not 100% perfect (and it's driving me crazy).
I will post a pic of the first one and then you'll see why I want to perfect the next one. If the wet method works out well for me, I will re-do the first one using the same technique. (I bought extras) Oh; btw, the graphic I am applying is the Kawaskai lettering (same as another forum member - ninjette - applied to her bike).
__________________________________________________
A woman is like a teabag; you never know how strong she is until she's in hot water! |
|
|
|
|
November 23rd, 2009, 11:28 AM
|
#15 |
|
Join Date: Nov 2008 Posts: Too much.
|
like most things we do, the final step (in this case the application of the decals) is really the easiest part. The hardest part for me was figuring out placement, cleaning the fairing and setting up an accurate alignment guide. with all that work beforehand, applying the decals themselves was a piece of cake.
|
|
|
|
|
November 23rd, 2009, 08:38 PM
|
#16 |
|
ninjette.org certified postwhore
Name: Lil One
Location: NB Canada
Join Date: Mar 2009 Motorcycle(s): '09 Ninja 250 Black Posts: A lot.
|
you seem to have the coolest ideas kelly cool DIY
__________________________________________________
I'm not small, I'm fun sized 
|
|
|
|
|
November 24th, 2009, 02:26 AM
|
#17 |
|
ninjette.org guru
Name: Karl
Location: Ireland the Hawaii of Europe!
Join Date: Jun 2009 Motorcycle(s): Ninja 250R Fuel Injected Model 2009 Posts: 357
|
This might be handy seeing as how my 50 decals (2007 kawi motogp hopkins decals) just arrived in the post.
Now if the rain stops and the 130 km/h (80mph) winds die down I can get around to cleaning it up.
__________________________________________________
My vlogs on Youtube are here |
|
|
|
|
November 24th, 2009, 07:22 AM
|
#18 |
|
ninjette.org sage
Name: darius
Location: GA
Join Date: Apr 2009 Motorcycle(s): 2000 250 sold; 2005 636 sold. BIKELESS IN ATLANTA Posts: 753
|
i'm loving that white on green. i've been thinking about removing my graphics and just going all red. adding one solid color would be great.
|
|
|
|
|
November 24th, 2009, 11:18 AM
|
#19 |
|
Join Date: Nov 2008 Posts: Too much.
|
Thanks, guys (and gals
). I've always liked the white on kawi green ever since the early days of Kawasaki dirt bikes.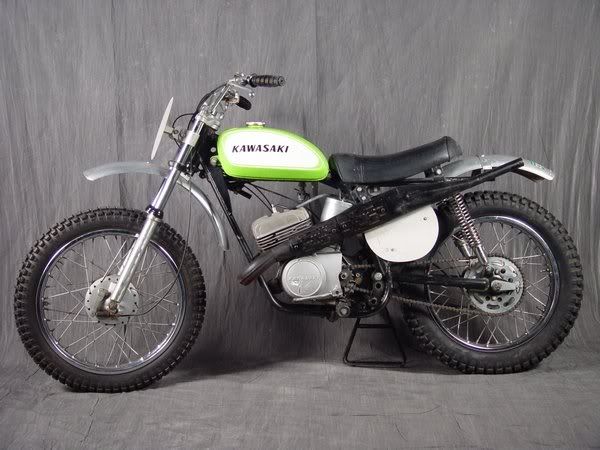 For anyone looking for graphics, I highly recommend Kevin. Easy to deal with at very reasonable prices. Helps that he's a really nice guy and works with you to get exactly what you want. http://www.ninjette.org/forums/showthread.php?t=25105 |
|
|
|
|
November 24th, 2009, 11:54 AM
|
#20 |
|
ninjette.org sage
Name: darius
Location: GA
Join Date: Apr 2009 Motorcycle(s): 2000 250 sold; 2005 636 sold. BIKELESS IN ATLANTA Posts: 753
|
how do you avoid burning yourself on that?
|
|
|
|
|
November 24th, 2009, 12:21 PM
|
#21 |
|
Join Date: Nov 2008 Posts: Too much.
|
there are pipe guards on the dirt bike expansion chambers.
besides, back then, racers wore leather pants. 
|
|
|
|
|
November 24th, 2009, 12:34 PM
|
#22 | |
|
ninjette.org sage
Name: darius
Location: GA
Join Date: Apr 2009 Motorcycle(s): 2000 250 sold; 2005 636 sold. BIKELESS IN ATLANTA Posts: 753
|
Quote:
. would that be considered a cafe racer too?
|
|
|
|
|
|
November 24th, 2009, 06:02 PM
|
#23 |
|
ninjette.org sage
Name: Wayne
Location: Brookfield, MA
Join Date: Nov 2008 Motorcycle(s): 2011 Honda CBR250R Posts: 585
|
Wow, someone finally made some oversized tank stickers. I knew it would just be a matter of time. Now I can finish the job and get those oversized logos off my tank.
|
|
|
|
|
August 25th, 2011, 10:32 AM
|
#24 |
|
ninjette.org dude
Name: 1 guess :-)
Location: SF Bay Area
Join Date: Jun 2008 Motorcycle(s): '13 Ninja 300 (white, the fastest color!), '13 R1200RT, '14 CRF250L, '12 TT-R125LE Posts: Too much.
Blog Entries: 7
|
__________________________________________________
Montgomery Street Motorcycle Club / cal24.com / crf250l.org / ninjette.org ninjette.org Terms of Service Shopping for motorcycle parts or equipment? Come here first. The friendliest Ninja 250R/300/400 forum on the internet! (especially Unregistered) |
|
|
|
|
February 16th, 2012, 05:01 PM
|
#25 |
|
ninjette.org member
Name: Javi
Location: Salinas, CA
Join Date: Nov 2011 Motorcycle(s): 2012 Ninja 250r Lime Green :) Posts: 25
|
Where are the pictures?? :/
|
|
|
|
|
March 3rd, 2012, 05:35 PM
|
#26 | |
|
CPT Falcon
Name: J.Emmett Turner
Location: Newnan, GA
Join Date: Apr 2009 Motorcycle(s): '08 CP Blue EX250J, '97 unpainted EX250F, 2nd '97 unpainted EX250F (no engine), '07 black EX250F Posts: A lot.
|
Quote:
 Many people have banded together to restore the pics in his other DIYs with pics pulled from caches or re-created, but this one still needs the treatment. Many people have banded together to restore the pics in his other DIYs with pics pulled from caches or re-created, but this one still needs the treatment.Please come back, kkim! |
|
|
|
|
 |
 Similar Threads
|
||||
| Thread | Thread Starter | Forum | Replies | Last Post |
| vinyl graphics | shellneil | General Motorcycling Discussion | 3 | November 1st, 2009 12:04 PM |
| DIY - Special Edition Vinyl | binlagin | 2008 - 2012 Ninja 250R Farkles | 14 | July 29th, 2009 07:03 AM |
| Vinyl Graphics | sm0kediver | General Motorcycling Discussion | 24 | April 4th, 2009 08:15 PM |
|
|


