
|
 December 1st, 2008, 05:43 AM
|
#1 |
|
That's me!
Name: TJ
Location: Ames, IA
Join Date: Nov 2008 Motorcycle(s): 2008 Ninja 250r (Tis blue), 2008 CBR600RR Posts: 454
|
Note before you go buck wild with this: I don't have an air-filter box so if you DO then you'll have to get creative to get the reservoir to fit... For those who have removed their air-filter box and want to clean up the exterior of the bike this is a relatively simple mod. So anywho here is how I relocated my rear brake reservoir (individual results may not be as AWESOME) .
Step 1: Open the brake reservoir to allow the fluid to drain easily. Note: There IS a little hold down you have to unscrew (you can barely see it flipped up above the mounting spot for the reservoir). Make sure to... Flip that up!  Step 2: Drain the brake fluid. To do this the easiest and most efficient way I used a handheld vacuum pump... 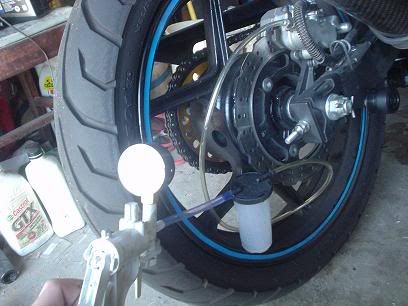 Open the bleeder valve and just pump away. Step 3: Remove the brake reservoir. Use a rag so remnant brake fluid doesn't find it's way out. Then plug both the hose and reservoir so while you're working nothing gets in there! 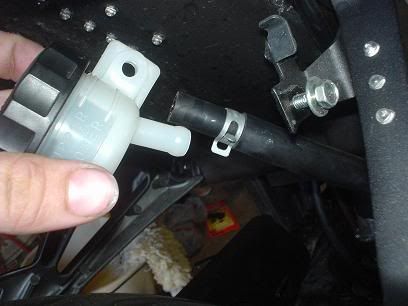 Step 4: With the sides opened up you can see a good spot to run the hose through. I was tempted to just go around the bottom of the mud flap, but there would be no support of the hose that and it runs near the rear shock. I opted for the shiny round spot on the mud flap! 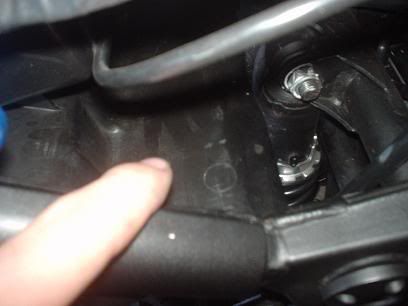 Step 5: Drill a pilot hole. In the never-ending usefulness of the Milwaukee offset screwdriver I used that to drill the pilot hole . 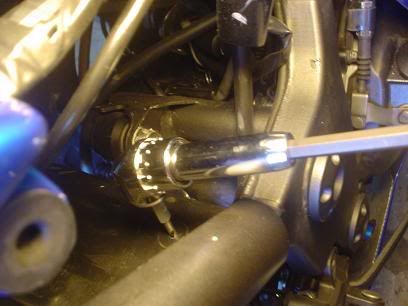 Step 6: Enlarge the hole to about 3/4". I was going to use a grommet, but there's a rubber sleeve around the hose and plastic isn't usually risky to run hoses and wires through, so I opted out of using a grommet. 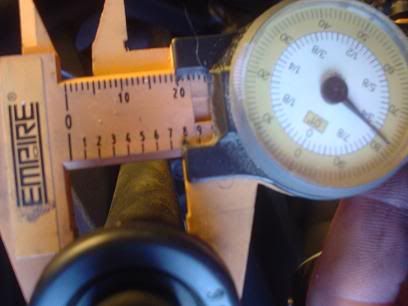 Notice you can see the grommet I was going to use before I figured it'd be silly Step 7: Run the hose through and notice that the elbow on the master cylinder rotates (It's supposed to). I rotated mine down and ran the hose around and up through the mudflap. 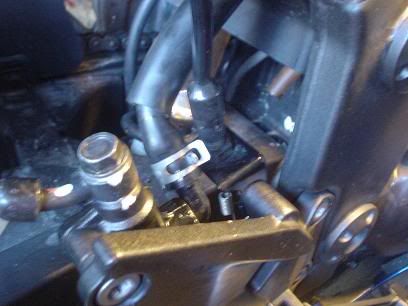 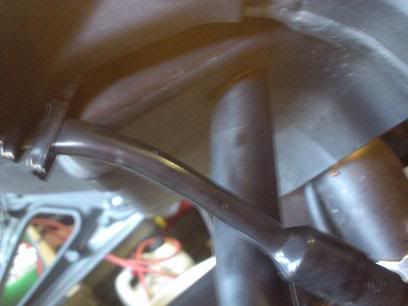 Step 8: To make the bracket for the reservoir I opted to make a bracket and mount it to the battery box. I used a simple piece of flat aluminum (1" x 1/8" thick) and cut it about 3 inches down. 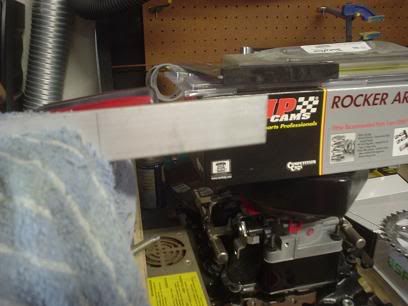 Afterwards I rounded the corners and filed it smooth. Step 9: Remove the battery by first (with the seat removed obviously) lifting the upper plastic piece. 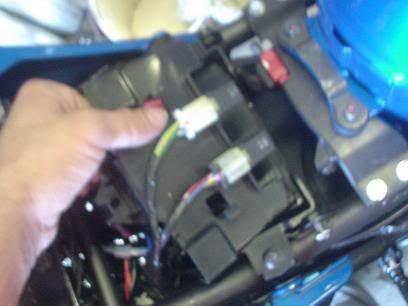 There's one relay hanging on this piece and one screw holding it down. Step 10: Remove the battery I always point out when disconnecting batteries ALWAYS remove the negative end first. That way the frame is no longer (-) charged. 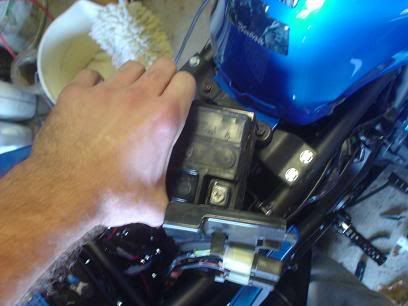 Step 11: The whole battery box has to come out. This is pretty easy to do. There's one more relay hanging on the box and two screws underneath the batteries pad: 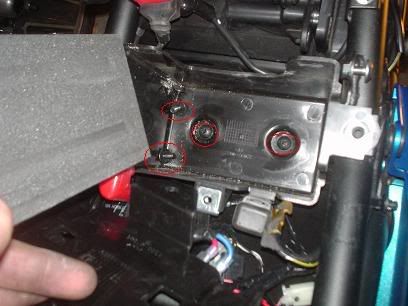 Step 12: I used two 10-32 beveled screws to hold the mount to the battery box. This way the screws can be countersunk into the battery box so the screw heads don't really rub against the battery inside the box. 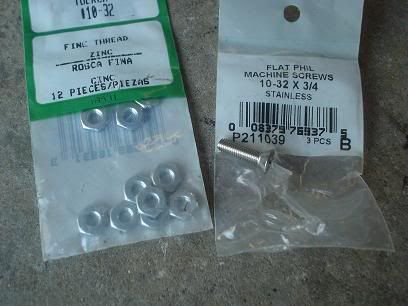 Step 13: With the battery box out I drilled two offset holes through the aluminum bracket and into the battery box. INSIDE the battery box I beveled the screw holes so the screws countersink and the battery is none the wiser there's screws there. 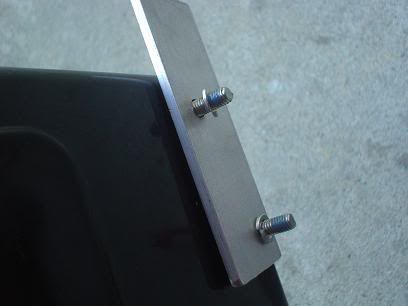 Note that I always throw blue loc-tite on threaded stuffs. A noble idea! Step 14: I held the reservoir up to the bracket on the side that's 'hanging out' and drilled a hole to mount the reservoir to. I didn't get a picture of it (whoops), but it's not too crazy a concept . You can re-use the original screw that mounted the reservoir (I did) and put a 6mm x 1.0 pitch nut on the backside, or if you have a tap kit (the way I did it) just tap the hole and everything looks ++. And finished up: Step 15: Drop everything back in and hook everything back up. You need to shorten the hose to the reservoir. After you hook it back up it should look like this: 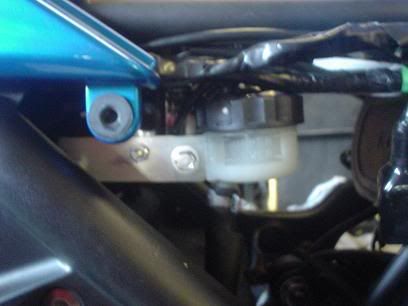 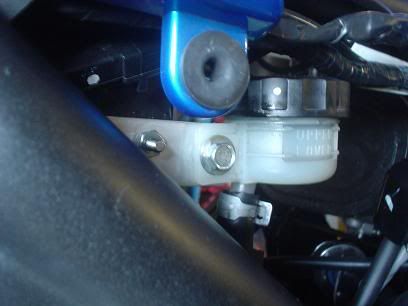 It's hard to see, but everything is nice and compact now. To refill the brakes, use DOT4 brake fluid, fill up the reservoir and let it sit for a minute or two (to clear the bubbles) and flush the brakes (open the bleeder, attach a section of hose and pump the brakes or use a vacuum pump until brake fluid starts coming out of the attached hose). Usually you have to do this more than once as little bubbles settle :P |

|

|
|
December 1st, 2008, 12:40 PM
|
#2 |
|
Join Date: Nov 2008 Posts: Too much.
|
Still haven't moved mine... it's on my (long) list of to do's.
 I've been thinking about it, though, and have a few questions for you... I've been thinking about it, though, and have a few questions for you...I'm thinking of notching the fender liner instead of drilling a hole. It would save me from having to drain the fluid and disconnect the reservoir, but it would also make taking the rear fender liner out much easier if ever needed. I know removing the liner happens once in a blue moon, but still, it does have a few advantages over drilling. What made you decide to drill instead of notching? Any problems at all since doing this? thanks 
|
|
|
|
|
December 1st, 2008, 03:30 PM
|
#3 |
|
That's me!
Name: TJ
Location: Ames, IA
Join Date: Nov 2008 Motorcycle(s): 2008 Ninja 250r (Tis blue), 2008 CBR600RR Posts: 454
|
I WAS going to notch it originally, but if you look you'd have to damn near remove the whole mudflap to get the hose around. I try to shy away from moving that thing around as it's a royal PITA!
 Hell I was even looking around for those D shaped grommets so the round side could fit into the notch on the mudflap and the straight side could hug the frame. That and draining the system isn't hard at all with a handheld vacuum pump. If I remember correctly the entire brake fluid supply fit in the pump, so I could just pour it right back in! Hell I was even looking around for those D shaped grommets so the round side could fit into the notch on the mudflap and the straight side could hug the frame. That and draining the system isn't hard at all with a handheld vacuum pump. If I remember correctly the entire brake fluid supply fit in the pump, so I could just pour it right back in!My other thought was notching the front of the mudflap (next to the rear shock), but I wound up shying away from that as well as it just struck me as half assing it  If you do wind up notching yours post some pics por favor! If you do wind up notching yours post some pics por favor! 
|
|
|
|
|
December 1st, 2008, 03:38 PM
|
#4 | |
|
Join Date: Nov 2008 Posts: Too much.
|
Quote:
I'll post up pics when I decide to do this. I have all the parts... just looking at different ideas at the moment. |
|
|
|
|
|
December 3rd, 2008, 08:38 PM
|
#5 |
|
ninjette.org sage
Name: Matt
Location: South East Florida/Rutgers University
Join Date: Dec 2008 Motorcycle(s): 2008 250r (Fastest Color) Posts: 914
|
Im thinking about doing this when I go to remove my snorkel. Eventually I might wanna get pods for my bike but the jet kit comes first...but i digress...my real question is where do you think a good spot to move the brake reservoir since i dont have a gaping hole where my airbox used to be? Any ideas?
|
|
|
|
|
December 3rd, 2008, 08:49 PM
|
#6 | |
|
Join Date: Nov 2008 Posts: Too much.
|
Quote:
|
|
|
|
|
|
December 3rd, 2008, 08:55 PM
|
#7 |
|
ninjette.org sage
Name: Matt
Location: South East Florida/Rutgers University
Join Date: Dec 2008 Motorcycle(s): 2008 250r (Fastest Color) Posts: 914
|
So what your telling me is I need to buy a jet kit and figure out how to use it...thus making my bike better...then remove my airbox and buy pods...which will make my bike sound nicer...all to move my this damn thing...to make my bike look cleaner? I like where your mind is at
|
|
|
|
|
December 3rd, 2008, 09:04 PM
|
#8 | |
|
Join Date: Nov 2008 Posts: Too much.
|
Quote:
come springtime, all the mods should be completed. I've done mine in steps and still was able to keep the bike rideable between mod upgrades. One step at a time. it's a hobby... enjoy it.
|
|
|
|
|
|
December 3rd, 2008, 09:11 PM
|
#9 |
|
ninjette.org sage
Name: Matt
Location: South East Florida/Rutgers University
Join Date: Dec 2008 Motorcycle(s): 2008 250r (Fastest Color) Posts: 914
|
This is true...im very excited to start...maybe ill start this winter break
...i should get the jet kit first right? haha i feel like a noob
|
|
|
|
|
December 3rd, 2008, 09:17 PM
|
#10 |
|
Join Date: Nov 2008 Posts: Too much.
|
how long have you been riding? best mod for a new rider is to get proficient at riding the bike safely and confidently.
my one mod that I advise all new owners to do is to shim the needles, if their bike needs it. this will give you 70% of what a jet kit does with 10% of the install headaches. If you want to install a jet kit later, the experience you gain from working on your bike to shim really pays off. |
|
|
|
|
December 3rd, 2008, 09:25 PM
|
#11 |
|
ninjette.org sage
Name: Matt
Location: South East Florida/Rutgers University
Join Date: Dec 2008 Motorcycle(s): 2008 250r (Fastest Color) Posts: 914
|
That sounds like a good idea...dont wanna jump into anything too fast...I mean I will have this bike for a while so no problem taking it slow. I read your DIY on doing the washer thing and I dont think my bike has the problems that you mentioned that would require the washers...i dunno maybe I got one of the "perfect" bikes but its probably that warm florida sun...so maybe Ill take the snorkel out to give myself a reason to do this
|
|
|
|
|
December 3rd, 2008, 09:28 PM
|
#12 | |
|
Join Date: Nov 2008 Posts: Too much.
|
Quote:

|
|
|
|
|
|
December 3rd, 2008, 11:13 PM
|
#13 | |
|
That's me!
Name: TJ
Location: Ames, IA
Join Date: Nov 2008 Motorcycle(s): 2008 Ninja 250r (Tis blue), 2008 CBR600RR Posts: 454
|
Quote:
. Usually the idle mixture screw setting is still really conservative though. I think I might do a thread on that come to think of it...
|
|
|
|
|
 |
 Similar Threads
|
||||
| Thread | Thread Starter | Forum | Replies | Last Post |
| Rear brake reservoir bent? | joecool | 2013 - 2017 Ninja 300 Tech Talk | 16 | October 20th, 2014 08:55 PM |
| Relocation of The Rear Brake Reservoir (Pics) | ladyrocket | 2008 - 2012 Ninja 250R Tech Talk | 12 | May 16th, 2011 09:41 PM |
| DIY: Relocating the rear turn signals | noche_caliente | 2008 - 2012 Ninja 250R Tech Talk | 6 | August 15th, 2009 05:15 PM |
|
|


