
|
 November 17th, 2010, 12:23 AM
|
#1 |
|
ModMy250.com
Name: Tri
Location: St, Louis
Join Date: Sep 2010 Motorcycle(s): 2009 Ninja 250R, 2005 R6 Posts: A lot.
|
DIY: fixing scratches in polished metals
I had to fix some gouges in my Yoshi exhaust heat shield, so I figured I'd do a DIY. It doesn't take much time and is pretty easy. The cost of tools may outweigh the cost of the job if you only need one or two pieces fixed. That being said...
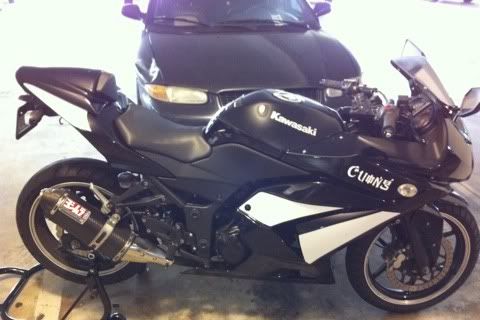
What you will need: Electric or Pneumatic Sander 60-220 grit sand paper 6" Bench polisher Various polishing pads Microfiber cloth Polishing compounds: Black, Brown (aka Tripoli), and White. White is only for aluminum. I found that the brown was more than sufficient for Stainless Steel. Following the brown with green didn't make a noticeable difference, so I wouldn't waste my time with it. You may not want to wear nice clothing for this because it will get messy and dirty fast. So, here's what I have: I picked up the polisher from harbor freight for $45. The compounds were around $3 each from HF as well. The different wheels were about $5 each.    Here's my project to be worked on:  You can see it's got some deep gouges. |

|

|
|
November 17th, 2010, 12:31 AM
|
#2 |
|
ModMy250.com
Name: Tri
Location: St, Louis
Join Date: Sep 2010 Motorcycle(s): 2009 Ninja 250R, 2005 R6 Posts: A lot.
|
Step 1: Flatten the scratches so you have a nice even surface. You may want to start at a medium grit to see how it does on the scratches. It will depend on how deep they are. I started with 80, but moved down to 60 because the 80 just wasn't doing it. When you sand, don't put pressure on the sander. Just let the sand paper do it's job. All you need to do is keep it from walking onto the areas you don't need to refinish.
Here's what I got with the 80:  You can see there are 3-4 deeper ones still present. Slapped on the 60 and went over it again. Last pass with the 220 to smooth out the large scratches from the 60. 
|
|
|
|
|
November 17th, 2010, 12:31 AM
|
#3 |
|
ModMy250.com
Name: Tri
Location: St, Louis
Join Date: Sep 2010 Motorcycle(s): 2009 Ninja 250R, 2005 R6 Posts: A lot.
|
Step 2: Here's the fun part. Install the flap wheels to the polisher if you haven't already done so. The fully threaded wheel is for the black compound. The half threaded wheel or unthreaded wheel will be for the brown. The brown can be used on a fully threaded wheel, but don't use the same one that got used with the black. Always keep your compound wheels separate.
To add the compound to the wheel, start up the polisher and touch the compound to the wheel. It should begin to melt the compound and the wheel will take on it's color. You don't need to coat the wheel entirely, just 1/4 of it will work. The sequence of compounds is: Black, Brown, and (green or white if necessary)   Step 3: Now that your wheel is coated with the black compound, pick up the project and hold it gently but firmly against the wheel. You shouldn't need to put too much pressure against the wheel, especially one that's fully threaded. Just run it along the bottom if you can.  After a few minutes, the compound should have removed most of the scratches. If more compound is needed, just add more. This is after 1-2 minutes with the black: 
|
|
|
|
|
November 17th, 2010, 12:32 AM
|
#4 |
|
ModMy250.com
Name: Tri
Location: St, Louis
Join Date: Sep 2010 Motorcycle(s): 2009 Ninja 250R, 2005 R6 Posts: A lot.
|
As you can see, the black did it's job and removed all the fine scratches after a few more minutes:
 Step 4: Now add the brown or tripoli to the other wheel. The wheels from HF aren't that great and began to grow hairs when the wheels caught some speed. I just trimmed the hairs off to have a nice even wheel.   So, repeat Step 3 and run the piece on the brown wheel. After a few minutes, you will have a refinished piece that looks as good as new  Step 5: Just take that microfiber cloth and buff off the compound. Check out the reflections!     You can't tell where the factory polish begins and where my refinish ends I hope this helps! -Tri |
|
|
|
|
November 17th, 2010, 02:22 AM
|
#5 |
|
Join Date: Nov 2008 Posts: Too much.
|
Thanks! Always wanted a step by step on how it's done.
 What attachments can you recommend when you can't take the parts to the polishing wheels? I have some engine parts and wheels that could use some polishing but will be still mounted on the bike while working on them.
|
|
|
|
|
November 17th, 2010, 06:26 AM
|
#7 | |
|
IC2(SW)
Name: Kerry
Location: Pensacola
Join Date: Nov 2008 Motorcycle(s): . Posts: A lot.
|
Quote:
|
|
|
|
|
|
November 17th, 2010, 08:44 AM
|
#8 | |
|
ninjette.org sage
Name: J
Location: Oklahoma
Join Date: Sep 2010 Motorcycle(s): 2008 250R Posts: 771
|
Quote:
__________________________________________________
Factory Pro Jet Kit, K&N R-0990 Pod Filter, Sportisi VR Black Exhaust, BRT TIS Ignition, White Paint, and 16/41 Sprockets. Soon: Maybe a 37T Rear Sprocket if I get things running like I'd hoped. |
|
|
|
|
|
November 17th, 2010, 08:50 AM
|
#9 | |
|
ModMy250.com
Name: Tri
Location: St, Louis
Join Date: Sep 2010 Motorcycle(s): 2009 Ninja 250R, 2005 R6 Posts: A lot.
|
Quote:
This HF kit comes with the attachments you would want to use on wheels or hard to reach places: http://www.harborfreight.com/14-piec...kit-98707.html Here's a Die Grinder: http://www.harborfreight.com/air-too...der-95029.html Just make sure the shank on the attachments fits the collet on the grinder. You will also need a compressor capable of maintaining 5 CFM for this particular grinder. |
|
|
|
|
|
November 17th, 2010, 11:45 AM
|
#10 |
|
noob motovlogger
Name: Gareth
Location: Austin, TX
Join Date: Dec 2009 Motorcycle(s): Black 2009 250r Posts: 328
|
Bah. That'll buff o-
damnit.  If I had loads of money I would have a big garage with loads and loads of tools like that buffer all over the place so I could learn to do all this stuff.
__________________________________________________
My Motovlog "Damn, either shimming the needles fixes 90% of any problems with the 250Rs, or kkim owns stock in a washer manufacturer." -DmbShn41 |
|
|
|
|
November 17th, 2010, 12:17 PM
|
#11 | ||
|
Join Date: Nov 2008 Posts: Too much.
|
Quote:
Quote:
|
||
|
|
|
|
November 17th, 2010, 03:01 PM
|
#12 |
|
ninjette.org certified postwhore
Name: Cuong
Location: San Diego
Join Date: Jul 2010 Motorcycle(s): 2008 Ninja 250r, 2007 Daytona 675 Posts: A lot.
|
I have polished wheels that are looking really dirty. What compound would you recommend using with a dremel (I have a rotary tool but too large for polished wheels). Dremel is good for anywhere from 10000-25000 rpm so which end of the spectrum is better? Thanks!
|
|
|
|
|
November 17th, 2010, 03:12 PM
|
#13 | |
|
ModMy250.com
Name: Tri
Location: St, Louis
Join Date: Sep 2010 Motorcycle(s): 2009 Ninja 250R, 2005 R6 Posts: A lot.
|
Quote:
If they're just dirty, I would suggest using a non-abrasive cleaner instead of trying to repolish them. Also, if they're clear coated, polishing won't do much. Mother's Mag polish works pretty well on a ball and drill attachment for cleaning. Just tape up the areas you don't want to get the polish on. |
|
|
|
|
|
November 17th, 2010, 03:35 PM
|
#14 |
|
ninjette.org certified postwhore
Name: Cuong
Location: San Diego
Join Date: Jul 2010 Motorcycle(s): 2008 Ninja 250r, 2007 Daytona 675 Posts: A lot.
|
i stripped the paint on the wheels so they're bare metal. They're getting dull and my elbow grease isn't very effective so I was looking towards using some kind of tool.
|
|
|
|
|
November 17th, 2010, 04:18 PM
|
#15 |
|
ModMy250.com
Name: Tri
Location: St, Louis
Join Date: Sep 2010 Motorcycle(s): 2009 Ninja 250R, 2005 R6 Posts: A lot.
|
Ah ok. If you have access to a die grinder, I would suggest using that along with the steps above to get a mirror finish. I'm not sure, but if the wheels are AL, then go black, brown, then white. The same would be with the dremel. Just be very careful not to let the wheel on the dremel get dry. Keep it wet with the compound and you should be fine. be prepared for many hours for each wheel tho.
After they're polished, I'd suggest spraying some Dupli-color high temp clear coat on them. It'll help protect the shine. Either that or get them powdercoated. |
|
|
|
|
November 18th, 2010, 12:29 AM
|
#16 |
|
ninjette.org dude
Name: 1 guess :-)
Location: SF Bay Area
Join Date: Jun 2008 Motorcycle(s): '13 Ninja 300 (white, the fastest color!), '13 R1200RT, '14 CRF250L, '12 TT-R125LE Posts: Too much.
Blog Entries: 7
|
/linked to DIY sticky thread.
__________________________________________________
Montgomery Street Motorcycle Club / cal24.com / crf250l.org / ninjette.org ninjette.org Terms of Service Shopping for motorcycle parts or equipment? Come here first. The friendliest Ninja 250R/300/400 forum on the internet! (especially Unregistered) |
|
|
|
 |
 Similar Threads
|
||||
| Thread | Thread Starter | Forum | Replies | Last Post |
| DIY - Fixing The Buzzing/Rattling Clutch Lever | NathanF | 2008 - 2012 Ninja 250R Tech Talk | 12 | May 5th, 2016 05:19 PM |
| Just got "done" with my DIY polished rim lips | edxmon | 2008 - 2012 Ninja 250R Farkles | 18 | July 18th, 2012 07:42 PM |
| [topix.net] - Simple Jack | Perform Metals CR2L Lift | Ninjette Newsbot | Motorcycling News | 0 | August 9th, 2010 03:20 PM |
| [topix.net] - Earning Your Masters of Exotic Metals Degree at the College of Hard Kno | Ninjette Newsbot | Motorcycling News | 0 | May 25th, 2010 08:40 AM |
| fixing minor scratches on the helmet... | deckone | Motorcycle Gear | 5 | August 2nd, 2009 01:36 PM |
| Thread Tools | |
|
|


