I'm 6'3" and 250lbs and always found the front end to be kinda "mooshy." The rear was kinda sloppy too, but it is adjustable so I've set it to the ma but that only makes the front end work harder. I did some reading and many folks recommended installing preload spacers in the forks. I did a little more research and found that pre-gen 250s had a similar fork setup and copied what some of the other riders my size have done. They recommended to cut spacers from PVC pipe 1/2" to 3/4" and insert them into the tops of the forks. So without having to go crazy measuring sag and doing excessive calculations I used someone else's homework.
Here's how:
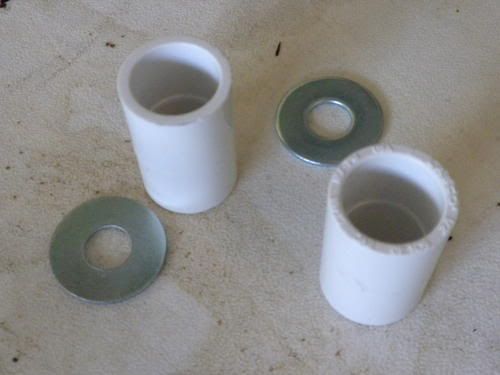
1. Go to the local hardware store and buy this stuff, the washer is 31mm outside diameter, the PVC coupler is 28mm diamter and about 1.5" in length. Find something about these sizes, if you find a washer that is bigger, you'll have to grind it down a little.
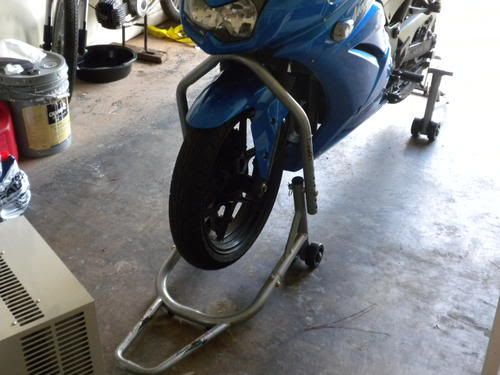
2. Put bike on a triple stand,
do not attempt to do anything past this point with the front wheel on the ground. If you must, hang the bike by some other means SAFELY with the front suspension dangling without any weight on it whatsoever! A stand that goes under the bottom of your forks is not good here, either!
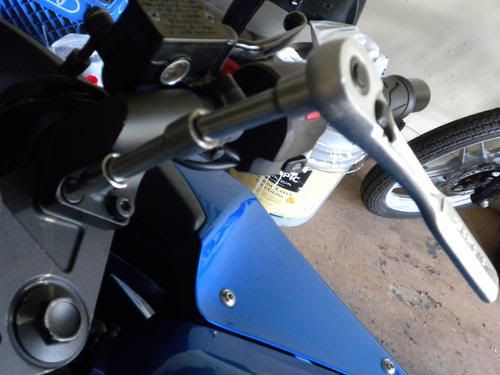
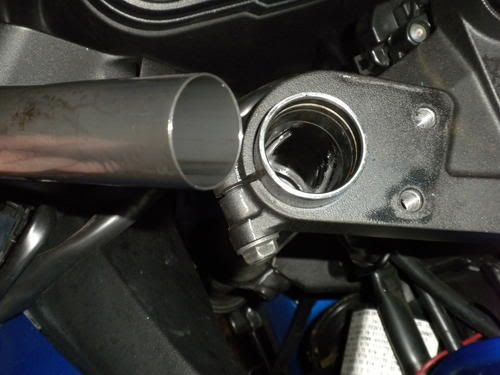
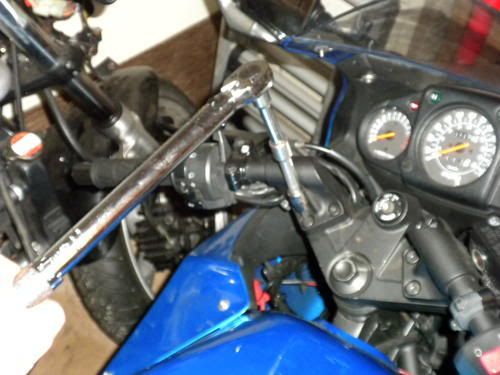
3. Remove handlebars, there are 2 allen bolts on each bar, then the bar should just lift off the top tree.
4. Cut your PVC spacers to 3/4" (you can always come back and cut more later if its too stiff for you. Remember that I am 250lbs, if you weigh less, you'll want shorter. If you weigh more or want a slightly taller ride height and stiffer front end you'll want the spacer to be longer.)
5. Press down on the plugs in the top of the forks with a wooden dowel or a screwdriver, you may need to your weight into this to compress the springs. While pushing the plug down, gently pry out the snapring with a smaller screwdriver... take care not to scratch up the inside of the fork leg. I couldn't take any pictures here, I don't have a 3rd hand.
6. Once the plugs are out, I found that my washer was a good idea, the steel collar below is thin metal and will probably chop through the PVC spacer. The washer will act as a buffer between the two.
7. Drop in the washer on top of the collar, then the PVC spacer on top of it, and finally put the plug back on top of this stack.
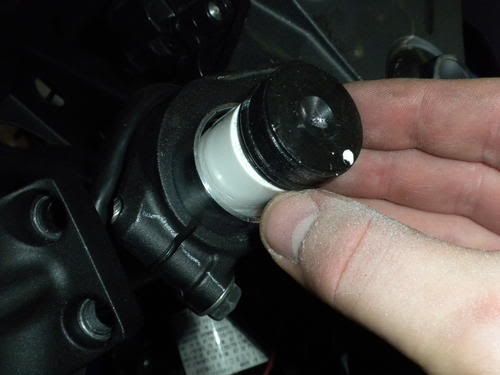
8. Make sure you have your wooden dowel, and the snapring that you took out earlier in your hand, and push the whole stack of spacers and plugs down into the fork it will stop when it can't go any further. This will require more force than before because of the extra 3/4" + washer thickness worth of spring compression required. Then gently slip the snapring back into its groove, make sure it is fit snugly around the entire circumference so that it doesn't pop back out. No pics again, no extra hands!
9. Finally re-attach your handlebars and torque the respective allen bolts to 18ft/lbs. Mine were kinda loose when I went to take them off so I added a little locktite even though the service manual doesn't call for it.
First impression when sitting on the bike is that the handlebars seem a little closer to me as the front end is sitting slightly higher under weight. Upon my first ride I found that I could feel more of the cracks and bumps on the road than before, but the front end felt stiffer and more sporty. It also helped control a little bit of the nose-dive I was experiencing under heavy braking. I think I will experiment with a heavier fork oil in the near future to try and help resist the nose-dive even further.