Ok, I wanted the strips that a lot of the GSXR's have in the back for the brake lights. I was going to make strips out of diffuser panels and then mount LED's behind it for a smooth light stream. The problem is some of the real estate atop the mudflap is limited! (Especially the area underneath the IC box). So I opted to drill and mount strips of individual LED's (I'm crazy I know). To further complicate this I wanted a running light set of strips and a brake light set of strips. So the outer rows are always lit, and the inner rows only light when you activate the brakes. To really emphasize the brake light I also packed the LED's tighter together on the middle rows (3 LED's for every 1 outer LED)...
I didn't really write-up a formal DIY on this as It's not overly complicated, but more tedious. First you have to remove the mudflap. Then on the backside I laid down 4-strips of masking tape. Down each masking tape strip I drew perfectly straight lines. Then I drew intersecting lines for every desired LED. After drilling all the LED holes peel back the masking tape and
I cleaned up the outer part (the visible side) of each hole with a stepped drill bit. Just a little "umphh" per hole is all you need. You're just aiming for somewhat bevel each hole to deburr it and give it a clean look. Again make the holes small so the LED's really have to be forced in.
Then push LED's in holes

The trick here is to make sure the strips of LED's all have the positive leads and negative leads lined up. For each side I had the positive leads facing outwards and the negative leads facing inward. This way I literally tied all the negative leads together down each side and soldered it all together...
Tip! - ALL hardware stores sell liquid electrical tape. I went buck wild with this stuff. With the negative leads I brushed liquid electrical tape in multiple coats over it all. Get freaky with the stuff. I also painted the backsides of each LED with it to prevent possible arcing if water gets in there or if things move. Like everything else I soldered a resistor to each LED lead (all 46 of them) and had to pick up a couple of packs of small shrink tubes from Home Depot. Again you don't have to wire them this way, but it's really not that difficult to solder that many resistors once you get going with it! When all's said and done the back of the mudflap looks like strips of firecrackers tied together
.
Wiring-wise you can wire the running-light strips to terminal 86 on either of your two previously installed relays (Always +12 volts when IGN is on) and for the brake light strips you just splice into the either the blue wire (if you're coming right from the tail light) or the blue/red wire (if you're before the connector). Again LED's don't draw much current so the 30 or so LED's that are in the 'brake light circuit' won't even phase the total current draw.
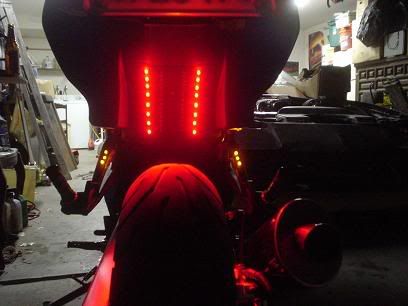
For the visual people, here's the final product:

There they are! Again the inner strips are the 'brake lights' and the outer strips are the running lights. So in action:
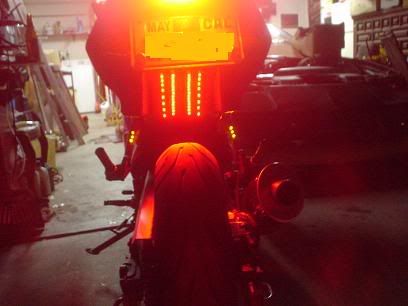
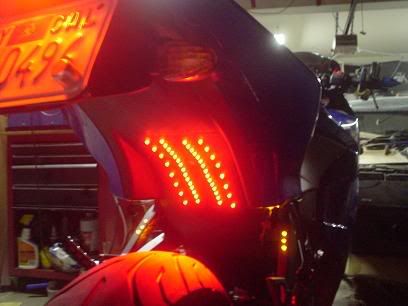
I've since updated these pictures. Notice there's no rear-brake reservoir to obscure the side markers? This makes me happy
