A couple of people wanted me to do this one and its way overdue.
There aren't many pictures that go along with this one simply because it's all basically just wiring and placing sensors. Its quite difficult to take pictures of wiring behind the dash.
Also, please note that I already had Ninja250's gear indicator installed so this one is temporary. But I've ridden around for almost 300 miles with it installed and it's still going strong. Even got rained on once.
So here goes...
Tools you will need:
- All the tools to remove the body work from your bike. The stock toolkit will do for this. But only if it's all you have. I would definitely recommend using quality tools.
- Soldering Iron
- Multimeter
- Electrical tape
- Wire Strippers
- Razor blade
- Double sided tape
- Basic electrical knowledge
- Rear stand (optional, but will make adjusting the sensors MUCH easier)
First things first:
Lets Get Nekkid
You only need to go as far as removing the two lower farings (sides) and the upper (front).
First:
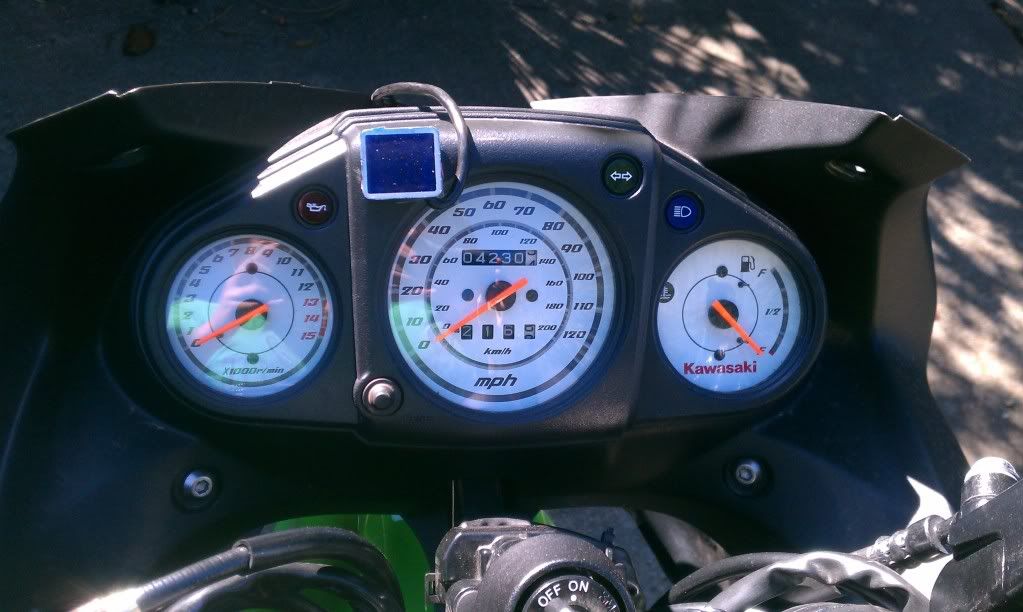
Figure out where you are going to be placing your indicator. I chose to place mine over the neutral light.
Second:
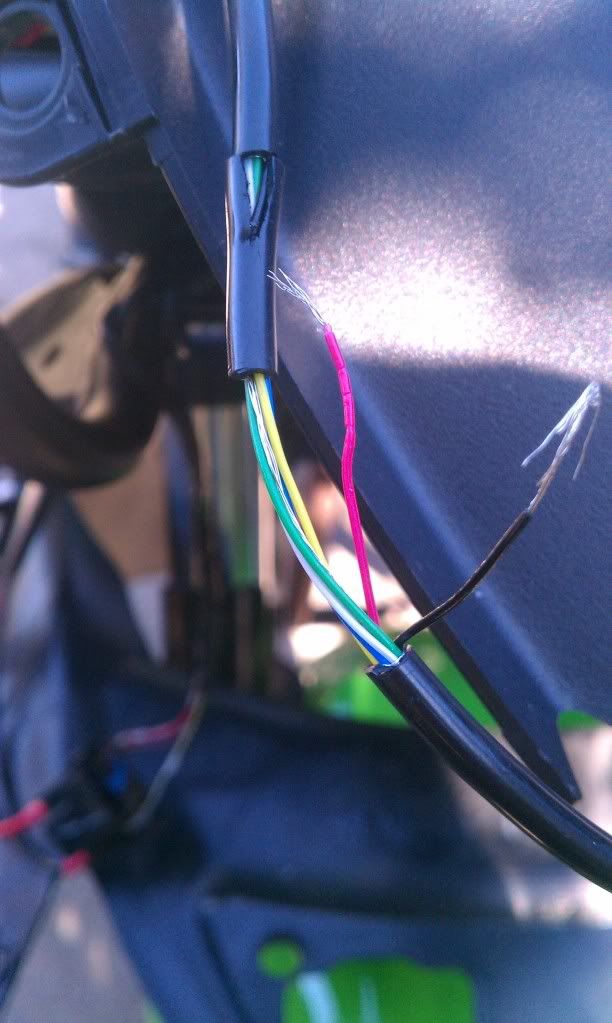
Lay the wire in the direction you want it to go. It will fit between the dash shroud and the upper faring. Route the wire behind the dash and strip about 1-2 inches from the outer layer of the wiring harness from the gear indicator.
Be sure to strip the wire in a location that will allow it to reach the wires coming from the back of the dash board.

Third:
Cut the black, red and white wires in the harness. These are the power, ground, and neutral sensor. Be sure to cut the wires closer to the open end of the harness.
Fourth:
Splice the red wire from the harness onto the positive wire going to any of the dash lights. Splice the black wire from the harness onto the negative wire coming from the same light. Splice the white wire from the harness onto the positive wire coming from the neutral light in the dash.
Fifth:
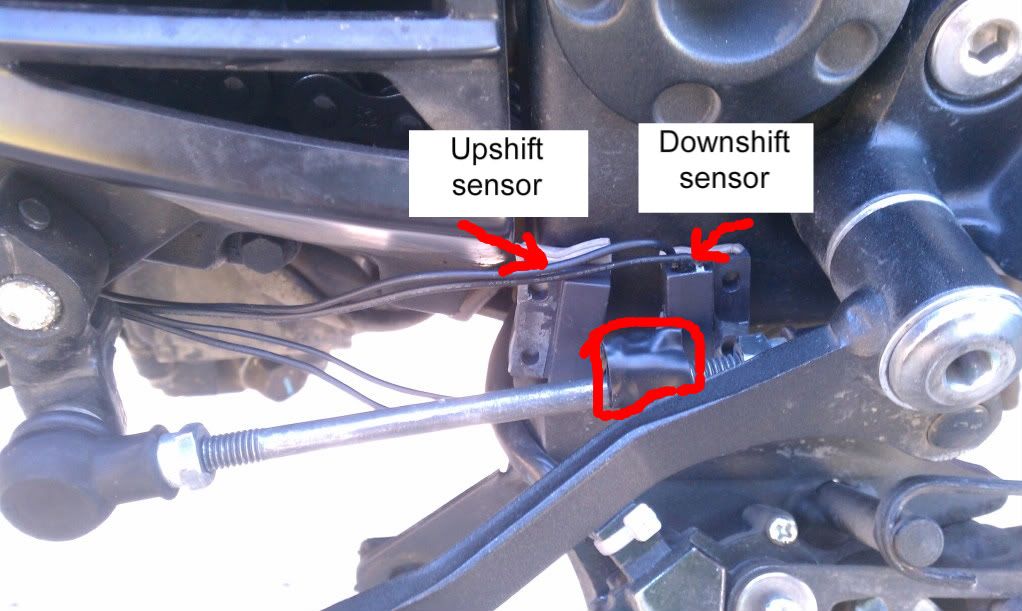
Connect the sensors to the main harness. You will need to figure out which sensor registers upshifts and which one registers downshifts. Do this by simply turning the bike on, (At this point everything should be working.) put the bike in gear to remove the neutral input and place the magnet near each sensor noting which one causes the indicator to display "1" this will be the downshift sensor.

Sixth:
Using the double sided tape, Place the sensors on the frame next to the shift linkage. Place the downshift sensor further back the bike and the upshift sensor further forward as shown. using a bit of double sided tape, place the magnet on the inside of the shift linkage and secure with tape wrapped around the linkage. If this installation was permanent, I would have used a dab of super glue to hold the magnet to the linkage.
Seventh:
This was the hardest part of the install for me, getting everything adjusted perfectly. This is where the rear stand comes in VERY handy.
Click this picture: Its a video. This is what it should look like when you are done.
Finally once everything is perfectly adjusted, using some kind of marker, mark where to drill holes through the frame Use a bolt long enough to go all the way through the frame and sensor to permanently attach the sensors.
But, if you don't want to go drilling holes through your frame(I don't blame you if you), like I said, I've put almost 300 miles on mine with only the double sided tape holding the sensors on and it still works flawlessly. Almost never misses gears. This indicator is definitely worth the $30 as long as you aren't afraid of doing a little work.
On a side note, this is my first DIY and I'm sure I overlooked a few minor details of the install, so if anyone has any questions or needs more pictures, please feel free to ask and I will do my best to help you out. And those of you seasoned DIYers, feel free to offer your advise

EDIT: I forgot to mention. Make sure your are very very careful when messing with the wires from the indicator. They are very fragile and break very easily. Ask me how I know....