I know this is going to stem a good 10+ posts of people asking if they should do this to their bike, but I digress:
Anywho, I don't like the slop in the stock master-cylinder and wanted to convert to Pazzo levers on the clutch AND brake side... That was the initial mindset. I also wanted to convert to Galfer SS brake lines. I figured I might as well just switch out the whole master cylinder/lever with a ZX-6R's (Which stock is an adjustable lever). So to begin:
Step 1 - Get the parts!
Here are the master cylinders next to one another:
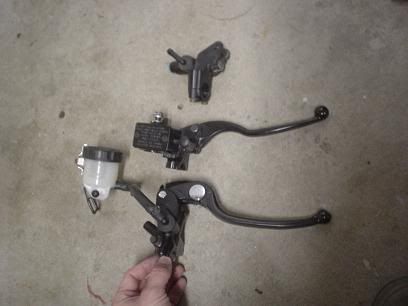
Fun story time: I got the 2007 ZX-6R master cylinder and lever (bottom) but it lacked a reservoir. I then got a reservoir from a ZX-7R (which CAME with it's master cylinder) (top)

. It was only $20 which is a steal considering a NOS M/C for the ZX-6r is around $60 . Lastly in the middle is the factory 250r mastercylinder and lever.
Top and bottom view of the ZX-6r M/C:
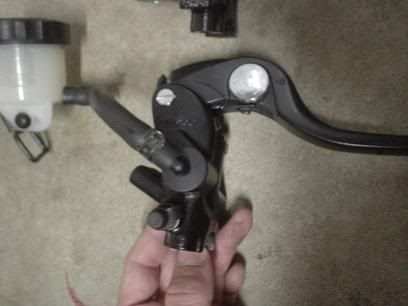
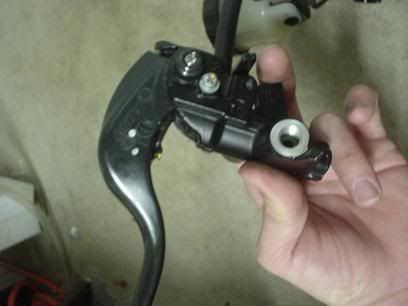
Notice the brake hose mounts underneath the M/C whereas the 250r's mounts on the front? This leads to...
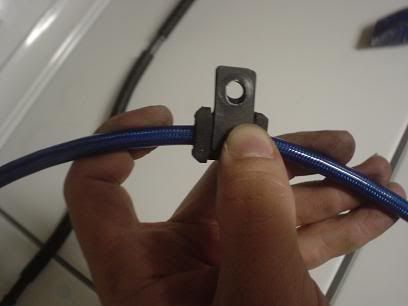
The tale of the two hoses:
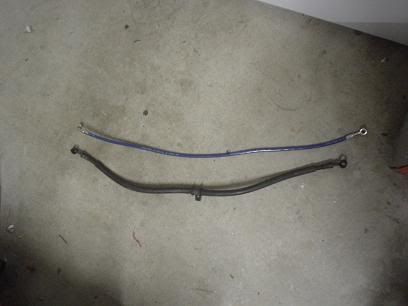
The shiny Galfer line makes the factory line look like a chump. Here's the important part:

The caliper side maintains the same angle (although look how much more compact and nifty the Galfer one appears).
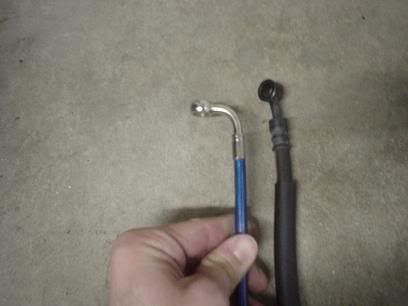
b
For the M/C side I ordered the hose with a 90 degree bend. This allows it to mount without incident except for one little hiccup which I'll go over shortly...
Step 2 - Loosen the reservoir cap.
This allows for the draining of the brake fluid.
Step 3 - Hook up a vacuum pump to the bleeder valve, open the bleeder valve and pump the lines clear.
 Step 4 -
 Remove the banjo bolt
Make sure to have a rag when you do this. The traces of brake fluid might form a drop or two and you don't want that stuff on paint!
Step 5 - Remove brake hose clamp
Follow the line up and on the triple tree clamp is a brake line clamp. One 10mm bolt holds it in place.
Step 6 - Remove the M/C brake line banjo bolt

Same as the lower, make sure you have a rag handy... The hose should come out with ease.
Step 7 -Remove the old M/C

Remove the cap (Should be two-8mm bolts), and swing the M/C up so that you can:
Step 8 -Remove the brake sensor
One phillips screw holds it on...
Step 9 - Put the new M/C on
Same as the 250r M/C except (2) allen head bolts attach the M/C to the handlebar. Here's one snag to the installation of this M/C. The way the brake hose mounts to the M/C on the bottom you can't swivel the assembly down like the old one. So it sits higher than the original. It's not THAT noticeable IMO, but I haven't really figured a way around it. The picture of this problem is in step 15. Also the brake sensor fits perfectly on the new M/C! It's clocked a little differently, but mounts the same way.
Step 10 - Making a reservoir mount.
In the last picture I was simply holding the reservoir up. To mount it I:
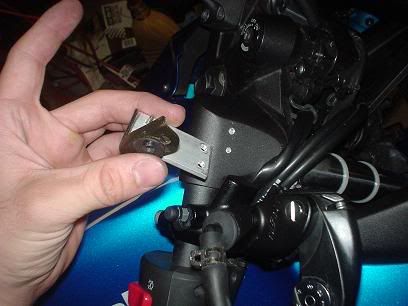
Cut a piece of 3/4" flat aluminum stock (about 2" long). The top of the bracket is notched so the aluminum slides up and 'seats'. I put one #10 sheet metal screw through the original bracket and the aluminum. I then attached the aluminum piece to the handle bar mounts (see the holes?).
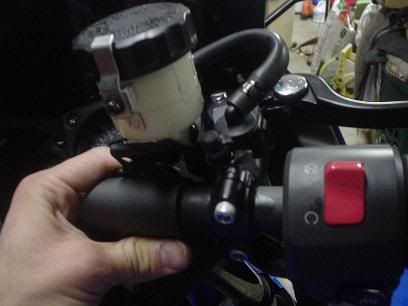
Step 11 - The reservoir attached:

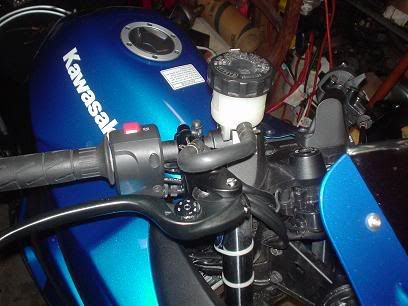
I'll paint the aluminum flat-black one of these days, but no matter. From the front you can see the original reservoir bracket attached to the aluminum with the sheet metal screw. You can't see the bracket much from the other side. I'll eventually get a new hose, but this one works surprisingly well (no kinks). I spun the M/C inlet forward and the reservoir inlet faces forward. So the hose makes a 'U'. I mounted the reservoir just high enough that there are no high spots on the hose (no place for air bubbles to form) and a dumb stroke of luck it is pretty level!
Step 12 - Preparing the new hose.
I reused the clamp from the original brake hose (to attach it to the lower triple tree clamp) and the grommet.
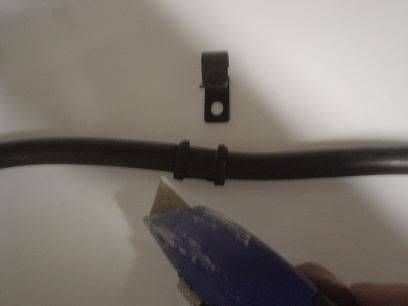
I cut a line along the grommet (there are seam lines on the grommet, so cut one of them). The grommet can then be peeled from the original hose.
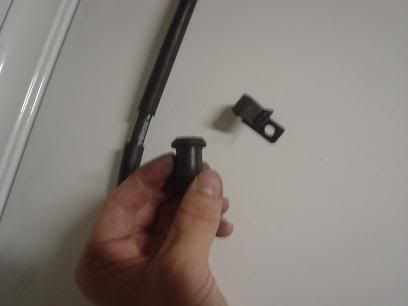
Step 13 - Install the grommet.
Nothing complicated here. The grommet slips over the new hose and you can bend the clamp back over it. Since the OD of the Galfer hose is thinner (SS lines are stronger AND thinner) the grommet doesn't 'clamp' the hose. You can plausibly wrap the hose with electrical tape to make up the gap, or you can just not sweat it (I'm not too worried).
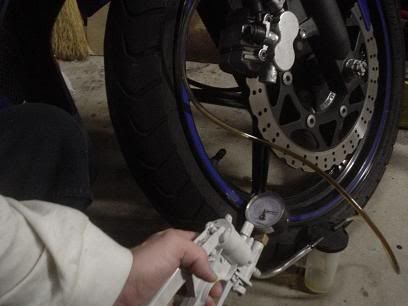
Step 14 - Install the hose.
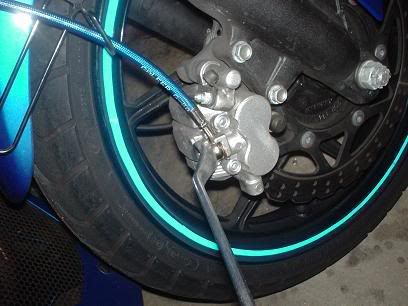
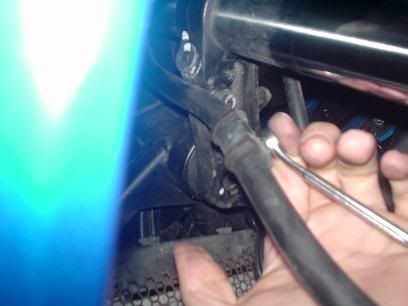
First connect the banjo fitting back on the caliper. Make sure you route the hose back through the brake hose guard (look about 3" up the picture). The new Galfer line includes new crush washers AND a new banjo bolt (sweet!)
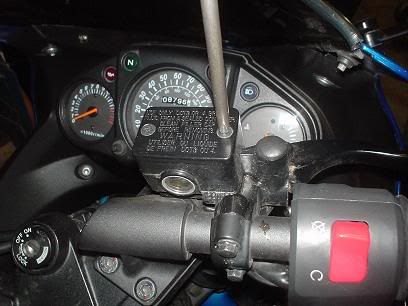
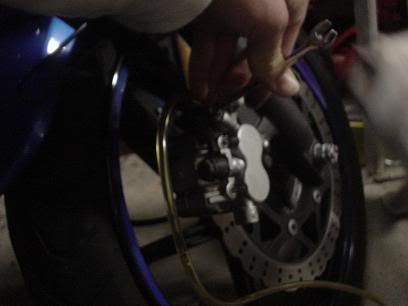
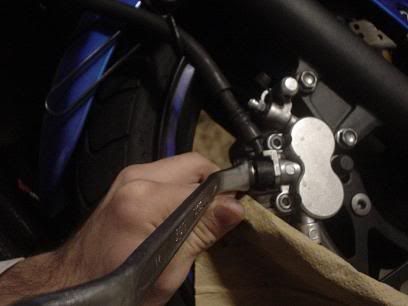
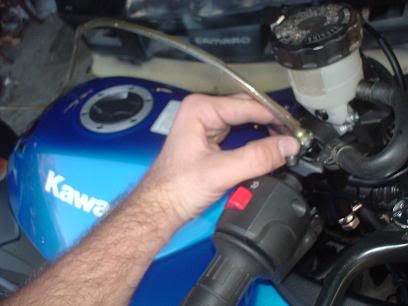
Step 15 - Finish hooking up the line.
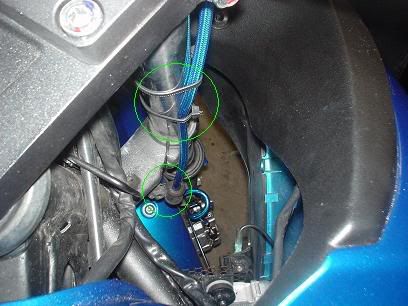
You can see here the hose clamp back installed. A few other 'points of interest'... See the 'slack' portion of the hose (between the lower triple tree clamp and the caliper)? The major 'unexpected' part of this was the clocking of the 90 degree banjo fitting atop the hose! The way it's clocked I had to spin the line around about 180 degrees and that's why there's a 'corkscrew' at the bottom

. I'm not entirely happy about that, but then again it shouldn't cause any problems. It just looks stupider than it should.
Also you'll see the zip-ties holding the brake line to the fork tube. The brake line will contact the plastic cowling around the fork tube otherwise. Since the area of the forks between the two triple tree clamps doesn't 'move' it's a safe spot to clamp to.
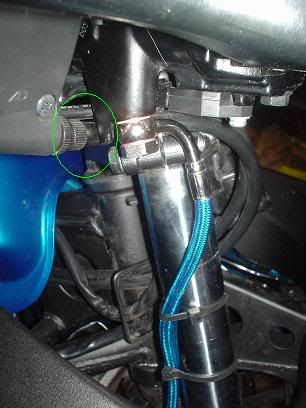
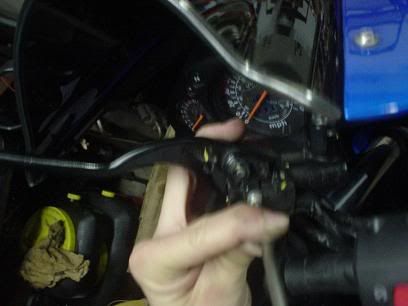
At the top of the hose you can see the 90 degree banjo fitting attached. Again it includes a new banjo bolt and crush washers (yeah!). Circled in green is the spot where the M/C contacts the throttle cable. As previously mentioned this is what causes the whole assembly to have to sit a little higher than previous. I actually clocked the clutch lever assembly up a little as well to ensure things don't looks 'dumb'

Whenever I lube my throttle cable I'll see about clocking the throttle assembly down a little and then I can move the M/C down
") Step 16 -
Step 16 - Bleed the lines.
Fill the reservoir with brake fluid. Just like flushing the line, do the same thing from step 2. This time pump until brake fluid comes out.
With this style M/C there's a bleeder ON the M/C (neato!). I hooked the pump up and pulled the air out of that one as well.
Little micro-bubbles always find their way into the system and it takes some time for everything to settle into normal bubbles. So I usually wait an hour or so and then re-bleed. Pumping the brakes a lot helps with this!
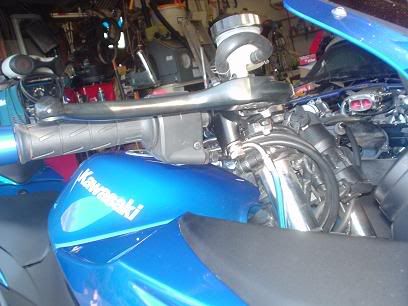
Huzzah! You can see it pretty well in the last picture as well. All in all I think it looks pretty flipping sweet. It looks nifty and the tolerances are real tight (no more slop!). I can't wait to go and... Stop!
