I'm not doing like a 'build thread' or anything official but I figured I'd post up my progress from the weekend. I see a lot of these bikes in this condition so maybe just to give folks an idea of what it takes to bring them back from this state...
First was the carbs. They were pretty crusty, but that wasn't the bad part.
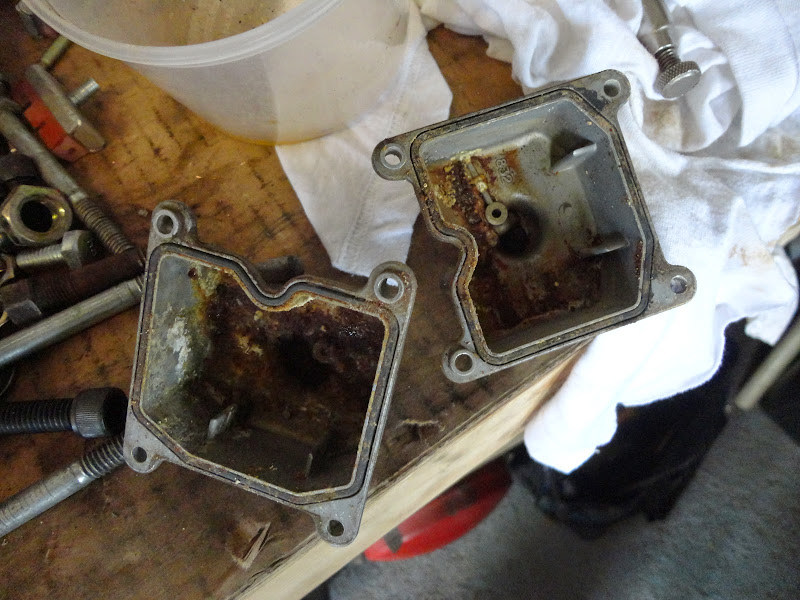
The diaphragms were torn and the air bleed screws were pretty buggered up, the threads weren't stripped per-se but they were cross threaded and it looked like someone had stuck a too-big screwdriver down there and tore the threads out the sides of the wells they sit in.
I got a set of used carbs off a 2008 'J' model.

I didn't take any 'before' pictures, but the main things that i changed were:
1) 105 mains and Emulsion tubes from the F swapped into the J carbs
2) Tank petcock vac hose had a barbed Tee on it, i put a cap on it and plugged it off. If you were retaining the vac petcock feature, you would just hook up a single hose to that, i think the tee is for emissions?
3) Needles from F swapped into the J
4) Both carbs had 38 pilot jets so those were drilled out from a #79 wire gauge to a #80 wire gauge
5) Idle adjust linkage from F swapped on to J
6) Air bleed screw adjustment covers/plugs drilled out using a small drill bit and pried out with an icepick.
7) Air bleed screws set to 2.5 turns out
8) thorough cleaning and all passages checked for blow-through
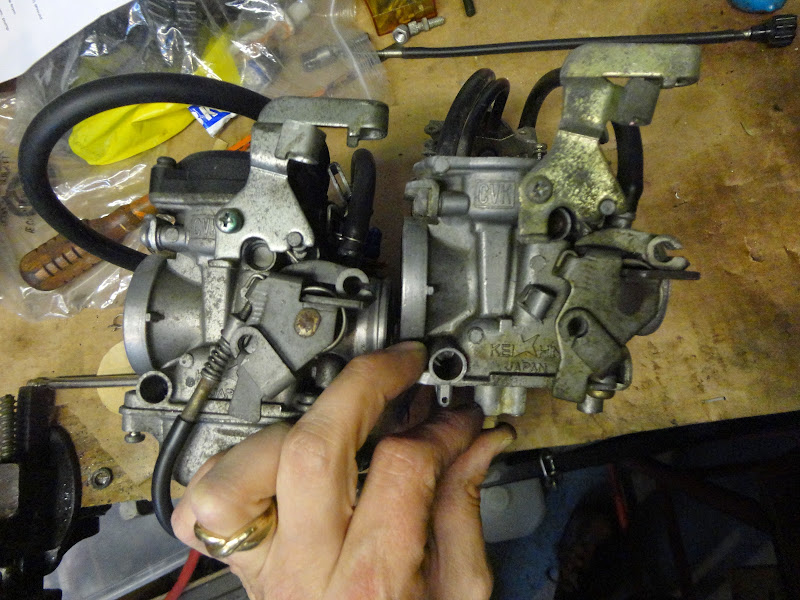
As far as i can tell, the bodies of the carbs are identical. The only changes between the years is covered by the re-arranging of components I performed.
I'm guessing that they will need re-synch after this. The two carbs were tuned differently with different air mix screw settings, different needles, some folks have suggested it is due to the unequal length header... I think it could be for emissions, the one rich cylinder makes it start easier and the lean cylinder makes it run cleaner? I dunno. Either way they are identical now, so they should only need minor futzing with the throttle balance screw and the air bleed.
Next the bike got treated to some fresh oil. The oil that came out was actually pretty clean. I think someone added 2 liters of new oil to an already full crankcase of used old oil. It was full to the top of the fill hole.

The filter and screen weren't in bad shape either. The filter had been changed at some point in the bike's life, so that's a good sign. 13,000 miles even with 2 filter changes isn't terrible.
While everything was apart I checked the valve clearances. They were darn close. The .010 gauge cleared under them so maybe a little loose but that is just fine with me. When its warmed up and running there is no clackety valve noise so I'm not worried.
The plugs also got checked and both looked good. They could probably stand to be replaced as they were a little dark but i'm sure one good run up to highway speeds will clean them up just fine. Keeping with the theme of the build, not spending any money where i don't have to, including spark plugs.
Next was re-fitting the carbs. They were real stubborn to get off due to the intake boots being somewhat stiff. I wiped some of the used motor oil on the boots and the carbs slipped right into place.
The airbox boots, not so much. A previous owner had forced the carbs in without lining up the intake boots and they were collapsed in a funny shape, and extremely hardened from age. I spent a solid 2 hours in between dealing with my 3 year old son who was not taking a nap and being a huge jerk.
The key to fitting these, if you didn't know, is to put them in boiling water on the stove. It makes them super soft and compliant. I had to do it at least 5 times because just when i got one on and it cooled down, i'd start wrestling the other one on and pop the now-cool and hardened other boot off! ARGH!
Needless to say I wasn't taking any pictures.
The way i finally got them on was to remove the inner fender and airbox completely, at least enough to push them back 3-4 inches.. this meant removing the CDI from the fender to slip it through the frame.
I was able to get the boots onto the carbs, then, working very quickly, pop the airbox on and force the boots into it. Luckily i was able to just barely fit my hand into the airbox to help it along.
I took a break in there while the boots were boiling away to bend all the bent footpegs, brackets, etc. back into place. The mufflers were hitting the swingarm so i just put my foot on the swingarm, sat down next to the bike, and pulled them out. The driver's peg on the left was the worst, i had to get a big crescent wrench on the aluminum bracket casting and pry that out trying not to snap the bracket in half. I was able to get it pretty straight.
Next I reassembled most of the underbody plastics... fender, airbox, etc. And dug through my nuts and bolts to get them all strapped down. Many of the weld-nuts were cross-threaded and required chasing with a M6 tap.
By this point the oil was all drained out, I put in a new oil filter and cleaned out the screen, torqued the oil filter bolt, drain bolt and 5 x 8mm headed screen cover bolts. Measured out 1.9L of Rotella T6 5w40 and filled the case, checked the sight glass level which was kinda low, then i added a bit more to bring it to the top of the sight glass.
At this point it was getting dark so I rolled the bike in the garage, hooked up a bottle of fuel, and tried to fire her up. The battery was low to begin with and died quickly, hooked up the charger. Gave it a hit of either while it was cranking and after coughing and sputtering for a minute, she sprang to life. Barely running at first, fiddling with the choke and throttle at the same time, i was able to coax her up to a good 4000 rpm idle for a couple minutes, then choke off and she's running happily down at 800 rpm.
Put her through a full warm up cycle, about 15 minutes until the electric fan kicked on- good that's working. High beam, low beam- working. Turn signals... not only working but the 'side tail light' turnsignal mod has already been done!! Awesome that was the first thing i was going to do. Looks like both brake lights work and temp gauge works. Measured stator output at 13.6V... seems pretty good to me.
Ended the night looking like this

She doesn't look like much, but that my friends, is a running motorcycle!!
So that was sunday, last night I picked up the freshly hot-tank'd and stripped gas tank. I'm going to have to get some pictures tonight. Looks pretty good. Kinda expensive but not having to strip the paint myself is pretty nice, I still have to weld up the bolt holes but at least i have a nice clean start.
Problem now is scope creep... i've got this nice clean tank sitting in front of me, makes me want to do a nice paint job...
but if I do a nice paint job my fairings should get matching paint
but then i have to replace my fairings or slather them with a gallon of bondo
arghhhhh
