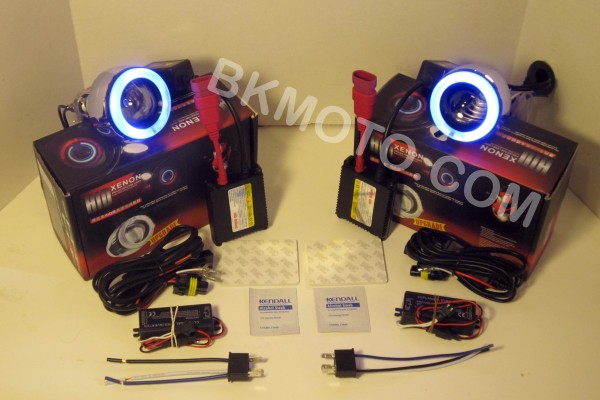
I have used bkmoto projector kits quite a few times for projector retrofits and wanted to post a complete guide on installation.
I have seen a few different methods on this site that require making complicated mounting plates and spend hours and hours on adjusting the plates so the lights are correctly positioned.
This how-to will show the easiest method of installing hid projectors into the ninja 250R, 99% bolt on, with no special tools needed at all.
this kit will fit the 2008 2009 2010 2011 2012 Kasawaki Ninja 250R 250
More information on this kit can be found on www.bkmoto.com
The kit will come with everything that you need to install the projectors, including all neccesary H7 adapters and H7 plugs which will plug into your OEM headlight plugs.
You will have both headlights on for low beams, and high beams, with super bright HID's and halo's
This project should take about a full day, or a nice weekend with lots of breaks.
Here are a few pictures from bkmoto.com website:

 Projectors with optional demon eyes (available in red or blue)

Here is the complete kit:

Lets start!
Remove headlight, remove light bulbs from the headlight

[B]Now, you will need to open your headlight.
To do this you will need to heat up the glue that holds the headlight together.
You have 2 choices, Either use the oven or buy a cheap heat gun (about $25 at any hardware store)
Heat gun Method:
Turn on the heat gun on high setting, hold the heat gun about 8" away from the seam and work your way around the headlight seam slowly for a few rounds.
Oven Method:
Preheat the oven to 225F degrees, place the headlight on a towel and into the center of the oven.
Bake the headlight for 8 minutes at 225F degrees, then remove the headlight.
Once headlight is hot, start to open it using flat head screw drivers, carefully open the little tabs that lock the headlight together and pry the headlight open.
This is the hardest step of the whole install, due to the fact that Kawasaki cheeped out on the 250R headlight and saved 25c by using silicone based glue and not rubber butyl glue like every single other headlight on the market.
This glue doesn't get much softer with heat unlike butyl glue and its harder to remove the lens.
You will need to stick the screw driver deep into the seam and cut away the glue as you wiggle the screw driver, do this all around the headlight.
This took me about 45 minutes and i had the lens apart.
ones the lens is off, scrape off the old glue.


 Remove the 2 screws on the back, on both sides of the headlight and remove the hardware

Now you need to drill 2 small holes for the projector wires.
I drilled them after painting, you should do it before painting so you wont chip away the paint.
drill from behind the headlight right under the bulb holder base.

Painting the reflectors:
This step is optional, I opted to paint my reflectors matt black, as i like the blacked out headlight look.
If you plan on leaving the reflectors chrome, then skip this step.
To paint the reflectors you can either remove them and spray paint them or use painters tape to cover the headlight around the reflectors, then spray.


We are now ready to mount the projectors!
Remove the bulb holders and all hardware, except the silicone washer.

This is all the hardware you will need:
Silicone washer on projector, H7 adapter plate, locking ring and a lock nut.

Now we need to fish the two white halo wires and the red/black wires through the drilled holes.
The white halo wires wont have a plug on them, but the red/black wires will, and the plug needs to be removed.
To remove the plug, you need to insert a needle or a hair clip into the small opening in the front of the plug just above the pin, and press down untill you get the pin out.
This part is a little tricky, especially the first few times you do it.

here is the pin that you will be removing, look at the little flap in the middle, this is basically what needs to be pushed down inside the plug for the pin to come out.

/[B]