Now that these bikes have been out almost a year a lot of people are likely coming upon their 7,500 mile "Valve check" service. This isn't a "hard" thing to do, but it does involve you doing a fair amount of tearing into your bike. If you're not too confident with tearing your bike down, or don't consider yourself "Mechanically-Inclined" then I'd shy away from this one

But anywho as I've learned with this style engine the valves wear in a manner that the gap (referred to as "valve lash") decreases over time. Therefore at 7,500 miles it's considered wise to check the valve lash to ensure it is within specs. This DIY delves into how to check the valve lash. I'll post a separate DIY on how to adjust the lash, but this gets you most of the way there
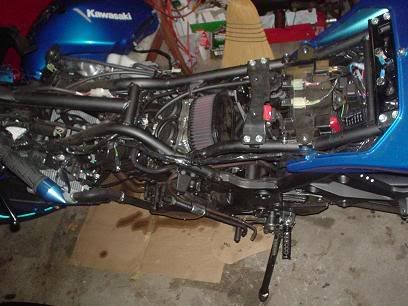
Step 1 - First you need to remove the front fairings, gas tank (and consequently the seat)
 Step 2 -
 Get your bearings and take a note of what you're dealing with:
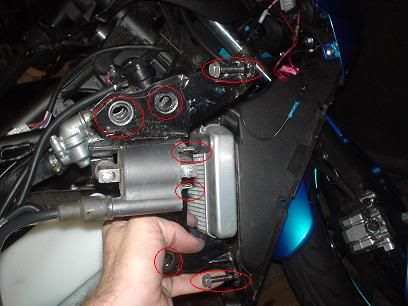
The valve cover has to come off (which in itself isn't too complicated as only 4 bolts secure it). It's the crap around it that makes it a little more complicated to remove...
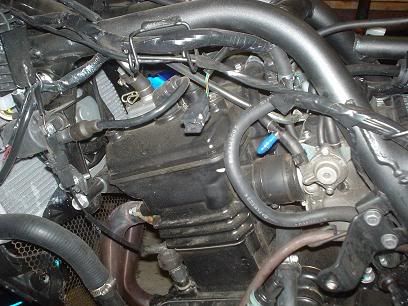
Step 3 - Pull the spark plug boots
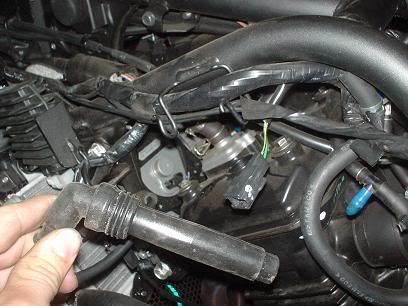
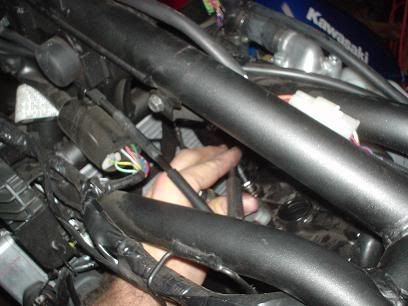
They can be a little tricky to get OUT and around the frame. Just be gentle and try to not rip them out. Simply set both boots out of the way... You don't HAVE to remove the spark plugs in this step (It's easier to wait actually). I don't have the Kleen-air system hooked up on my bike, but if you do on yours you need to move the hose. The one hose that connects in the middle of the valve cover is it and simply needs to be pulled and set aside.
Step 4 - Remove valve cover bolts
There are (4) 10mm perimeter bolts securing the valve cover. Remove them and try to get the washers underneath them out as well. Otherwise they'll fall off when you remove the valve cover and possibly get lost.
Step 5 - Now you need to LOOSEN the upper radiator hose and thermostat housing.
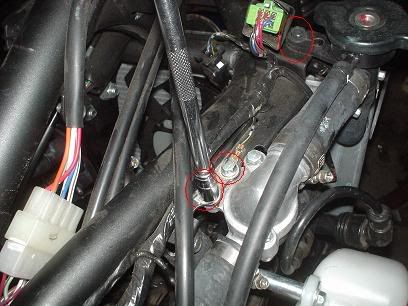
Start with the thermostat housing. There are (2) 8mm bolts (one has a grounding wire attached).
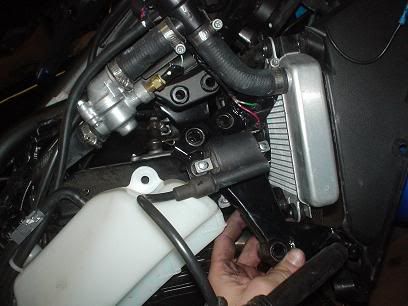
Step 6 - Remove the radiator cap mount.
The circled 10mm bolt should be removed freeing the radiator cap. I also point out that whenever you can try to hand thead removed fasteners so you don't lose them and know EXACTLY where they belong. That's why I circled the previously removed bolts from the thermostat housing. Notice how I put them BACK into the thermostat housing and simply hand threaded them? Don't be that person with a 'bolt bin' with random nuts, bolts, and washers.
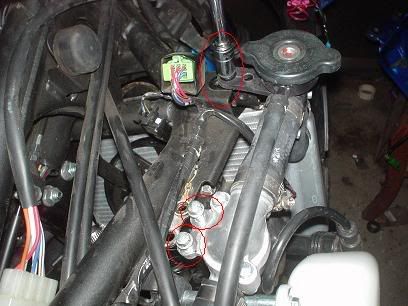
Step 7 - Remove the radiator reservoir mount.
There should be a little more room between the thermostat housing and the frame to remove the 10mm bolt that the radiator reservoir mount attaches to. Remove that and the long 8mm bolt that goes through the radiator reservoir INTO the mount. The reservoir is now free to swing around.
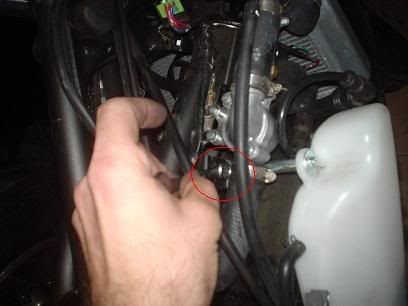
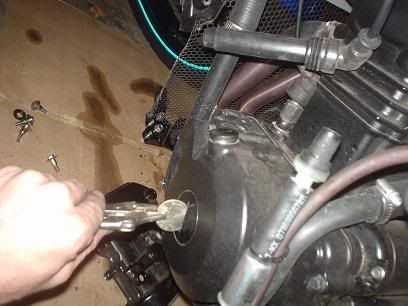
Step 8 - Remove the engine support...
There are (2) 14mm bolts threading into matching 14mm nuts. The two in this picture go through the engine support and through the frame (for reference you can see they are RIGHT above the right side coil). I used a 14mm closed wrench and a 14mm socket wrench to remove these bastards. At the bottom of this mount is one more 14mm nut. THAT nut needs to be removed, but not the bolt. The bolt is a through-bolt that goes from one side of the from, through the engine mounts, out this side. So after you remove the nut simply PUSH the bolt about 2 inches in so that the support is free.
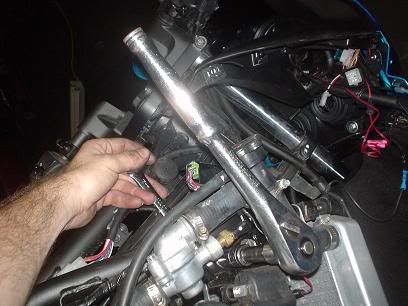
Step 9 - Finish removing bolts attached to the support.
So let me break this picture down. The two side-by-side holes were the nuts/bolts I just removed. Where my hand is is the nut I removed and pushed the bolt in about 2". Above and below the radiator are 8mm bolts. Don't be confused by the picture. I removed them and HERE I've put them into the back of the bracket (again so I don't lose them). They aren't securing anything in this picture! Lastly make sure you pull the red and green wires from the coil...
Step 10 - Pull the engine support mount
GENTLY shimmy the support mount down. You should have to apply a little pressure to push the radiator forward to help this along. The mount should slide down and it along with the attached coil can safely be removed. I point out to exercise caution here. If you're careless you can easilly bend fins or even puncture the core on the radiator. That'd be bad
Step 11 - Remove valve cover.
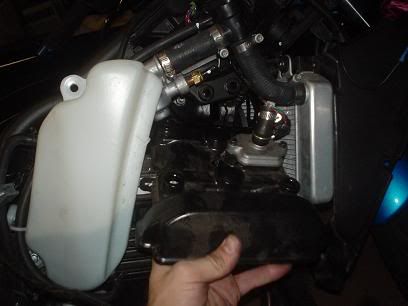
The valve cover is kind of tricky to get out, but with a little loving will come up and out. Notice how the reservoir swings upward along with the hoses.
Step 12 - LOOSEN the spark plugs.
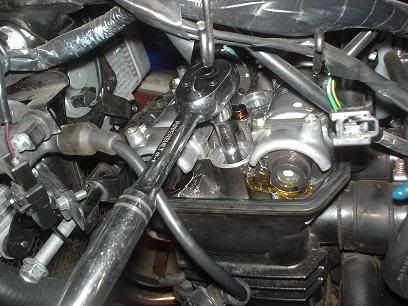
With a 5/8" spark plug socket loosen each of the spark plugs (It helps when you turn the engine over so that there is no compression present). You don't need to fully pull the plugs out, just loosen them and let them chill down there.
Step 13 - Remove inspection plugs.
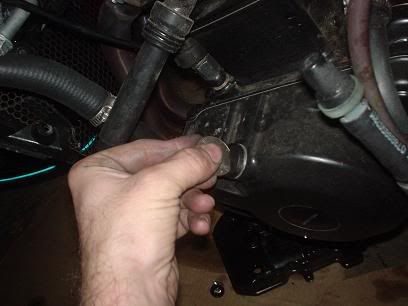
It's noted on the faq at Ninja250.org to use a nickle on these plugs, but I had a silver dollar which works even better. It is NOT recommended to use a flat blade screwdriver as this can damage the little plastic covers...