
|
 January 14th, 2009, 09:31 PM
|
#1 |
|
That's me!
Name: TJ
Location: Ames, IA
Join Date: Nov 2008 Motorcycle(s): 2008 Ninja 250r (Tis blue), 2008 CBR600RR Posts: 454
|
DIY - Removing the air filter box (oh my!)
It had just occurred to me (or actually brought to my attention) that with this talk of air filters (and the ridiculous cost of the K&N drop-in filter I should bring my "Removing the air-box" thread over.
Welp no one seems to have done a how-to on installing air pods on here for the new 250's. That and I was hunting through K&N's catalog and after some measurements found a cool little air filter that would work bitching... You'll notice that it's an oval filter that has two openings so it covers both carburetors. In the last picture you can see the neck is tilted down so the air filter ducks down a bit and clears the frame nicely... You can order it through any major auto parts store (Kragen, Napa, Autozone, etc.) K&N P/N "R-0990" . As simple as this little filter is, getting the stock air box out is a PITA to put it lightly. I chronicled my way through tearing out the factory air box. I think it goes without saying that your results may vary and even though I listed this in steps, you may do it however you please. FUTHERMORE, if you are one of those ass clowns that thinks installing this is going to double your horsepower and fuel economy (Hell and that's simply by just putting the sticker on your bike alone) you're going to probably be disappointed. I was surprised after jetting and re-shimming the needles that this does have a huge increase in acceleration though! I don't have any HP numbers though, but I'm sure there was actually a good 5 hp increase (Which could be partly due to the fine tuning with jets). This is mainly a good 'mod' to allow easier carburetor tuning and to clean up a bunch of clutter out of your bike. It's also not the easiest thing to do so if you're not very mechanically inclined save your time and money on this one! Edit: Also I learned the hard way that you NEED to re-jet before you can really run without the air box. If you're going to rip out the factory air box make sure you have a jet kit (with jet sizes 110-115 or so). Otherwise the bike will run so lean you won't be able to rev past 5k or so. (Look on the bright side, changing jets is a cinch after that damned air box is gone!) OK... So to begin you literally have to rip everything imaginable off of your bike (I'm not kidding). Step 1: Open up and remove the stock air filter. The seat's going to have to go and so are the front fairings Step 2: You can see I've pulled the air filter, yanked the seat and lifted the gas tank. If you don't know how to remove the gas tank I can sum it up really quick, or you can read kkim's post on how to do this (http://www.kawiforums.com/showthread.php?t=110857). But basically make sure to disconnect the vacuum line to the fuel petcock, followed by the fuel line. Don't forget on the '08 models to disconnect the fuel level sensor as well (essentially anthing I circled in red). On the other side (I didn't show it) to disconnect either the single vent hose from the tank, or on California model tanks the 2 emissions hoses as well... Step 3: Everything here has to be moved (The air filter box components come out HERE). Remove the tank 'cross member' and set it aside. Also take notice how FRIGGIN BIG that box is. It literally goes from the battery (to the left of my hand) to the carburetors (In front of the two intake hoses in the picture). Wow Step 4: Might as well do the other side's disconnections now. The air filter box is mounted to the transmission via the screw circled in red. Remove this and let it hang there. It also has a clip to hold 2 wiring harnesses. Also circled in red is the breather which mounts to the bottom of the air filter box. Disconnect this bad boy Step 5: I'm not kidding when I say everything imaginable has to go. Here I'm yanking the battery and battery box. .. Make sure to disconnect the NEGATIVE battery lead followed by the positive battery lead. It's a good habit to get into. Also as you might have guessed those rear fairings? They've got to come off. Step 6: To get the battery box out after you remove the top panel and leave it dangle, remove the battery AND remove the three screws holding the battery box to the frame... There are two more screws underneath the battery pad which have to come out. I like to keep things together so I also circled in red the screws that hold the battery box down outside of the box. By keeping all these screws together in the battery box you're less likely to lose them. Step 7: Sigh... After you've removed the rear fairings and tail light assembly you're ready to drop the mud guard. The mud guard is only really held in by 4 screws (And the tail light assembly which should already be removed). The two screws in the side that also hold the fairings on (which have already been removed to remove those fairings, and there's a screw on each side of the bike underneath the passenger peg mounts. It's kind of blurry, but here I removed the two screws holding one of the passenger mounts on and have removed the screw (circled in red) holding that side of the mud guard in. Pheww. It's the same thing on the other side. Step 8: I circled in red where the two intake hoses lead from the air box to the carburetors. I jabbed all around both hoses to break them free from their glue captors (I don't cater to their terrorism). With any luck you should be able to pull back slightly on the air box and separate the hose from the air box. Step 9: Here's where it starts getting hard to explain as there's a lot of yanking and cursing. The air box is comprised of two compartments. The side which lends access to the air filter element is removable from the main compartment. I **** you not there's 8 or so screws all around the air box attaching this guy in. Remove all of the screws and then check because there's probably 2-3 more. With any luck you'll get them all and the two compartments will separate. With the mud guard dropped a bit you can finagle the air box around and with a lot of effort should be able to yank the small air box compartment up. Here I am pulling it through. ... There's one wiring harness that I didn't look into what function it serves that connects on the mud flap. You need to disconnect that (otherwise you can't swing the mud flap around)... So with a little effort and while making sure nothing is snagging you should be able to pull the mud flap out a bit and spin it. The main chamber of the air box pulls through where the mud flap goes and is FREE AT LAST. I didn't catch any pictures of this as I was pretty pissed off trying to get everything free... Edit: Thanks TheDuck for the pics of the bike disassembled! (I can lie and say their mine as MINE is also blue) Here's a good idea of what you have to remove to take out this box (Something to consider) 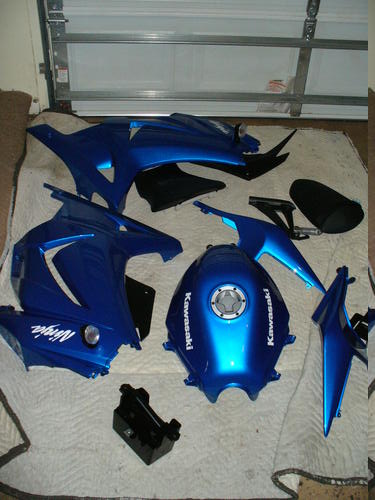 And the bike will wind up looking something LIKE... 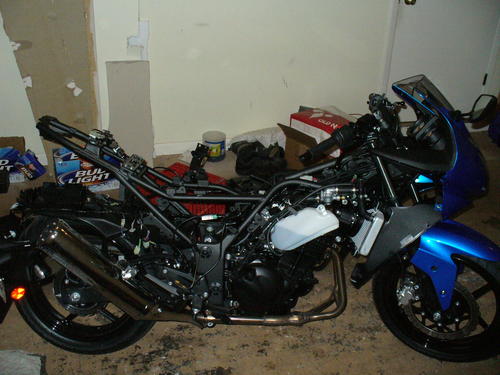 Next up I'll show more magical happy pictures as things go back together. |

|

|
|
January 14th, 2009, 09:32 PM
|
#2 |
|
That's me!
Name: TJ
Location: Ames, IA
Join Date: Nov 2008 Motorcycle(s): 2008 Ninja 250r (Tis blue), 2008 CBR600RR Posts: 454
|
Ok so it begins:
To fill the void... And another view... Ohh shiny I always over look some mundane details. Here I forgot to pick up a breather (and at 1am no one is open to sell one) for the gear case. RATHER than leave this open (yikes) I threw a cheapy inline fuel filter I had lying around. I've now ran out to Kragen and picked up one of their cheapy breathers and popped it back on the original tube (zip-tied to hold it from flopping around) and life is good. I didn't notice this until now, but while showing how wide open the area is which used to be occupied with the air filter box... My damned Firebird's wheel obscures this. Oh well. Where you see wheel is in actuality 'wide open space' yeah! ... I'll try to show some pictures of the old air box in its entirety (perhaps in a couple hours, who knows). With the 're-install' for this you more or less do the tear down in reverse. Nothing required fabricating new brackets or anything, so that's a + . Any questions or what not, just shoot me a line! --VeX |
|
|
|
|
January 14th, 2009, 09:59 PM
|
#3 |
|
Join Date: Nov 2008 Posts: Too much.
|
Thank you, sir.
 My contribution of a green bike apart and the holy mess one ends up with to get to pulling that  airbox!!! airbox!!!  ...and for anyone interested, pictures taken during pulling the airbox and rejetting. http://picasaweb.google.com/kkim993/AirboxAndRejet# |
|
|
|
|
January 15th, 2009, 08:08 AM
|
#4 |
|
WORKDADDY
Name: Dave
Location: slc utah
Join Date: Nov 2008 Motorcycle(s): 2008 ninja 2fitty Posts: 112
|
nice write up VEX.. I was wonder witch one of y'all was going to do this first... WInk Wink
I wonder wich one would be faster with out the plastics now? |
|
|
|
|
January 15th, 2009, 10:57 AM
|
#5 |
|
Join Date: Nov 2008 Posts: Too much.
|
Vex is always the stupid one to do stuff like this, first. I'm just stupider to follow.
 
|
|
|
|
|
February 16th, 2009, 01:49 AM
|
#6 |
|
Join Date: Nov 2008 Posts: Too much.
|
TJ,
I was working by the filter tonight and the silver clamps on the filter were pretty loose. Just a reminder to keep an eye on them as when I installed my filter I made sure to tighten those clamps pretty damned tight. Also, I didn't like how the filter was unsupported and would vibrate a lot, so I rigged up some tie wraps to act as a brace. It's ghetto to the max, but the entire carb and filter assembly is now nice and solid. You may want to try this with yours.  I also used the rubber runner pieces from the stock airbox and used them to lengthen the runners from the filter to the carbs. I like how solid the runners mount to the carbs and how the other end of the runner slides easily into the r0990 filter's openings. Everything clamps up quite nicely.  |
|
|
|
|
February 16th, 2009, 03:00 AM
|
#7 |
|
ninjette.org guru
Name: Tom
Location: Dayton, OH
Join Date: Jan 2009 Motorcycle(s): '13 Ninja 300 '09 Boulevard C50. '08 250r(TOTALED BY DEER) Posts: 467
|
^^sweet **free** runner idea^^
I did notice how loose the whole assy was...thought it was the norm  The r0990 was a bear to put on the carbs(and the clamps aren't a perfect fit) Nice DIY
__________________________________________________
 CHEERS!!! CHEERS!!!
|
|
|
|
|
February 16th, 2009, 03:11 AM
|
#8 |
|
Join Date: Nov 2008 Posts: Too much.
|
Well prior to pulling the airbox, the carbs were sandwiched between the engine cylinder and the frame mounted airbox. When the airbox was removed, that left everything hanging off the backside of the engine without the airbox to stabilize everything. That's the reason everything moves around with the 0990 filter. It would be great if someone could fab up a bracket, but in lieu of this happening anytime soon, 2 tie wraps seem to stabilize the carbs just fine.
I like the runners as they move the filter back a bit and also angles it down and to the side. I haven't ridden the bike to see if the additional short runners make a diff... I just hope they don't hurt. After reading Duck's experience with different length runners, I frankly don't know what to expect. I'm hoping the engineers at Kawasaki did the math for me and that putting the stock runner length back on will help get some low end back. |
|
|
|
|
February 16th, 2009, 03:20 AM
|
#9 |
|
ninjette.org guru
Name: Tom
Location: Dayton, OH
Join Date: Jan 2009 Motorcycle(s): '13 Ninja 300 '09 Boulevard C50. '08 250r(TOTALED BY DEER) Posts: 467
|
....yeah I just found the runner discussion...
__________________________________________________
CHEERS!!!
|
|
|
|
|
February 16th, 2009, 03:21 AM
|
#10 |
|
Join Date: Nov 2008 Posts: Too much.
|
If you've rejetted your bike, perhaps you wouldn't mind adding to our jetting database?
http://www.ninjette.org/forums/showthread.php?t=10208 |
|
|
|
|
February 16th, 2009, 03:38 AM
|
#11 |
|
ninjette.org guru
Name: Tom
Location: Dayton, OH
Join Date: Jan 2009 Motorcycle(s): '13 Ninja 300 '09 Boulevard C50. '08 250r(TOTALED BY DEER) Posts: 467
|
I am doing everything at once(not always the best idea) and have not fired it up since the rejet/airbox removal/kleen removal/slide drill/carb cap removal...still need new fuel tap/gas cap mod/tune carbs/sync carbs/new plugs/check valves... in a cold garage in the next month before I go to Florida
 But I will definitely post results..............................someday 
__________________________________________________
CHEERS!!!
|
|
|
|
|
February 16th, 2009, 02:30 PM
|
#12 |
|
That's me!
Name: TJ
Location: Ames, IA
Join Date: Nov 2008 Motorcycle(s): 2008 Ninja 250r (Tis blue), 2008 CBR600RR Posts: 454
|
Yeah I've thought about making something to hold the opposite side of the carbs up, but never got around to it. I like the free runner extensions
Have you gone for any rides yet?
|
|
|
|
|
February 16th, 2009, 03:46 PM
|
#13 |
|
Join Date: Nov 2008 Posts: Too much.
|
not yet... will post when I do.
|
|
|
|
|
April 16th, 2009, 04:19 PM
|
#14 |
|
Giggity Giggity
Name: Ryam
Location: San Diego
Join Date: Feb 2009 Motorcycle(s): 08 ninja 250R aka Hiryu Posts: 481
|
I plan on doing this mod but wanted to use individual filters as apposed to a dual flange. The flange inside diameter matches the one on the R-0990 so they should be OK right?
http://www.knfilters.com/search/prod...px?Prod=R-1090
__________________________________________________
 DY Fender chop, Danmoto CB slip-on w/baffle, Airbox removed, Kleen-air removed, shimmed needles, Mikuni #117.5 Main jets, K&N RU-1822 air filter pods DY Fender chop, Danmoto CB slip-on w/baffle, Airbox removed, Kleen-air removed, shimmed needles, Mikuni #117.5 Main jets, K&N RU-1822 air filter pods
|
|
|
|
|
April 16th, 2009, 04:29 PM
|
#15 |
|
Join Date: Nov 2008 Posts: Too much.
|
dunno... but you need to make sure you have enough space between the carbs so that filter width will be able to fit side by side. why the desire to reinvent the wheel?
some other alternatives. |
|
|
|
|
April 16th, 2009, 04:36 PM
|
#16 |
|
ninjette.org member
Name: TBoz
Location: New York
Join Date: Apr 2009 Motorcycle(s): Nothing Posts: 93
|
I like the single filter option that Vex uses. Very cool mod. Did mine a while back and am still diggin it.
|
|
|
|
|
April 16th, 2009, 04:37 PM
|
#17 |
|
ninjette.org certified postwhore
Name: Sam
Location: Northern Virginia
Join Date: Nov 2008 Motorcycle(s): Ninja 250R 2009 and ZX-12R 2000 Posts: A lot.
|
Kelly, some people like choosing their own route out of the mine field, instead of following someone else, who has already done it...successfully!
|
|
|
|
|
April 16th, 2009, 04:39 PM
|
#18 | |
|
Join Date: Nov 2008 Posts: Too much.
|
Quote:
http://www.ninjette.org/forums/showthread.php?t=10208 |
|
|
|
|
|
April 16th, 2009, 04:43 PM
|
#19 | |
|
ninjette.org member
Name: TBoz
Location: New York
Join Date: Apr 2009 Motorcycle(s): Nothing Posts: 93
|
Quote:
|
|
|
|
|
|
April 16th, 2009, 04:43 PM
|
#20 | |
|
Join Date: Nov 2008 Posts: Too much.
|
Quote:
I am already intrigued Vex figured out that 0990 filter he used would fit to begin with. That boy's got some skills. 
|
|
|
|
|
|
April 16th, 2009, 04:44 PM
|
#21 | |
|
Giggity Giggity
Name: Ryam
Location: San Diego
Join Date: Feb 2009 Motorcycle(s): 08 ninja 250R aka Hiryu Posts: 481
|
Quote:
__________________________________________________
DY Fender chop, Danmoto CB slip-on w/baffle, Airbox removed, Kleen-air removed, shimmed needles, Mikuni #117.5 Main jets, K&N RU-1822 air filter pods
|
|
|
|
|
|
April 16th, 2009, 11:42 PM
|
#22 |
|
忍者
Name: Jake
Location: WA
Join Date: Dec 2008 Motorcycle(s): None Now - Used to have an '08 Ninja 250R Candy Blue Posts: 151
|
Hey kkim, Vex, and whoever else did this mod: feedback on the pod system? is it really a noticeable difference compared to the stock airbox? I guess what I'm asking is, is it worth the trouble?
|
|
|
|
|
April 16th, 2009, 11:51 PM
|
#23 |
|
Join Date: Nov 2008 Posts: Too much.
|
yes, but you won't think so when you are removing that airbox!!

|
|
|
|
|
April 16th, 2009, 11:59 PM
|
#24 |
|
忍者
Name: Jake
Location: WA
Join Date: Dec 2008 Motorcycle(s): None Now - Used to have an '08 Ninja 250R Candy Blue Posts: 151
|
thanks kkim, looks like I got another mod to add to my list...and this one looks "fun"!

|
|
|
|
|
April 17th, 2009, 12:05 AM
|
#25 |
|
Join Date: Nov 2008 Posts: Too much.
|
plan for the whole weekend for this, especially if you're going to be rejetting, too. your bike will look like a bomb went off in it by the time you get that box out.

|
|
|
|
|
April 17th, 2009, 01:02 AM
|
#26 |
|
The Sexy Filipino
Name: Jordan
Location: Bakersfield, Ca
Join Date: Dec 2008 Motorcycle(s): Ninja 250R 2008 (da black one) Posts: 312
|
 Keep a crate of beer on standby.  Ask me how I know. Ask me how I know.
__________________________________________________
Area P CF Standard,Airbox Removed,K&N R-0990,Factory Pro Jet Kit 3.0, Zero Gravity DB I'm not riding too fast... I'm flying too low. 
|
|
|
|
|
April 17th, 2009, 01:04 AM
|
#27 |
|
Join Date: Nov 2008 Posts: Too much.
|
lol... where is that thread of your agonizing, Jordan? good times, eh?
|
|
|
|
|
April 17th, 2009, 03:56 AM
|
#28 | |
|
Ms. Personality
Name: CB
Location: Murvill, TN
Join Date: Jan 2009 Motorcycle(s): Depends on the week you ask Posts: A lot.
|
Quote:
Whole weekend? Gettin' old brah, only took me 8 hours including my first attempt at a rejet. I'm not sure if it's the pod that helps or the fact that you can reject it. Either way it is worth the hassle. Makes everything sound alot better too. I get my bike mistaken for a Ducati all the time. Which either means it sounds good, or i live near some really ignorant people. I guess they both have the twin cylinder thing going for them... |
|
|
|
|
|
April 17th, 2009, 03:59 AM
|
#29 | |
|
Join Date: Nov 2008 Posts: Too much.
|
Quote:
look who's talking about getting old, birthday girl.
|
|
|
|
|
|
April 17th, 2009, 07:25 AM
|
#30 | |
|
The Sexy Filipino
Name: Jordan
Location: Bakersfield, Ca
Join Date: Dec 2008 Motorcycle(s): Ninja 250R 2008 (da black one) Posts: 312
|
Quote:
 CB it took me 4-5 hours to get the box out, but I waited a week to tackle the jets because I wanted to read up and make sure I knew what I was doing.
__________________________________________________
Area P CF Standard,Airbox Removed,K&N R-0990,Factory Pro Jet Kit 3.0, Zero Gravity DB I'm not riding too fast... I'm flying too low.
|
|
|
|
|
|
April 17th, 2009, 07:43 AM
|
#31 |
|
忍者
Name: Jake
Location: WA
Join Date: Dec 2008 Motorcycle(s): None Now - Used to have an '08 Ninja 250R Candy Blue Posts: 151
|
yeah, I have already rejetted with a jet kit and I have the Yoshi full exhaust system on. I was getting little backfire snaps and pops in lower revs and on decelleration so I decided that I should probably remove the Kleen air system and plug the holes per kkim's DIY.
then I was just delving a little deeper into the forums and saw this thread again and I was like "hmmm, should I do this while I'm at it?" so I just wanted some opinions on if it's worth it or not. thanks for those who have thrown in their 
|
|
|
|
|
May 22nd, 2009, 02:07 PM
|
#32 |
|
Member
Name: Daniel
Location: Kailua, Hawaii
Join Date: May 2009 Motorcycle(s): 08 Ninja 250 Posts: 4
|
Any one interested in doing this mod, Amazon has the filter available with free shipping. Unfortunately this free shipping does not apply to Hawaii as it is considered hazardous and must be shipped by 2day air or 1 day air.
http://www.amazon.com/K-R-0990-Unive...3023044&sr=8-2 Daniel |
|
|
|
|
May 22nd, 2009, 02:13 PM
|
#33 |
|
Join Date: Nov 2008 Posts: Too much.
|
have you tried pricing the filter from auto parts stores on island?
|
|
|
|
|
May 22nd, 2009, 02:22 PM
|
#34 | |
|
Member
Name: Daniel
Location: Kailua, Hawaii
Join Date: May 2009 Motorcycle(s): 08 Ninja 250 Posts: 4
|
Quote:
Plan to give checkers a call and some other bike shops. Posted via Mobile Device |
|
|
|
|
|
May 22nd, 2009, 02:24 PM
|
#35 |
|
Join Date: Nov 2008 Posts: Too much.
|
try looking in the phone book and call an Auto Value parts store. That's where I bought mine.
|
|
|
|
|
May 22nd, 2009, 02:51 PM
|
#36 |
|
Member
Name: Daniel
Location: Kailua, Hawaii
Join Date: May 2009 Motorcycle(s): 08 Ninja 250 Posts: 4
|
I ended up ordering it from amazon with a bunch of other car maintenance stuff and paying the 2 day shipping.
Based on the local prices of everything I bought and assuming a local price of $40 for the filter it came out to $10 more. It so happened that the mobile1 oil i bought for the car has a $10 rebate =). So it ended up being worth it to not have to call a bunch of local shops and go through all that hassle. Daniel |
|
|
|
|
May 24th, 2009, 06:03 PM
|
#37 |
|
ninjette.org certified postwhore
Name: Dave
Location: Michigan
Join Date: May 2009 Motorcycle(s): 2009 Kawasaki Ninja 650RTE & 2009 Kawasaki Ninja 250R (SOLD) Posts: A lot.
|
Hehe well i dont have that problem, as my 250R is the uber FAST (RED) and a 2009!
|
|
|
|
|
August 12th, 2009, 08:12 AM
|
#38 |
|
ninjette.org member
Name: Vinh
Location: Maryland
Join Date: Jun 2009 Motorcycle(s): Black 2009 Kawasaki Ninja 250R Posts: 153
|
Should I do this mod before getting a full exhaust or does it matter? I saw you guys mention to do this while rejetting, but with current mods in my sig, I won't plan to rejet until my full AP exhaust funds become available.
I haven't done a mod in a week and am getting bored
__________________________________________________
Black 09 Ninja 250R|Shogun Crash Kit|Woodcraft Full Rearsets|Proton Flush LEDs|De-Snorkeled|Shimmed|K&N|Red Rim Tape|ProGrips|Puig|10K HIDs|15T Front |
|
|
|
|
August 12th, 2009, 11:30 AM
|
#39 | |
|
Join Date: Nov 2008 Posts: Too much.
|
Quote:
|
|
|
|
|
|
August 28th, 2009, 03:06 PM
|
#40 | |
|
ninjette.org member
Name: Vinh
Location: Maryland
Join Date: Jun 2009 Motorcycle(s): Black 2009 Kawasaki Ninja 250R Posts: 153
|
Quote:
what would need to change if i have a stock exhaust and later installed a full areap or another exhaust? i anticipate changing the shimming on the needles.. would i need to change jets as well? which jet is recommended for stock exhaust, 2 shims on needle, and airbox-less? and snorkel-less and wheres the cheapest place u guys know with the factory pro kit? or is dynojet just fine?
__________________________________________________
Black 09 Ninja 250R|Shogun Crash Kit|Woodcraft Full Rearsets|Proton Flush LEDs|De-Snorkeled|Shimmed|K&N|Red Rim Tape|ProGrips|Puig|10K HIDs|15T Front |
|
|
|
|
 |
 Similar Threads
|
||||
| Thread | Thread Starter | Forum | Replies | Last Post |
| DIY- Removing the Kleen Air System Hoses and Plugging the Holes on a 08 250R | kkim | 2008 - 2012 Ninja 250R Tech Talk | 152 | March 15th, 2019 07:37 PM |
| K&N air filter to stock air box | Graugaard | 2008 - 2012 Ninja 250R Tech Talk | 29 | July 28th, 2012 06:33 AM |
| Air Filter Box Question | Little Green Machine | 2008 - 2012 Ninja 250R Tech Talk | 7 | July 14th, 2012 06:25 AM |
|
|


