
|
 March 25th, 2012, 01:23 PM
|
#1 |
|
ninjette.org member
Name: Ian
Location: Houston TX
Join Date: Mar 2012 Motorcycle(s): '10 Ninja 250 Posts: 27
|
Ian's '10SE rebuild
I posted these pictures in my intro thread but I figured they would be better kept here in a thready on my bike since I have a lot more work that will be done on the ninjette before I call it "done".
Here's my 250 as I picked it up. Fairings damaged and some other issues to sort out. My current plans: fix and paint fairings, get turn signals installed again, get another mirror, new levers to replace the bent ones, undertail to clean up the rear fender area, and some fresh rubber to replace the bricks that they call tires from the factory. Here she is as I picked it up:  Friday I started in on repairing the fairings. I'm short the unpainted plastic piece from the wrecked side as well as the tail fairing from that side. The rest of it was actually better than anticipated from the low side it went through. Left full before: 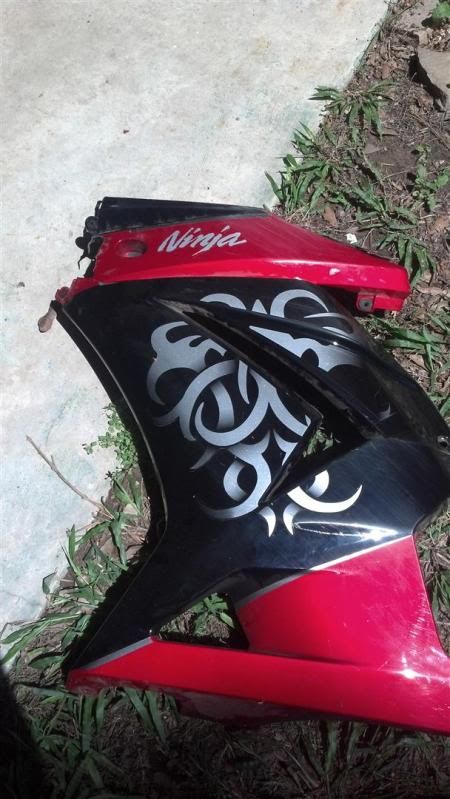 Left damage: 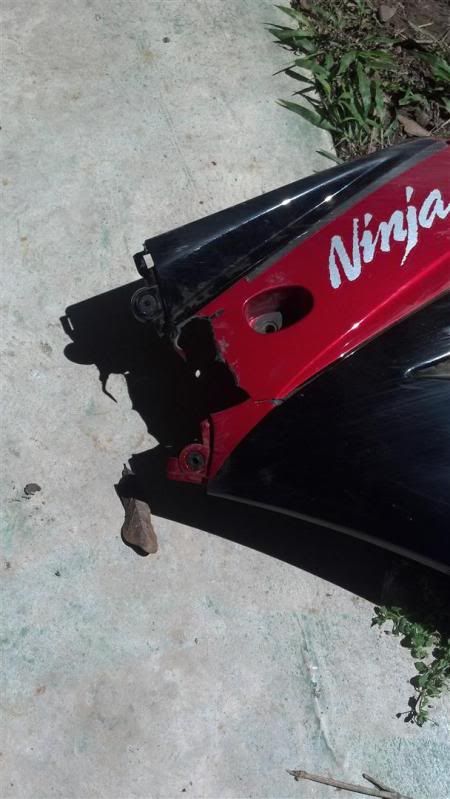 Another big crack: 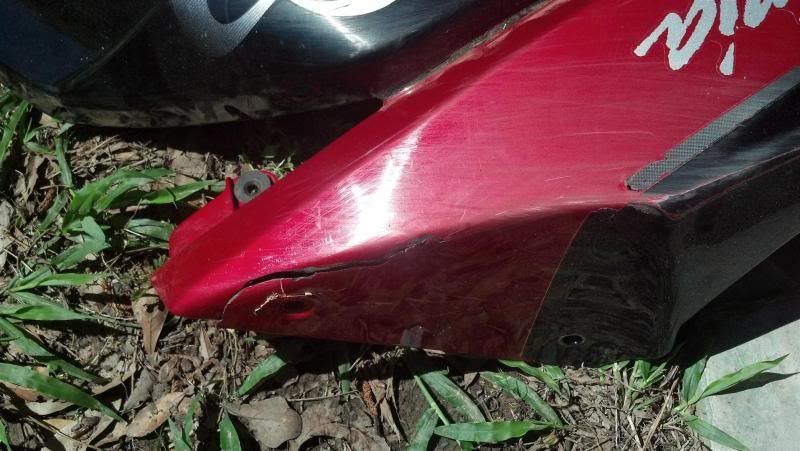 Right side damage from turn signal punching in the fairing: 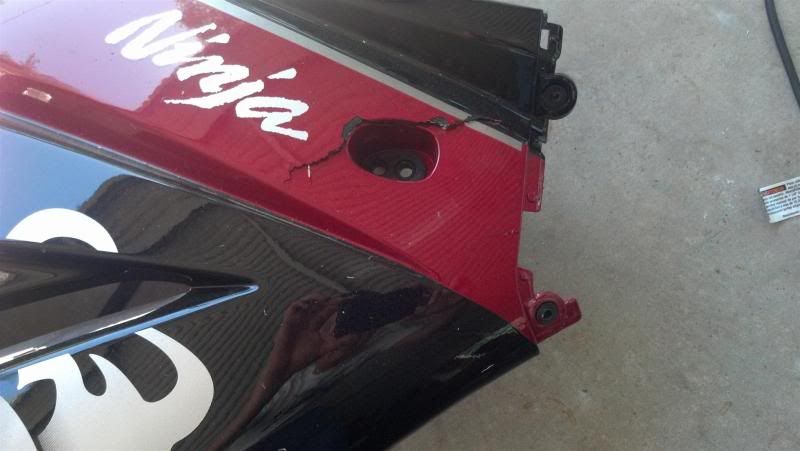 I took some aluminum tape and use it to simulate the surface of the chunk that was missing. Then I put some painters plastic down to keep the glass from sticking to anything on the bike, flipped the fairing, and glassed on the back side. Once that was dry I pulled the piece away from the plastic and pulled the tape off the bike. Then I taped the piece back in place and glassed it in on the back side. This is what it looked like after I trimmed the front: 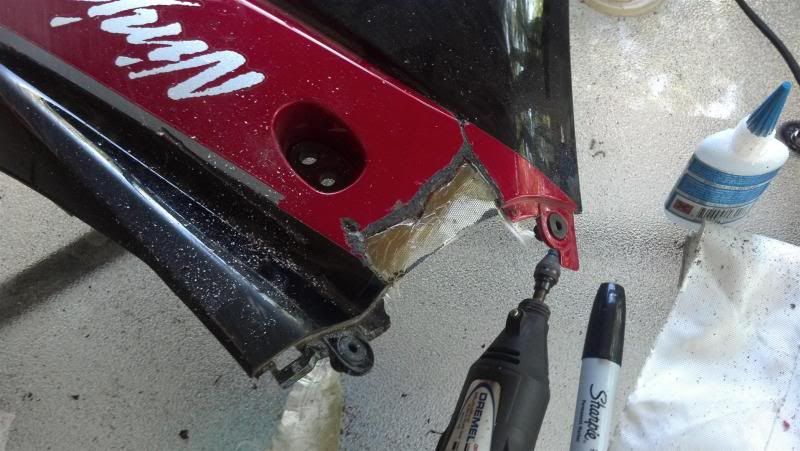 Here's the other fairing crack after I dremeled a trench on all the cracks and glassed the back side: 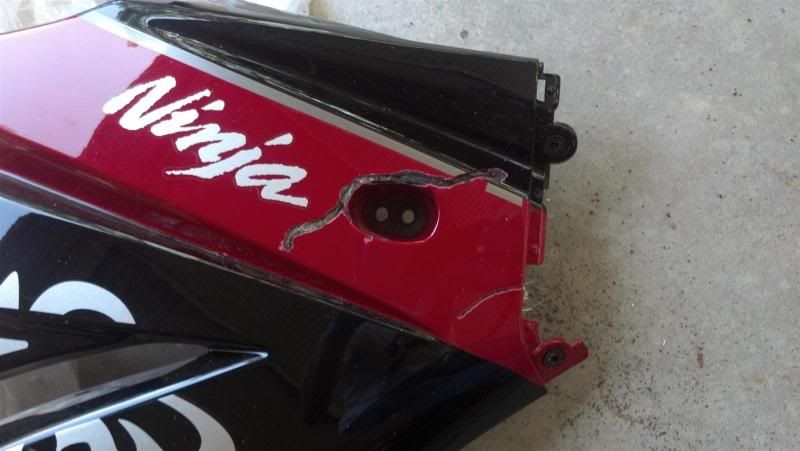 And here it is with the trenches filled with some resin mixed with filler: 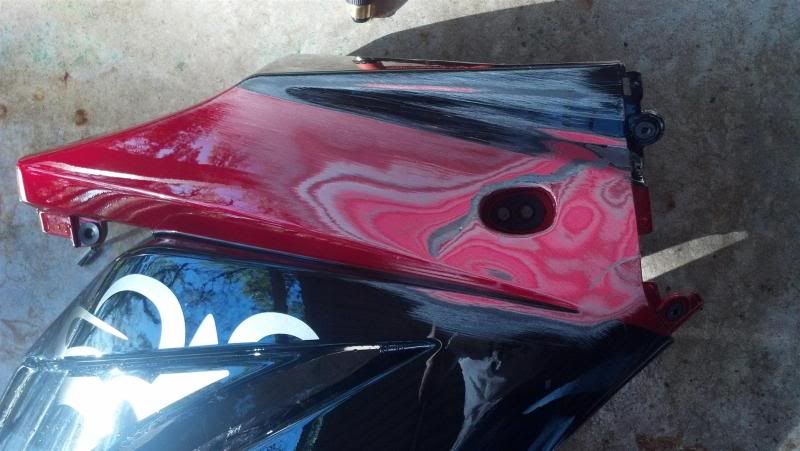 Here's the pair after a coat of primer to find imperfections. I know it looks pretty good in the cell phone picture but there's an awful lot of pinholes that will need some spot putty and a lot of finish sanding to get it ready for gloss black paint: 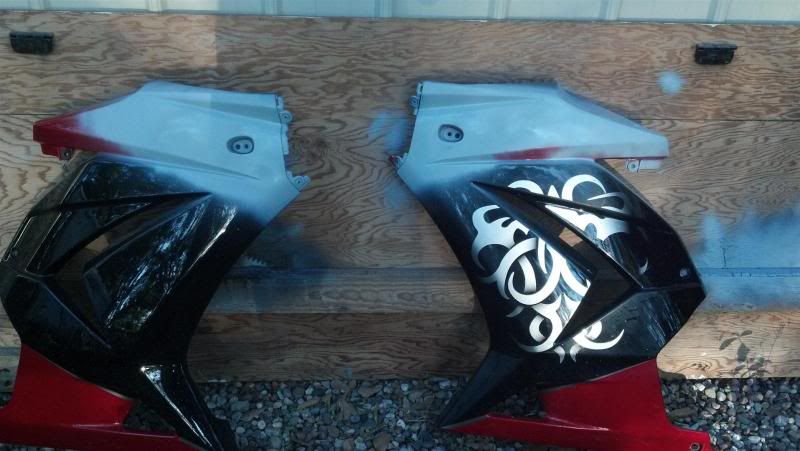 Fortunately for me, Kawasaki was cheap as hell when they built this bike and the red on the front farings is actually a sticker, not actually painted on. I'm going to pull those off and just paint the entire upper section of the fairings where the damage is gloss black. The lower red I will leave to tie in with the rear fairings and tank. I shouldn't have to go even close to that to blend in the black. Today I've filled the pinholes and I'm posting this as I wait for my second coat of high-build primer to dry. A little wet sanding and I should have color on the bike before this evening. |

|

|
|
March 25th, 2012, 01:29 PM
|
#2 |
|
#squid
Name: nickypoo
Location: Five Guys
Join Date: Jul 2011 Motorcycle(s): Track dedicated 2008 ZX6R Posts: A lot.
MOTM - Jul '16
|
Good luck with the build

__________________________________________________

|
|
|
|
|
March 25th, 2012, 02:00 PM
|
#3 |
|
ninjette.org member
Name: Ian
Location: Houston TX
Join Date: Mar 2012 Motorcycle(s): '10 Ninja 250 Posts: 27
|
Just got in from putting down the first color coats.
Here's the fairings after I removed the other graphic and put on another couple coats of high build primer. 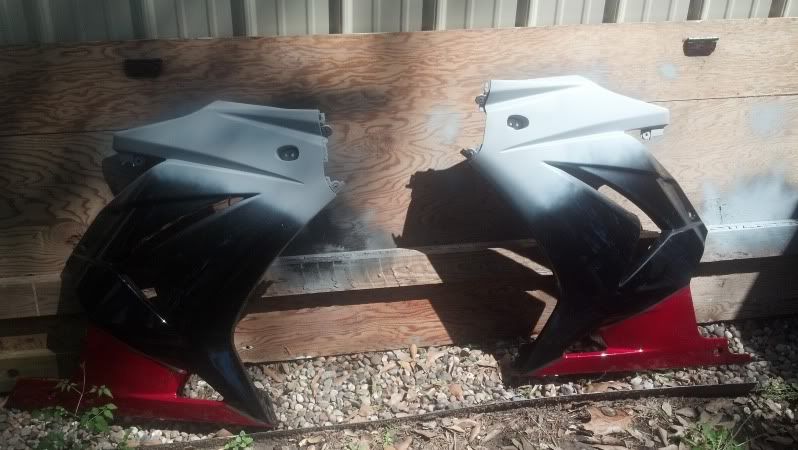 And here is the first color coat. It needs another layer of black, some clear, and then a good color sand with 1000 grit and polish to really shine. 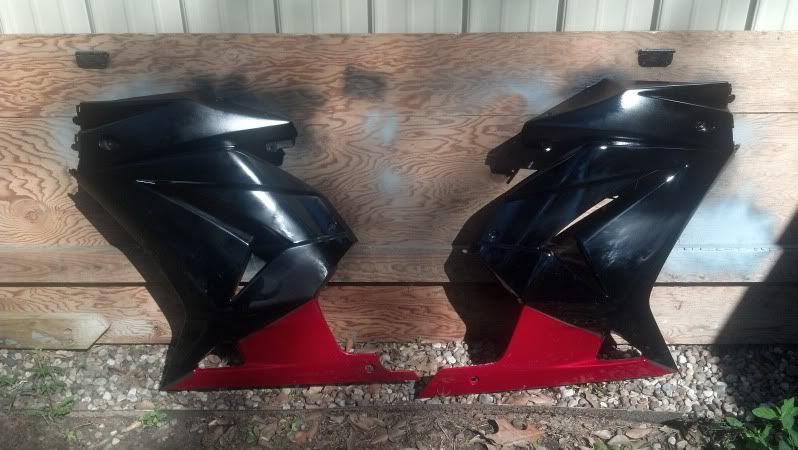
|
|
|
|
|
March 25th, 2012, 05:19 PM
|
#4 |
|
ninjaholic
Name: Dustin
Location: Oceanside, CA
Join Date: Jun 2010 Motorcycle(s): 09' SE 250R (sold), 03' ZX-6R, 99' XL1200C SP Posts: A lot.
Blog Entries: 3
|
Looks like you are off to a really good start and have way more patience than I do... I would have just got another set of fairings
 Keep up the great work and I look forward to seeing the end result 
__________________________________________________
09' SE Ninja 250R $2,547.83 worth of mods installed... come on Unregistered, you know you want to know what? Check my Blog "Modification List"
|
|
|
|
|
March 25th, 2012, 06:52 PM
|
#5 |
|
ninjette.org member
Name: Ian
Location: Houston TX
Join Date: Mar 2012 Motorcycle(s): '10 Ninja 250 Posts: 27
|
If I had any more money that's what I would have done as well. What I'm doing will be cheap but it will never look as good as a fresh set of fairings and it is a ton of work. As it is though, it'll look good enough for now, and this is my little beater bike. I put fresh fairings on it, I'll be afraid of messing them up if I low side at a track day. As it is I won't care as much about it and that is a good thing. My F3 was decent looking but not perfect and I liked it that way. You scratched it and went "meh, whatever" instead of flipping out.
|
|
|
|
|
March 26th, 2012, 04:50 PM
|
#6 |
|
ninjette.org member
Name: Ian
Location: Houston TX
Join Date: Mar 2012 Motorcycle(s): '10 Ninja 250 Posts: 27
|
No new shots just yet but I did get a chance to get out and work with the fairings some more. The "paint the **** out of it and then sand" method I was using just wasn't yeilding the results I had hoped for so I sanded things down today with 800 grit and followed that up with another layer of black and clear. This time I didn't try to blend in to the original bottom black since that was just not working and masked the red at the bottom and brought the paint on down to that line. That gave a lot nicer results and other than a sag on the front of one fairing, I'd call them pretty darn good. Once I can handle them I'll throw them on the bike and take a picture.
I'm planning on digging into the carbs and shimming the needles later tonight since my bike is an awful hard starter when it is cold, plus I also ordered a pair of pirelli's for her earlier today. This thing is coming together! |
|
|
|
|
March 26th, 2012, 05:06 PM
|
#7 |
|
ninjette.org member
Name: dawn
Location: crestview, fl
Join Date: Jan 2012 Motorcycle(s): 02 ninja 250r Posts: 18
|
You need to go get some plastic putty from your local carquest store. And you'll need to seal over anything you put on the plastics...otherwise, yes...you will have to "sand and paint the s**t" out of it. Black is very unforgiving when it comes to high gloss...so prep is key...you can never prep too much.
__________________________________________________
 NinjaMama7 NinjaMama7
|
|
|
|
|
March 26th, 2012, 05:43 PM
|
#8 |
|
ninjette.org member
Name: Ian
Location: Houston TX
Join Date: Mar 2012 Motorcycle(s): '10 Ninja 250 Posts: 27
|
You know, you are absolutely right and I didn't even think about it. I've been working on it using the same techniques that I used working on fiberglass and metal for my race cars but this is plastic...
Oh well, I'm past that point anyway. If I get the urge to fix some of the other little cracks and imperfections I missed the first time around I'll go get the right products from the start. For now though, what I have is acceptable. |
|
|
|
|
March 26th, 2012, 05:57 PM
|
#9 |
|
wat
Name: wat
Location: tustin/long beach
Join Date: Sep 2009 Motorcycle(s): wat Posts: Too much.
Blog Entries: 5
MOTM - Oct '12, Feb '14
|
nice work. i think @ManyCavies would be very interested in this thread.
__________________________________________________
  
|
|
|
|
|
March 26th, 2012, 06:04 PM
|
#11 | |
|
wat
Name: wat
Location: tustin/long beach
Join Date: Sep 2009 Motorcycle(s): wat Posts: Too much.
Blog Entries: 5
MOTM - Oct '12, Feb '14
|
Quote:
__________________________________________________
|
|
|
|
|
|
March 26th, 2012, 06:24 PM
|
#12 | |
|
ninjette.org member
Name: Ian
Location: Houston TX
Join Date: Mar 2012 Motorcycle(s): '10 Ninja 250 Posts: 27
|
Quote:
|
|
|
|
|
|
March 26th, 2012, 06:51 PM
|
#13 | |
|
ninjette.org guru
Name: Jason
Location: Houston, TX
Join Date: Nov 2011 Motorcycle(s): 2007 Ninja 250 (sold), '06 Ninja 650R Posts: 455
|
Quote:
|
|
|
|
|
|
March 26th, 2012, 07:35 PM
|
#14 |
|
wat
Name: wat
Location: tustin/long beach
Join Date: Sep 2009 Motorcycle(s): wat Posts: Too much.
Blog Entries: 5
MOTM - Oct '12, Feb '14
|
the needle on these carbs go into the main jet. the needle effects mid-throttle fuel mix. the main jet, WOT fuel mix. idle (as in, no throttle) fuel mix is determined by the pilot jet and air screws. aka "idle mix screws" behind the caps jason is talking about.
summary: - shimming the needle will increase the amount of fuel going through the main jet as you open the throttle. - adjusting the pilot mix screws will effect the fuel mix at idle. a side note- cold air is denser than warm air. that means when its cold, theres too much air for the amount of fuel going through the pilot jet. so if you were to screw out the pilot mix air screw, you would be "turning up" the amount of fuel going into the mix for idle. richening the mix. so cold == too much air, so give more gas to make cold run better. but i will say, you should be more concerned with how it runs when its hot. you can always use the choke to start it when its cold but you can't exactly use it to fix an incorrect mix when its hot.... well you kinda can but thats a whole other can of worms.
__________________________________________________
Last futzed with by alex.s; March 26th, 2012 at 07:46 PM. Reason: i mixed it up... got fuel/air backwards on the pilot screw... |
|
|
|
|
March 26th, 2012, 07:37 PM
|
#15 |
|
ninjette.org guru
Name: Adam
Location: Orlando FL
Join Date: Jun 2011 Motorcycle(s): 2010 Kawasaki Ninja 250R red/black SE <-- totalled now '11 650r BLACK Posts: 334
|
So u don't want fairings? I have a left one for sale. 2010 SE
__________________________________________________
Proud to stand by the fact that I saved my life by laying my bike down and sliding away from it, to avoid a T-Bone collision with a red light runner. |
|
|
|
|
March 27th, 2012, 10:25 AM
|
#16 | ||
|
ninjette.org member
Name: Ian
Location: Houston TX
Join Date: Mar 2012 Motorcycle(s): '10 Ninja 250 Posts: 27
|
Quote:
Quote:
I don't need any new main fairings right now though, no. In other news, I did get the fairings finished up to an acceptable gloss and bolted them up to see how they look. 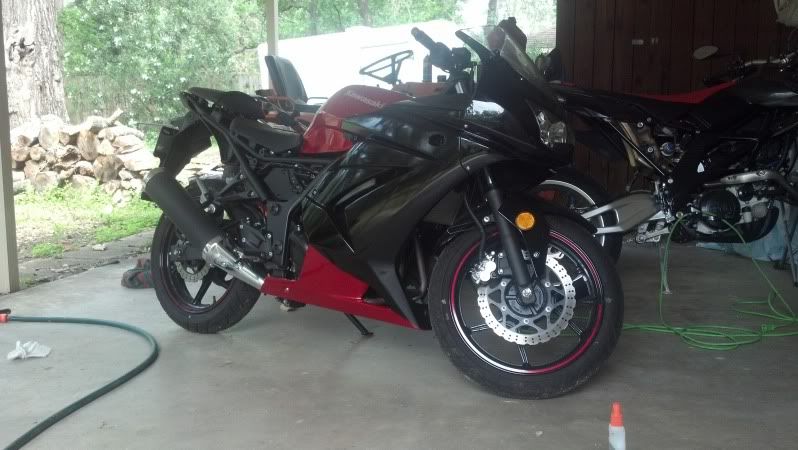 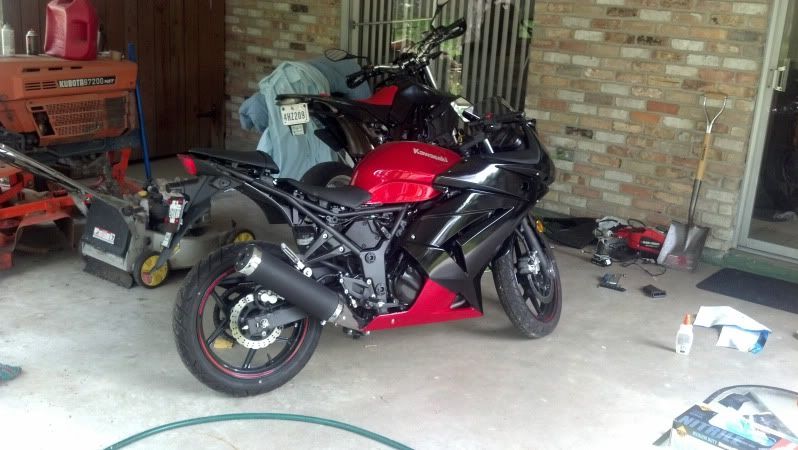 Honestly, there is some contrast between the original gloss black and the fairings, but its not that bad. I kind of need to pull off the front fairing anyway since it is cracked and scratched up from the low side and when I'm done it'll get repainted and will match the side fairings. For now though I have it looking acceptable and I'll leave it at that. Next up... lets see... shimming the needles, finding new rear and mid fairing bits, and turn signals. Oh yeah, and a mirror! Boy I would really like a mirror... |
||
|
|
|
|
March 27th, 2012, 10:41 AM
|
#17 |
|
wat
Name: wat
Location: tustin/long beach
Join Date: Sep 2009 Motorcycle(s): wat Posts: Too much.
Blog Entries: 5
MOTM - Oct '12, Feb '14
|
somebody makes a sweet carbon fiber ... uh... side... accent... knee piece...thing....whatever its called. trailerboy has a set on his, looks sick.
bikes looking good btw. nice work so far maybe the transition from the head to the side fairings would look better with something inbetween? maybe pin stripe white along the border... in my head it looks great but often whats in my head doesnt translate to reality.......
__________________________________________________
|
|
|
|
|
March 27th, 2012, 10:50 AM
|
#18 | |
|
ninjette.org member
Name: Ian
Location: Houston TX
Join Date: Mar 2012 Motorcycle(s): '10 Ninja 250 Posts: 27
|
Quote:
I thought about something on the transition, but since I'm going to repaint the front anyway, its really going to end up a non-issue. I can live with a bit of gloss mismatch for now. I will be re-striping the transitions from red to black with some silver like the original scheme. I had to remove it for painting, but I own a vinyl shop so cutting some new stripes is a non-issue. I just want to give the paint some time to cure before I throw vinyl at it. |
|
|
|
|
|
March 27th, 2012, 10:53 AM
|
#19 |
|
wat
Name: wat
Location: tustin/long beach
Join Date: Sep 2009 Motorcycle(s): wat Posts: Too much.
Blog Entries: 5
MOTM - Oct '12, Feb '14
|
yeah. i usually use cheap paint so i have to wait upwards of a month before its cured enough to do good quality finish work, but then i usually **** it up before i get to that point by dropping it or something... my bikes are kinda in a perpetual state of repair. lol. :/
__________________________________________________
|
|
|
|
|
April 1st, 2012, 08:08 PM
|
#20 |
|
ninjette.org member
Name: Ian
Location: Houston TX
Join Date: Mar 2012 Motorcycle(s): '10 Ninja 250 Posts: 27
|
I'm actually really peived - I did a lot of work and forgot to take pictures today.
Ah well, not like what I didn't get shots of is anything special. I tore into the carbs today. I stripped out one of the screws on the bowl trying to use the offset screwdriver so they had to come out and get a vice grip to get that screw off. I replaced all of the screws with some stainless metric allen head screws I had on hand. I had already shimmed up the needles with a couple washers, but with the snorkel removed, it still bogged like crazy at anything under very high RPM's, and even up high it felt like there was more to give. I pulled the plugs off of the mixture screws and put them back to factory specs. Then I pulled the jets in anticipation of my jets coming in. Then I got a wild hair and figured "ah well, I'm never using the stockers again anyway..." and put a #60 drill through the jets which would be something around a 100-102. After putting everything back together I took it for a ride and I'll be damned if it doesn't seem like I got things about right! I need to do some high speed highway pulls but at lower speeds it certainly feels much better! I ended up opening up the mixture screws about a quarter turn each to get the response off of idle about right and I didn't notice any hesitation at 6-7k under load so I think that the needles are about where they need to be. With that out of the way I got to work on a home made undertail. I took the stock back piece that holds the tail light and drilled out the rivets that hold the metal to the plastic. Then I cut away everything below the bits that go around the light and cleaned up the jagged edges with a belt sander. A little aluminum angle and a drill bit and I had a nice undertail. I still need to rig up some LED's for a plate light but I'll get that taken care of. Unfortunately the pictures really look like crap since I don't have a fairing on the back, but you get the idea. 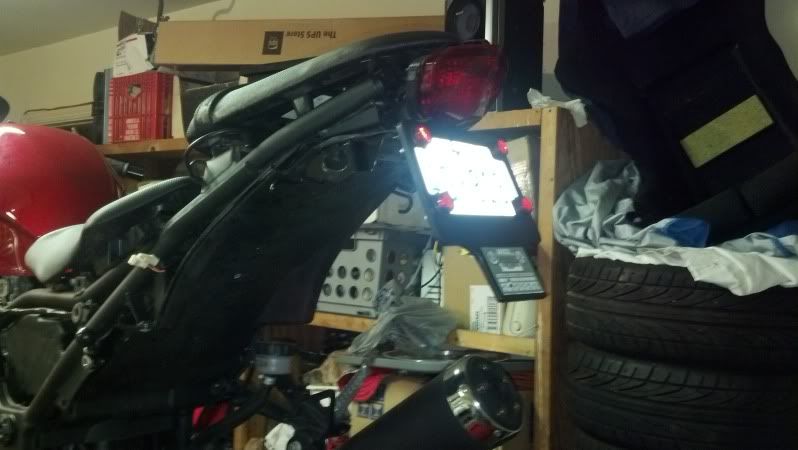 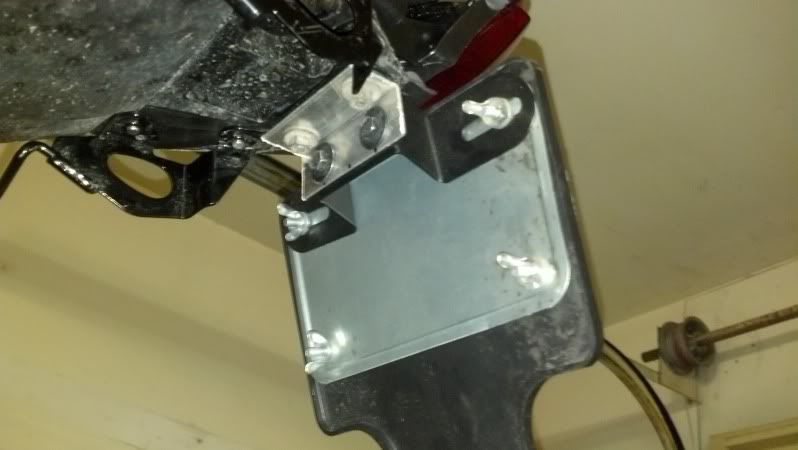 Right now she's up on a rear stand and a jack while the wheels are off. Tomorrow I'll run them by somewhere to get the new pirelli's put on. Unfortunately it was also a case of "two steps forward, one step back" today. I set the gas tank on its nose per the suggestion from somewhere on here to keep the petcock off the ground. I didn't notice but the filler cap started leaking and the gas ate through the clear coat over the special edition sticker on the tank and ruined the clear right there. I'll have to pull the sticker and put some vinyl over that area. I think a nice black/silver design will actually look ok there. Also going tomorrow at lunch to look at a SV650 as a potential low cost replacement for the fiancee's aprilia SXV550. We're saving up some cash for a BMW S1000RR and also for our trip to the dragon here in a couple of months. The suzuki ought to do nicely in that regard. Fingers crossed it is a nice bike and I'll be a suzuki owner again. |
|
|
|
|
April 2nd, 2012, 09:46 AM
|
#21 |
|
ninjette.org guru
Name: Jason
Location: Houston, TX
Join Date: Nov 2011 Motorcycle(s): 2007 Ninja 250 (sold), '06 Ninja 650R Posts: 455
|
Looking good Ian.
Let me know how that SV works out. I'm interested in upgrading to that when winter rolls around. |
|
|
|
|
April 2nd, 2012, 08:49 PM
|
#22 |
|
ninjette.org member
Name: Kody
Location: theodore
Join Date: Feb 2012 Motorcycle(s): 2003 Ninja 250 Posts: 91
|
Ive had the same gloss problem before on a vehicle using spray cans.
I just wet sanded with 1500 after a week, polished, and buffed and it was like glass!!! I dont know how long it lasts or how durable it is cause i sold it 3 months later. |
|
|
|
|
April 4th, 2012, 01:34 PM
|
#23 |
|
ninjette.org member
Name: Ian
Location: Houston TX
Join Date: Mar 2012 Motorcycle(s): '10 Ninja 250 Posts: 27
|
Got the new tires mounted up. Here's a picture of us heading to the store to get them done. We did end up picking up the SV which also had crap tires on it, so we ended up getting them both taken care of at the same time.
 And here's a fun picture of the new SV with its new shoes. Fortunately for us I spotted a craigslist listing for some nice battleaxe tires that were track take-offs with about 1/4 to 1/3 even life left in them for $20 so we saved a few bucks there. We'll have to get some really new tires before too long but even if I get 500 miles out of these I'll be happy.  So far the SV seems like a nice bike. Plenty of low end grunt, in fact probably about the same pull down low as a literbike, just without that big hit up higher in the revs. We weren't looking for a speed demon and the torque will make powering in and out of tight twisties really nice since you won't have to shift all that much. The seating position is comfortable and it seems like it will be a good bike to spend time in the saddle with. It has been neglected and needs a lot of TLC and cosmetic clean-up but it will be a much nicer bike once we're done with it. All and all I'm happy with the purchase. |
|
|
|
|
April 8th, 2012, 08:01 PM
|
#24 |
|
ninjette.org member
Name: Ian
Location: Houston TX
Join Date: Mar 2012 Motorcycle(s): '10 Ninja 250 Posts: 27
|
Got a few more of my goodies in and on. Installed the blinker mirrors and spools I picked up off someone here. I also got in on the A&L rear set adjuster group buy and picked up a set of those and installed them this morning.
I love the mirrors and spools, but unfortunately the rear set adjusters are just not doing it for me. I'm 6'2" and the ninja is a little tiny bike for me to start with. I figured that bringing the pegs back and up would help, but due to the geometry of my long legs, my knees are actually at the same level but with my feet higher and in an even MORE cramped position. I actually may go ahead and have a custom set of adjusters made that goes back without going up, but first I'm going to add about an inch of foam to the seat and see how that does. I sit so low that my knees are bent when I'm sitting on the bike with my feet on the ground, so there's plenty of room to go up with that. I did have a good ride today despite being a bit uncomfortable. Things almost went very bad though. I got to my in-laws house in the country and discovered that the relocated brake master pushed the line to where it vibrated over and touched the tire and melted through. That put brake fluid all over the right side of the tire - and this with me doing 70-80mph corners hard! Fortunately everything stuck to the ground fine and I dug up some brake cleaner in the barn and cleaned everything up before the trip back. In any case, here's a pic of the ninja and SV together at the farm: 
|
|
|
|
|
April 8th, 2012, 08:20 PM
|
#25 |
|
ninjette.org member
Name: Devin
Location: Lancaster, SC
Join Date: Nov 2011 Motorcycle(s): '10 Ninja 250r Posts: 48
|
Can we get pictures of the mirrors?
|
|
|
|
|
April 9th, 2012, 08:23 AM
|
#26 |
|
ninjette.org member
Name: Ian
Location: Houston TX
Join Date: Mar 2012 Motorcycle(s): '10 Ninja 250 Posts: 27
|
Sure, I'll take some closer pics of everything in a day or two and post them.
|
|
|
|
|
April 9th, 2012, 09:22 AM
|
#27 |
|
ninjette.org guru
Name: Jason
Location: Houston, TX
Join Date: Nov 2011 Motorcycle(s): 2007 Ninja 250 (sold), '06 Ninja 650R Posts: 455
|
Ian,
What paint did you use on the black? I need to touch mine up. |
|
|
|
|
April 9th, 2012, 09:39 AM
|
#28 |
|
ninjette.org member
Name: Ian
Location: Houston TX
Join Date: Mar 2012 Motorcycle(s): '10 Ninja 250 Posts: 27
|
I just used duplicolor universal black from my local auto parts store. I've had good luck with duplicolor in the past on cars I have worked on, so I stuck with it. It didn't hurt that I had a lot of it in my paint cabinet as well...
|
|
|
|
|
April 15th, 2012, 08:07 PM
|
#29 |
|
ninjette.org member
Name: Ian
Location: Houston TX
Join Date: Mar 2012 Motorcycle(s): '10 Ninja 250 Posts: 27
|
No updates on the little ninja - progress kind of got derailed when I picked up another SV650 for $500 that needed some love. It has been on the lift getting attention for the last couple days.
Pics of the new project to keep everyone happy: As it came in: 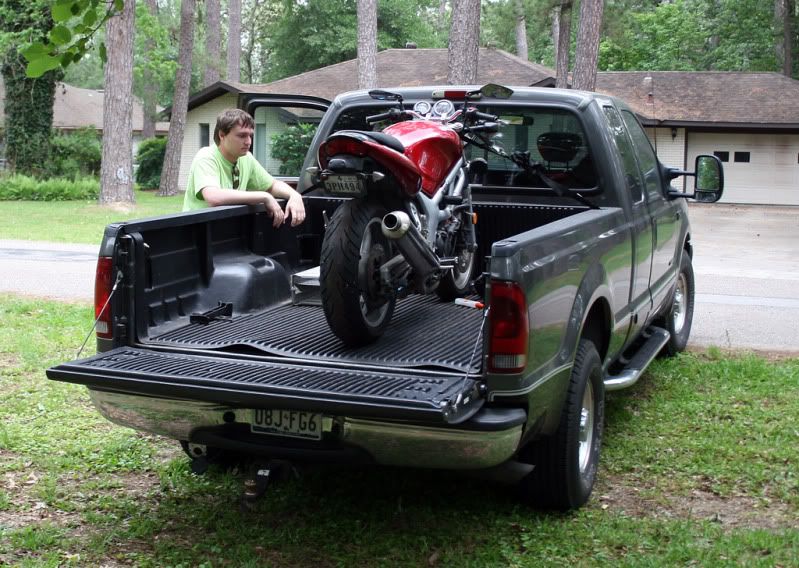 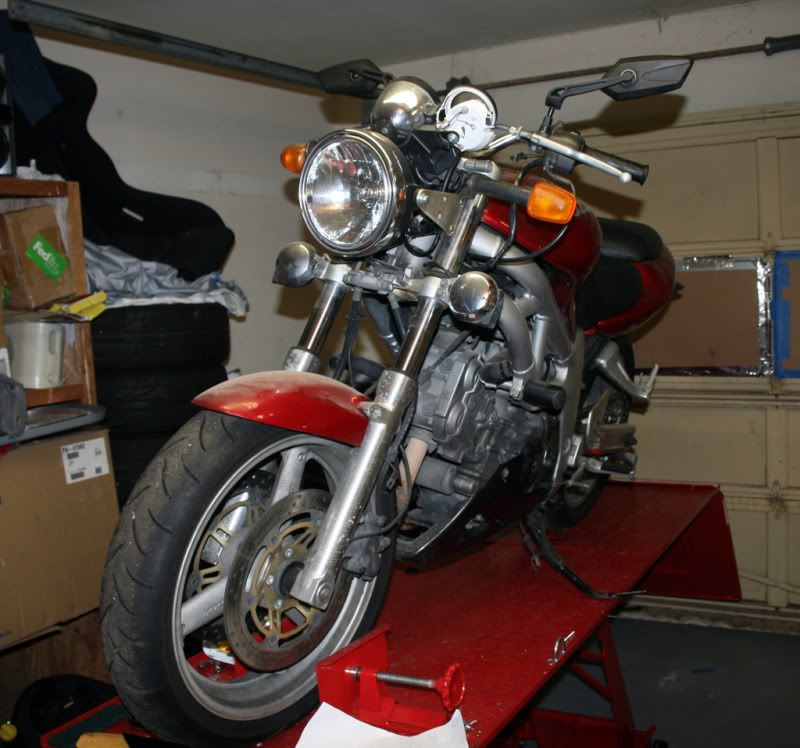 Now with turn signals pulled, cleaned up under-tail and dirty bars: 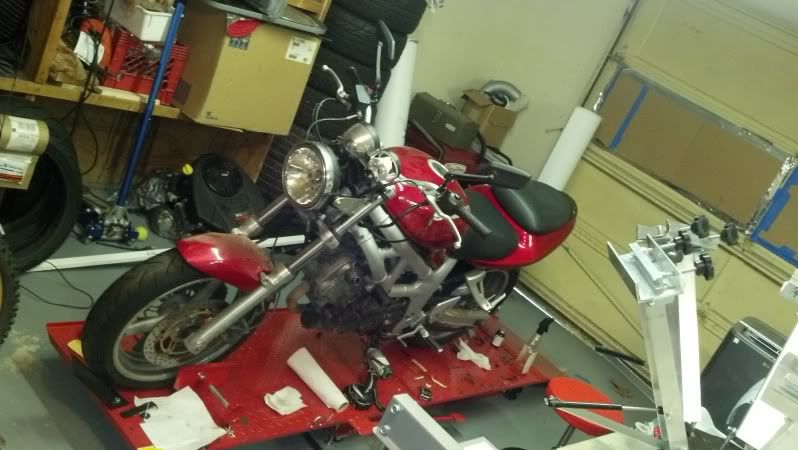 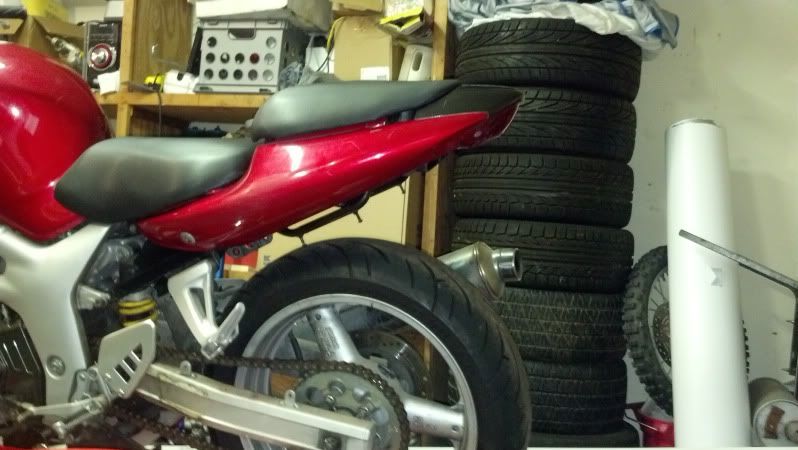 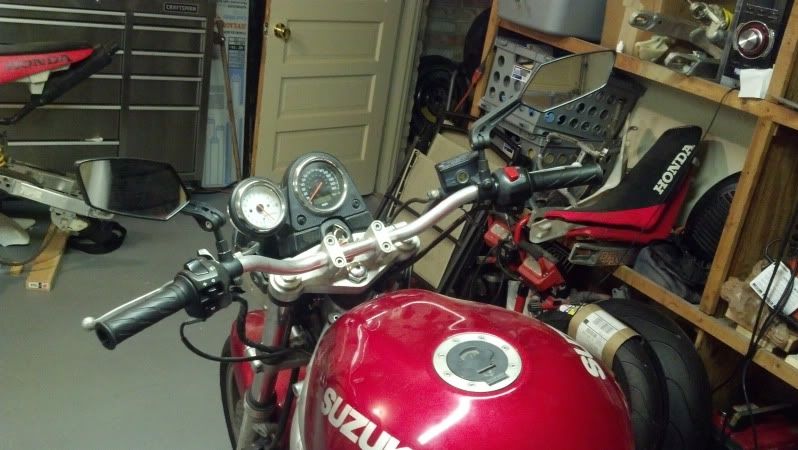
|
|
|
|
|
May 23rd, 2012, 11:18 AM
|
#30 |
|
ninjette.org member
Name: Ian
Location: Houston TX
Join Date: Mar 2012 Motorcycle(s): '10 Ninja 250 Posts: 27
|
Since I hate to leave everyone wondering what happened, I'm leaving this with a nice closing post.
The ninjette has been sold. After riding the SV650 and taking it to the dragon, it really became clear that I wasn't going to ride the little ninja even if I kept it. I listed it up and it sold within four hours! Shortest craigslist sale I've ever made. Had a great but short time over here. Right now I'm concentrating on finishing up the custom SV and I have a wrecked RC51 making its way to me right now that I will be rebuilding as well. iBang signing out! |
|
|
|
|
June 11th, 2012, 05:00 PM
|
#31 |
|
ninjette.org member
Name: Gabe
Location: NOVA
Join Date: May 2012 Motorcycle(s): 250r Posts: 29
|
Lovin the black and red combo.
|
|
|
|
 |
 Similar Threads
|
||||
| Thread | Thread Starter | Forum | Replies | Last Post |
| [topix.net] - Ian Hutchinson vs a seagull | Ninjette Newsbot | Motorcycling News | 0 | May 29th, 2012 08:20 PM |
| [hell for leather] - Ian Hutchinson vs a seagull | Ninjette Newsbot | Motorcycling News | 0 | May 29th, 2012 08:20 PM |
| [topix.net] - Ian Hutchinson's IOMTT Trifecta | Ninjette Newsbot | Motorcycling News | 0 | June 8th, 2010 01:21 AM |
| Ian | ians_04_250 | New Members | 13 | May 2nd, 2009 12:40 PM |
| [roadracingworld.com] - Racer Ian Gunn, R.I.P. | Ninjette Newsbot | Motorcycling News | 0 | December 6th, 2008 07:22 AM |
|
|


