
|
 July 25th, 2017, 07:00 AM
|
#1 |
|
All the news that's fit to excerpt
Name: newsie
Location: who knows?
Join Date: Jun 2008 Motorcycle(s): only digital replicas Posts: Too much.
|
[motorcycle.com] - MO Wrenching: How To Install Braided Steel Brake Lines
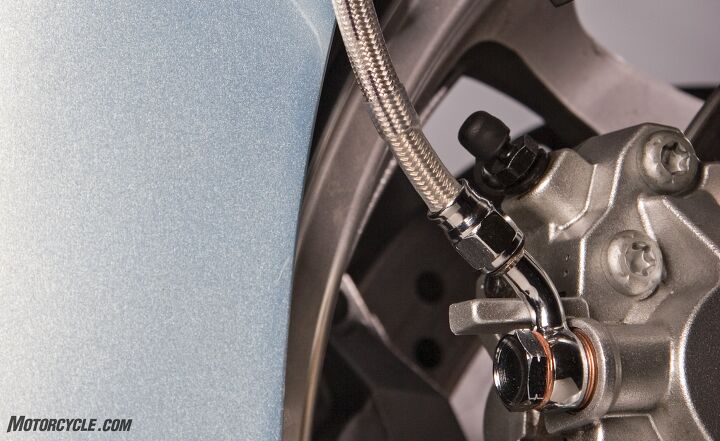 Fitting a set of braided, stainless-steel brake lines to your motorcycle can have a dramatic effect on its stopping performance. The initial onset of braking will be much quicker since stainless lines dont expand. Also, because the lines are sheathed in metal (usually with a protective plastic outer coating), you dont have to worry about stainless lines cracking from age and exposure to the sun. Additionally, the teflon interior is less prone to becoming brittle than rubber. So, a trip to the aftermarket will give you better braking and longer-lasting lines, to boot. Lets not discount how cool they look, too. Thats why youll find them on a ton of cruisers and not just sportbikes. Most of the major line manufacturers, like Goodridge, have pre-measured kits available for almost every sportbike manufactured in the last 10 years (plus many other standard and cruiser models, too). So, you shouldnt have any problem finding one for your ride. However, if youve modified your bike by raising or lowering the bars or have installed bars with a different bend, you may want to have a custom-length kit special ordered for you. Some manufacturers offer build-em-yourself kits where you cut the lines and attach the fittings. While these kits are great for custom applications, you need to order each individual part right down to the angle of the bend on the banjo fitting, so be forewarned. 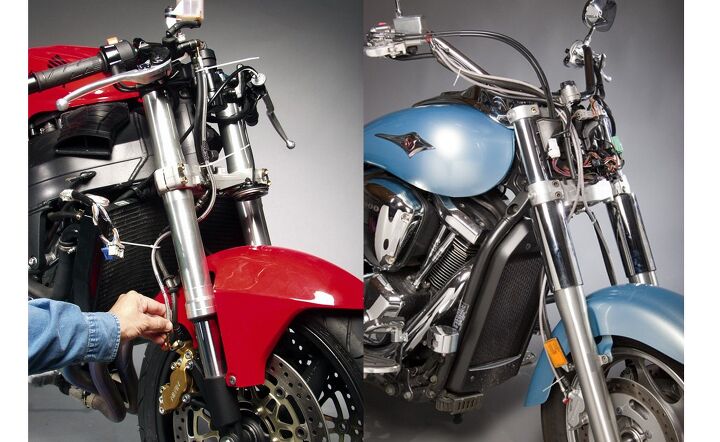 Whether youre adding braided lines to a cruiser or sportbike, quickly attaching the new line to the stocker will tell you if it is the right length. This will also help you to prepare for any idiosyncrasies of your bikes brake line routing. Whether youre adding braided lines to a cruiser or sportbike, quickly attaching the new line to the stocker will tell you if it is the right length. This will also help you to prepare for any idiosyncrasies of your bikes brake line routing.Before you begin installation, check to make sure that all of the lines in your kit are the correct length. Nothing will make you crazier than having a line end up an inch short while your bike sits idle with the entire system disassembled. Youre then stuck with no bike until you get the correct part, or reinstalling lines you want to take off anyway. The simplest way to check the length of the lines is by zip-tying them to the existing lines. Although this takes a couple of extra minutes, you can tell right away if the lines will have the proper amount of slack in them. Having your brake lines go taut before the fork is fully extended would be a Very Bad Thing. 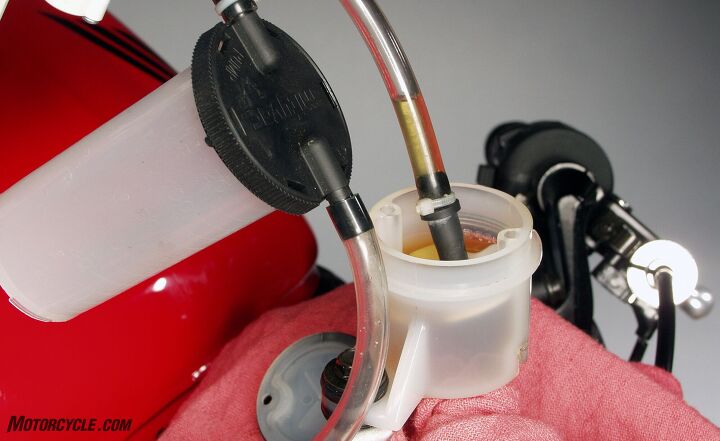 Sucking the fluid out of the reservoir will speed up the task of draining the system. Place the cap back on the system but dont screw it down to keep dust out of it while youre changing the lines. Sucking the fluid out of the reservoir will speed up the task of draining the system. Place the cap back on the system but dont screw it down to keep dust out of it while youre changing the lines.Even in the best-case scenario, changing hydraulic lines is messy. Since brake fluid can damage paint and other shiny stuff on your bike, you should remove or cover any vulnerable painted surfaces. You will also want to get the system as empty of fluid as possible before removing the lines. A vacuum bleeder is ideal for this. Begin by sucking the extra fluid out of the reservoir. Then attach the hose to a calipers bleeder valve. Give the bleeder a couple of pumps to build up the suction and crack the valve until fluid starts to be drawn into the catch tank. Keep pumping until the system is dry. Do this for all calipers that will receive new lines.  Using a vacuum bleeder is much more effective at draining the brake system than trying to pump it dry with the master cylinder. Using a vacuum bleeder is much more effective at draining the brake system than trying to pump it dry with the master cylinder.Unscrew or unclasp all of the fasteners holding the hydraulic line in place. Using a ratchet, remove the banjo bolt from the caliper. To keep the fluid leakage to a minimum, wrap the banjo with a rag and secure it with a zip tie or piece of tape. Remove the master cylinder banjo and feed the line out of the chassis. Now, feed the new line into place following the exact same route as the stock line. Often, aftermarket front brake kits will use two lines from the master cylinder instead of a T-junction further down the line. Be sure you run the correct line to each caliper. (One is usually longer than the other.)  The OE system only used a single line at the master cylinder, so the second aftermarket line needs to be held in place while the banjo is torqued. Note the three copper crush washers used to seal the system. The OE system only used a single line at the master cylinder, so the second aftermarket line needs to be held in place while the banjo is torqued. Note the three copper crush washers used to seal the system.Always replace the crush washers when the banjo bolts have been removed. The soft copper (for steel banjos) or aluminum (for aluminum banjos) is designed to conform to any irregularities on the fitting or mounting surface. A washer should be used on both sides of the banjo. If two banjos are being bolted together (as on the front brake master cylinder), be sure to use a crush washer between the two banjos, as well. Screw the banjo bolts in finger tight and check your hose routing before you torque things down. You dont want any sharp bends or kinks in the lines. If things dont line up right you may have the banjos at the wrong mounting point. Hydraulic line manufacturers spend a lot of time making sure that the fittings have the same bend as the OE lines they replace. If something doesnt look right, it probably isnt. 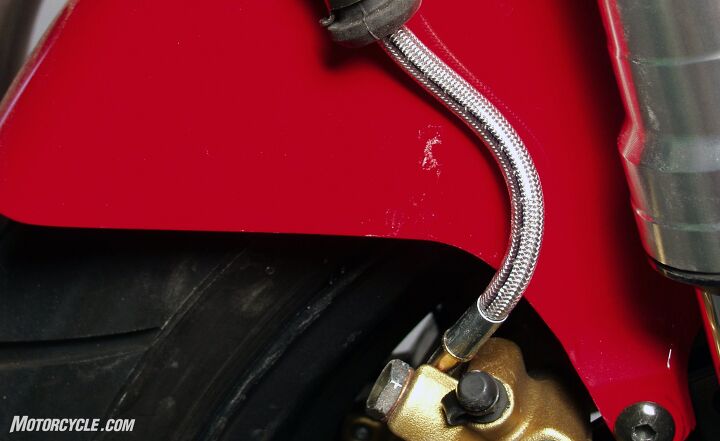 Notice the gentle curve of the stainless line as it leaves the caliper. If it had the wrong bend in the banjo fitting, the line could kink. Notice the gentle curve of the stainless line as it leaves the caliper. If it had the wrong bend in the banjo fitting, the line could kink.Once youve torqued banjo bolts down, make sure you attach the lines to the chassis at all the original points. Sometimes youll need to use zip ties to hold the thinner, stainless lines to the OE clips. Although most stainless lines are sold in protective sheaths, bare, braided stainless-steel lines can cut through metal like a hacksaw. If your lines are uncoated, make sure you wrap the lines with tape or spiral wrap specifically designed for the purpose at all potential points of contact with the chassis. Your next step will be to go here: [This article was adapted from Evans Brasfields book 101 Sportbike Performance Projects. Learn more about it here. Read the MO review here.] MO Wrenching: How To Install Braided Steel Brake Lines appeared first on Motorcycle.com. Click here for full story...
__________________________________________________
I'm a bot. I don't need no stinkin' signature... |

|

|
 |
 Similar Threads
|
||||
| Thread | Thread Starter | Forum | Replies | Last Post |
| Stainless steel braided brake lines install | Bob2010 | 2008 - 2012 Ninja 250R Tech Talk | 8 | June 11th, 2016 07:01 AM |
| question about steel braided brake lines | adouglas | General Motorcycling Discussion | 8 | March 31st, 2015 08:53 AM |
| where to buy steel braided lines | james250ninja | 1986 - 2007 Ninja 250R Tech Talk | 10 | November 13th, 2013 11:26 PM |
| steel braided brake lines | james250ninja | 1986 - 2007 Ninja 250R Tech Talk | 4 | October 10th, 2013 07:07 AM |
| [roadracingworld.com] - Video: Installing Braided Stainless Steel Brake Lines On The | Ninjette Newsbot | Motorcycling News | 0 | November 15th, 2010 12:40 PM |
|
|


