
|
 February 21st, 2012, 01:26 AM
|
#1 |
|
ninjette.org member
Name: Nathan
Location: Portland, Oregon
Join Date: Apr 2011 Motorcycle(s): 2009 V-Strom 650 ABS Posts: 166
|
DIY - Hot Grips Heated Grips Install
Well, after getting some POS $5 heated grip pads on eBay that were total junk, I decided to go to the other end of the spectrum and purchase some top notch, US made Hot Grips brand heated grips.
On Amazon I ordered the 475-875 kit, which comes with two grips, the hi/low switch, and some misc wire. Turns out that was the wrong kit, as our bike requires the ends to be drilled out. The proper kit is the 475-876, and here is the Amazon link for it. As of today, it's $98.26 shipped from Powersport Superstore. I drilled mine out with my drill press and two appropriately sized forstner bits. This created factory perfect holes with some care, though I stressed about this for about 2 days before finally doing it. (Buy the right kit to avoid this!) Here they are right after drilling before being cleaned up a bit:  After getting those ready, I removed the bar end weights and existing grips. I used a small micro torch to heat the bar end weight bolt for about 30 seconds, and then they came right out with my impact driver. The grips came off quickly with the help of my compressed air wand. The instructions call to epoxy both grips on to the handlebars. I decided I wanted to make them as removal as possible. This is easy for the clutch side. I drilled two small holes in the bottom of the handlebar, and inserted a bent piece of a coat hanger.  When fitted into the bottom of the handblar, this provides a perfect key to fit into the ribbed, notched grips. I put a small kink in it, then friction fit the clutch side grip on.  The throttle side is more tricky, since you can't drill into the plastic throttle tube. What I ended up doing was wrapping the tube so the grip fit on snugly. I then expoxied to that, with a small amount on the actual throttle tube. It should be enough to hold, but not enough to be totally permanent.  The low setting of these grips uses a big honking resistor to shed unnecessary heat. I mounted it to the metal center bar in front of the handlebars.  You can wire this straight to your battery, but that is not considered wise since you can leave them on by mistake. I wired up a relay into my tail light flasher (to avoid having to cut into any factory wires) at the rear of the bike. The relay is a $5 12v from Radioshack. As a result of this, turning the key off kills all power to the grips, whether they are on or not. All connections were made with soldered crimp connectors and protected with heat shrink tubing.  To mount the switch, I cut a piece of aluminum flat bar, drilled two holes in it, and cut the corners off. One hole holds the switch, while the other is bolted to the preexisting, normally plugged threaded hole in the clutch lever assembly. A bit of textured black spray paint on the bolt and aluminum makes it blend in.  Here it is all finished!  A comparison of the old grip and new grip. The Hot Grips are much harder, larger, and feel more substantial. This means your hands are less cupped which lessens fatigue. I loved them the very first ride I took. However, if you were foolish enough to ride without gloves, the softer more rubbery stock grip might be missed slightly.  The verdict? Hot damn these grips a nice. Their larger size is much more comfortable than the dinky stock grips, and the heat they put out is unbelievable. I did 150 miles on 40-45 degrees a weekend or so ago, and they made a huge difference. In fact, I had to keep turning it back to low, since high was downright uncomfortably hot. It's amazing how much better off you are if at least your hands are warm.  PS: This mess took a while to clean up.  
Last futzed with by NathanF; February 21st, 2012 at 06:03 PM. |

|

|
|
February 21st, 2012, 05:35 AM
|
#2 |
|
ninjette.org certified postwhore
Name: Jason
Location: Jacksonville, Florida
Join Date: May 2010 Motorcycle(s): 09 Ninja 250R SE, 07 Honda CRF230F, 06 Honda CRF150F Posts: A lot.
|
Nice!
If you don't mind me asking though... what was wrong with the $5 kit? I thought it was getting descent reviews... I have one but I have yet to install.
__________________________________________________
09 250R SE: Paying it forward one post at a time!   Don't forget to add yourself to our Member Map Don't forget to add yourself to our Member Map
|
|
|
|
|
February 21st, 2012, 06:48 AM
|
#3 |
|
ninjette.org dude
Name: 1 guess :-)
Location: SF Bay Area
Join Date: Jun 2008 Motorcycle(s): '13 Ninja 300 (white, the fastest color!), '13 R1200RT, '14 CRF250L, '12 TT-R125LE Posts: Too much.
Blog Entries: 7
|
/linked from main DIY sticky
__________________________________________________
Montgomery Street Motorcycle Club / cal24.com / crf250l.org / ninjette.org ninjette.org Terms of Service Shopping for motorcycle parts or equipment? Come here first. The friendliest Ninja 250R/300/400 forum on the internet! (especially Unregistered) |
|
|
|
|
February 21st, 2012, 12:31 PM
|
#4 | |
|
ninjette.org member
Name: Nathan
Location: Portland, Oregon
Join Date: Apr 2011 Motorcycle(s): 2009 V-Strom 650 ABS Posts: 166
|
Quote:
http://www.ninjette.org/forums/showt...750#post425750 |
|
|
|
|
|
February 21st, 2012, 12:35 PM
|
#5 |
|
ninjette.org certified postwhore
Name: Jason
Location: Jacksonville, Florida
Join Date: May 2010 Motorcycle(s): 09 Ninja 250R SE, 07 Honda CRF230F, 06 Honda CRF150F Posts: A lot.
|
Thanks. Maybe I'll do some testing prior to the install.
__________________________________________________
09 250R SE: Paying it forward one post at a time! Don't forget to add yourself to our Member Map
|
|
|
|
|
February 21st, 2012, 02:35 PM
|
#6 |
|
-
Name: -
Location: -
Join Date: May 2009 Motorcycle(s): - Posts: A lot.
|
You made a good choice with the HotGrips. I've been using them on my EX-250 for three winters now, couldn't be happier with the product.
I put my switch on the fairing (right above the voltmeter in the picture). 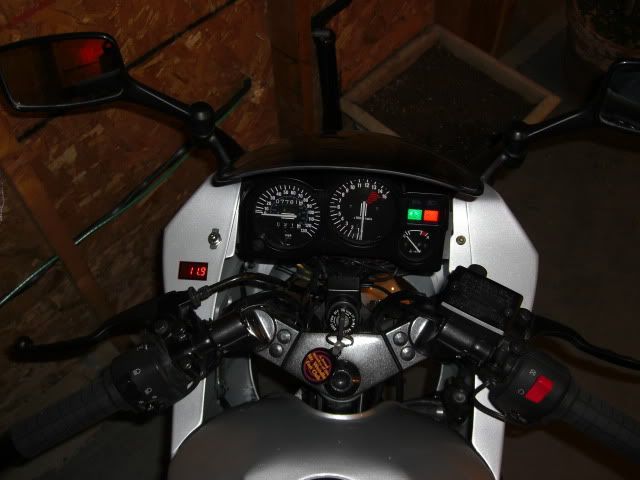
|
|
|
|
|
February 21st, 2012, 05:21 PM
|
#7 |
|
Jigglin' your Jiglets
Name: Sean
Location: San Jose, Ca
Join Date: Jun 2011 Motorcycle(s): 2009 K1300S, 2013 Ninja 300, 2011 Ninja 250R, Faster than Unregistered's ninjette Posts: Too much.
Blog Entries: 1
MOTM - Apr '13
|
What is the total power consumption of this thing? 36 watts? And about how much thicker are they than the stock grips? Do you notice one side being warmer than the other side?
__________________________________________________
If the Ninja 250 doesn't have enough power for you, then you don't know how to ride it. AFM #676  Supersports are for n00bs |
|
|
|
|
February 21st, 2012, 05:45 PM
|
#8 | |||
|
-
Name: -
Location: -
Join Date: May 2009 Motorcycle(s): - Posts: A lot.
|
Quote:
Once the RPMs come up the voltmeter sits at 13.8 or 13.9 Quote:
Quote:
|
|||
|
|
|
|
February 21st, 2012, 05:51 PM
|
#9 | |
|
ninjette.org member
Name: Nathan
Location: Portland, Oregon
Join Date: Apr 2011 Motorcycle(s): 2009 V-Strom 650 ABS Posts: 166
|
Quote:
The inside of both grips are ribbed/slotted plastic, which I'm sure makes them perform much better than the "wrap the heating element around the bar" variety. The end result is much more heat going into your hands. |
|
|
|
|
|
February 21st, 2012, 06:01 PM
|
#10 | |
|
ninjette.org member
Name: Nathan
Location: Portland, Oregon
Join Date: Apr 2011 Motorcycle(s): 2009 V-Strom 650 ABS Posts: 166
|
Quote:
|
|
|
|
|
|
February 21st, 2012, 06:30 PM
|
#11 | |
|
Jigglin' your Jiglets
Name: Sean
Location: San Jose, Ca
Join Date: Jun 2011 Motorcycle(s): 2009 K1300S, 2013 Ninja 300, 2011 Ninja 250R, Faster than Unregistered's ninjette Posts: Too much.
Blog Entries: 1
MOTM - Apr '13
|
Quote:
__________________________________________________
If the Ninja 250 doesn't have enough power for you, then you don't know how to ride it. AFM #676 Supersports are for n00bs |
|
|
|
|
|
February 25th, 2013, 06:02 AM
|
#12 |
|
ninjette.org sage
Name: Fox
Location: Boston
Join Date: May 2012 Motorcycle(s): 08 250R Posts: 881
|
a year later... and thanks for the diy...
it was nice to see a few of the things illustrated. I did mine with epoxy though, that simplified everything a lot. I figured I'll never actually take them off, I'd just buy a new set for a new bike if the time came. btw, what did you use for ground for the grips? I haven't gotten to taking the side fairings off yet. And I'm also looking at using one of these switches... with the extra "kill" button, I'll scrape the "kill" off and wire it up to a garage door opener. 
|
|
|
|
|
February 25th, 2013, 02:57 PM
|
#13 | |
|
ninjette.org member
Name: Nathan
Location: Portland, Oregon
Join Date: Apr 2011 Motorcycle(s): 2009 V-Strom 650 ABS Posts: 166
|
Quote:
|
|
|
|
|
|
January 17th, 2014, 01:25 PM
|
#14 |
|
ninjette.org sage
Name: Brian
Location: Orange County, CA
Join Date: Apr 2012 Motorcycle(s): '12 ninja 250r Posts: 762
|
Old thread revival...Wanted to try and install these, but wasn't sure about the wiring. I replaced the flasher relay when I got an LED brake light and turn signal; was this wired to that flasher relay? What exactly does the wiring look like? What are other options/ideas to wire this thing short of directly to the battery?
|
|
|
|
|
January 17th, 2014, 02:13 PM
|
#15 |
|
Certified looney toon
Name: Teri
Location: 39°52'40.7"N 118°23'53.8"W (Northern NV)
Join Date: Jun 2012 Motorcycle(s): 2012 Ninja 250, 102k+ miles -- 2014 CB500X, 42k+ miles Posts: A lot.
Blog Entries: 16
MOTM Jul '13, Jul '14
|
I m not an electrician, but i have hooked up accessories without blowing up my bike.
Based on the pictures, this is not hooked to the flasher relay. Leave that one alone. It only controls the turn signals. You buy a new automotive relay at any electronic store. What it does is has four or five terminals you attached wires to. One wire comes from the battery straight to the relay. One goes from the relay to a grounding point. One is a switched wire that has been tapped into another wire only powered on when the key is turned (ie the tail light wire). The final one or two terminals provide power to what accessor(ies) you are hooking up. This allows you to leave the accessory plugged in and power will only be supplied when the switched wire has power to it. That flips the relay to connect the power from the battery to the wire going to the accessory.
__________________________________________________
 <-- Linky <-- LinkyHey Unregistered! The code [you] shows the username currently logged in. IBA # 56020 AMA # 521481  Fun Rides! ][ My Videos ][ My Gear Fun Rides! ][ My Videos ][ My GearHold yourself to the same rules you expect others to follow. |
|
|
|
|
January 17th, 2014, 03:12 PM
|
#16 | |
|
ninjette.org sage
Name: Brian
Location: Orange County, CA
Join Date: Apr 2012 Motorcycle(s): '12 ninja 250r Posts: 762
|
Quote:
It might make more sense if I had the bike in front of me, but I wanted to get as much information beforehand as possible. |
|
|
|
|
|
January 17th, 2014, 03:34 PM
|
#17 |
|
Certified looney toon
Name: Teri
Location: 39°52'40.7"N 118°23'53.8"W (Northern NV)
Join Date: Jun 2012 Motorcycle(s): 2012 Ninja 250, 102k+ miles -- 2014 CB500X, 42k+ miles Posts: A lot.
Blog Entries: 16
MOTM Jul '13, Jul '14
|
That may be possible, I honestly haven't tried.
What i did originally was bought a wire crimp (?) ... Um, this thing...  And just laid the tail light wire into it and then the line going to the relay from the tail light. Pinch it together and it breaks through the plastic cover and connects the two lines. However, i decided later I wanted a more permanent solution, so stripped the plastic cover off a small segment of the tail light wire, stripped a bit of plastic off the relay wire and wrapped it around the tail light wire, and soldered the two together, then covered the connection with heat shrink. The only thing i could see going wrong if you power the tail lights through the relay is if the relay goes bad, you loose your tail lights.
__________________________________________________
<-- LinkyHey Unregistered! The code [you] shows the username currently logged in. IBA # 56020 AMA # 521481 Fun Rides! ][ My Videos ][ My GearHold yourself to the same rules you expect others to follow. |
|
|
|
|
January 17th, 2014, 04:07 PM
|
#18 | |
|
ninjette.org certified postwhore
Name: Fish
Location: co
Join Date: Apr 2013 Motorcycle(s): 250/300 Posts: A lot.
|
Quote:
__________________________________________________
Hey Unregistered never go faster than your brakes can be applied... |
|
|
|
|
|
January 17th, 2014, 04:30 PM
|
#19 | |
|
ninjette.org sage
Name: Brian
Location: Orange County, CA
Join Date: Apr 2012 Motorcycle(s): '12 ninja 250r Posts: 762
|
Quote:
|
|
|
|
|
|
January 17th, 2014, 04:50 PM
|
#20 | |
|
Certified looney toon
Name: Teri
Location: 39°52'40.7"N 118°23'53.8"W (Northern NV)
Join Date: Jun 2012 Motorcycle(s): 2012 Ninja 250, 102k+ miles -- 2014 CB500X, 42k+ miles Posts: A lot.
Blog Entries: 16
MOTM Jul '13, Jul '14
|
Quote:
The tail light has a very tiny wire and I would presume a very low draw since it is only a small bulb. My heated jacket has a thicker wire coming off the battery (I think) because it has a far greater draw. A wild @$$ guess believes that if you try powering the heated grips through the tiny little tail light wire, you will end up blowing the fuse for the tail lights along with whatever else gets damaged when something draws too much power for what the wire was designed for.
__________________________________________________
<-- LinkyHey Unregistered! The code [you] shows the username currently logged in. IBA # 56020 AMA # 521481 Fun Rides! ][ My Videos ][ My GearHold yourself to the same rules you expect others to follow. |
|
|
|
|
|
January 17th, 2014, 05:07 PM
|
#21 |
|
ninjette.org sage
Name: Brian
Location: Orange County, CA
Join Date: Apr 2012 Motorcycle(s): '12 ninja 250r Posts: 762
|
You make a good point. I'll stick with the relay; pretty sure I got a good grasp on this now. Thanks for your help.
|
|
|
|
|
January 17th, 2014, 05:11 PM
|
#22 |
|
Certified looney toon
Name: Teri
Location: 39°52'40.7"N 118°23'53.8"W (Northern NV)
Join Date: Jun 2012 Motorcycle(s): 2012 Ninja 250, 102k+ miles -- 2014 CB500X, 42k+ miles Posts: A lot.
Blog Entries: 16
MOTM Jul '13, Jul '14
|
You are welcome.
Sorry i couldn't be more detailed or specific. But I am glad i could help some.
__________________________________________________
<-- LinkyHey Unregistered! The code [you] shows the username currently logged in. IBA # 56020 AMA # 521481 Fun Rides! ][ My Videos ][ My GearHold yourself to the same rules you expect others to follow. |
|
|
|
|
January 22nd, 2014, 03:06 PM
|
#23 |
|
EX500 full of EX250 parts
Name: Bill
Location: Grand Rapids-ish, MI
Join Date: Jul 2012 Motorcycle(s): '18 Ninja 400 '09 Ninja 500R (selling) '98 VFR800 (project) '85 Vulcan VN700 (sold) Posts: A lot.
Blog Entries: 1
MOTM - Aug '15
|
A relay uses a small amount of power to control a bigger amount of power. The taillight wire is used to trigger the relay, since it switches on and off with the key. OP tapped into it at the flasher to avoid cutting any factory wiring. The relay then feeds power directly from the battery to the heated gear. The accessory gets power through thick wire that's essentially hooked right to the battery, but the power feed is switched on and off with the key (thanks to the taillight wire and relay).
Here's a diagram of a relay.  You would hook up the switched trigger wire and the ground on the left side to the coil. The battery would be connected to the upper right point, and the accessory would be connected to the middle bottom point, which is a normally-open (not connected) circuit. When you power up the coil circuit (taillight in this case), it acts as an electromagnet and pulls (represented by the dotted line) the relay switch over, connecting the input (the battery) to the middle bottom output (the accessory). The switch moving over to the other contact is the clicking you hear when a relay activates. Standard automotive relays may or may not have the bottom right point, which is normally-closed. This contact is connected to the battery when the coil circuit is not powered, and disconnects when the coil gets power (since the switch is pulled over to the other contact). In this particular scenario, there's not a whole lot of use for the NC contact, but it's handy for other things when you want to turn on A and have B turn off automatically. |
|
|
|
|
January 22nd, 2014, 03:46 PM
|
#24 |
|
ninjette.org sage
Name: Fox
Location: Boston
Join Date: May 2012 Motorcycle(s): 08 250R Posts: 881
|
haven't been paying as much attention to this site since the weather went downhill around here.
As stated above, you definitely want a relay. These things pull a bunch of amperage, you'll definitely keep blowing fuses if you try to run in parallel with any other item on the bike. There is plenty of room to store a relay under the seat (in the battery area). You really only need an automotive SPST (single pole single throw) relay that lacks the extra terminal that is closed when the switch is not active. The image posted above is from a SPDT (single pole double throw) relay. Personally I try to use the right tool for the job. If you chose to use a SPDT, make sure you either clip off, or adequately cover the unused terminal or you could find that you're shorting things out, causing fires, etc. Personally, I'd stay away from using the brake light as your switched wire. The last thing you need is something to short while you're riding and lose your tail light. Pick something else. Personally, I picked the license plate light. Think about the routing of the wires. You'll want wire covers if you want it to look professional as they will be visible in some locations, and wire covers prevent the wire insulation from becoming worn and shorting out on metal parts. Mounting of the switches seemed to be the biggest battle for me. I don't like the cheesy looking switches that come with the kit. I got one of these: http://www.motorcycle-superstore.com...WT.MC_ID=10010 That switch fit perfectly on the left handle bar (of a stock ninjette) and provides a clean install. Nothing looks "tacked on", like it would with those simple toggle switches. Plus, it provided an additional momentary switch (advertised as a kill switch), that I wired up to a garage door opener... now I can pull straight into my garage when I get home without fumbling in my jacket pocket. |
|
|
|
|
January 23rd, 2014, 08:59 AM
|
#25 | |
|
ninjette.org sage
Name: Brian
Location: Orange County, CA
Join Date: Apr 2012 Motorcycle(s): '12 ninja 250r Posts: 762
|
Quote:
I ended up cutting the power wire for the tail light and connecting it to the relay, then two wires out of the relay to the tail light and grips. I was a little confused on where the fuse should be...I put it between the relay and grips. Is that not right? |
|
|
|
|
|
January 23rd, 2014, 12:34 PM
|
#26 | |||
|
EX500 full of EX250 parts
Name: Bill
Location: Grand Rapids-ish, MI
Join Date: Jul 2012 Motorcycle(s): '18 Ninja 400 '09 Ninja 500R (selling) '98 VFR800 (project) '85 Vulcan VN700 (sold) Posts: A lot.
Blog Entries: 1
MOTM - Aug '15
|
Quote:
Quote:
|
|||
|
|
|
|
January 23rd, 2014, 03:37 PM
|
#27 | |
|
ninjette.org sage
Name: Brian
Location: Orange County, CA
Join Date: Apr 2012 Motorcycle(s): '12 ninja 250r Posts: 762
|
Quote:
BTW, everything everybody says about these grips is true. It's a total godsend and by far the best mod I've done to my bike. |
|
|
|
|
 |
 Similar Threads
|
||||
| Thread | Thread Starter | Forum | Replies | Last Post |
| Anyone using heated grips? | caineroad | General Motorcycling Discussion | 5 | September 24th, 2013 06:05 AM |
| $5 ebay heated grips | Socal5646 | 1986 - 2007 Ninja 250R Farkles | 45 | January 14th, 2013 08:00 PM |
| tried these heated grips? | smackenz | 2008 - 2012 Ninja 250R Farkles | 7 | October 17th, 2012 03:11 PM |
| heated grips | bhalv | 1986 - 2007 Ninja 250R Farkles | 10 | January 17th, 2011 09:39 PM |
| Heated Grips | sudadoda | 2008 - 2012 Ninja 250R Farkles | 7 | May 4th, 2010 07:15 AM |
|
|


