**DISCLAIMER: This thread pertains to all things in regards to stunting your 250. Performing stunts with your motorcycle can be dangerous. Please gear up and practice safely away from public. Keep your comments classy  **
Gearing:
**
Gearing:
The power to weight ratio of our bikes makes it hard to perform power wheelies where you can just twist the throttle and lift up the front wheel. Granted you can just rev your bike up to 10k and just dump the clutch in first to get the wheel up. Changing the gearing via sprockets will change the power curve and give you the necessary oomph you need to get your bike on one wheel easily and controlled.
Quote:
Where do I start?
We recommend anybody looking to run larger sprockets starts with the back. Down -1 tooth in the front is roughly equal to +3 in the back. Also, anytime more than one or two teeth are added in the back a new chain will be required to fit. For this reason it is generally easier to start gearing with the back. Pick a rear sprocket and chain that will fit your riding style. As you progress or decide to change your gearing it is much easier to change the front sprocket to accommodate. This eliminates the need for new costly rear sprockets and chains. (Ex. Adding +3 to the gearing can be accomplished for $15 with a -1 front sprocket vs. a +3 rear sprocket and new chain.)
What gearing is right for me?
+5 – Provides a good place to start for anybody looking to get a little more into the stunts without sacrificing street riding or too much top speed. Will gain some torque/acceleration while losing roughly 10% of top speed.
+10 - Provides good amounts of power for slower wheelies while still having decent street riding. Will gain good torque/acceleration while losing roughly 20% of top speed.
+15 – Provides great power for technical slow wheelies. Street riding will be reduced to moderation in the city limits. No highways. Will gain great torque/acceleration while losing roughly 30% of top speed.
+20 - Provides huge power for anything and everything technical. Street riding will be reduced to just parking lots. Not for beginners. Will gain huge torque/acceleration while losing roughly 40% of top speed.
+25 or bigger – Ridiculous… but fun. Go big.
|
http://stuntride.com/vbstunt/showthr...(for-beginners)
Stock gearing is 14/45
Stunt pro Reza SS is using 13/47
According to @
ninja250, the 13/48 combo he used is streetable since he was able to hit 85mph before redlining. Just be aware that the motor will be revving higher than normal and the exhaust note may be louder.
http://www.ninjette.org/forums/showthread.php?t=82642
Running a larger rear sprocket increases acceleration at the cost of top speed and has the same effect as running a smaller front (countershaft) sprocket. Here is a list of gear ratios from JT Sprockets along with gearing calculator from Gearing Commander:
http://www.jtsprockets.com/fileadmin...tgearratio.pdf
http://gearingcommander.com/
You can use a rear sprocket from a 2003+ R6 with a 520 pitch conversion if you have trouble sourcing a larger rear sprocket.
Driven Racing makes a rear sprocket from 42-54T. Vortex has a 60T sprocket but reviews say that their aluminum sprockets do not last long. Thrust Company specializes in sprockets and you can find sprockets from stock to over 60+T. Sick Innovations currently produces steel stunt sprockets whereas most others are aluminum.
An issue with running a 13T sprocket is that the chain is turning in a tighter radius so more wear is seen on the sprocket and chain over time. Chain guide wear may be seen too.
www.thrustcompany.com
www.kneedraggers.com
www.thestuntfactory.com
www.moto-heaven.com
www.sprocketcenter.com
www.haibikeshop.com
www.sickinnovations.com
Chain length:
http://www.stuntlife.com/forums/post...631-post1.html
The stock chain is a 520 pitch with a length of 106 links. Most chains are 120 links so cut them down to what you need.
Quote:
inks = number of teeth divided by 2, + 1
or
links = (teeth / 2) + 1
However, if you go to drastic measures, say +15 or so, then you get into more of a complex issue, due to the chain wrapping more than 180 degrees around the rear sprocket.
if you want a good formula to determine total chain length, try this:
F = front teeth
R = rear teeth
P = pitch in inches .625 for 5xx chains (520,530)
Ci = centerline distance in inches (distance center to center of sprockets)
Pi = pi = 3.14159265
Cp = centerline distance in pitches
Cp = Ci / P
Links = (2 * Cp) + ( (R+F) / 2 ) + ( ( (R-F)^2 ) / (4 * Pi * Cp) );
Round links up to the nearest whole number.
When you measure the Centerline Distance (Ci) measure in inches, and round to the nearest 1/8 inch (.125)
This may seam complex, but it will give a darn near good count of links needed.
Hope this helps
|
http://www.stuntlife.com/forums/post...631-post1.html
some chain link calculators:
http://www.rbracing-rsr.com/chainlength.html
http://www.rebelgears.com/chainlengthcalculator.html
Vortex Racing has a nice little calculator for the number of links. Just input your bike and choose from the drop down. They don't have a drop down for 13 tooth front sprocket though.
https://www.vortexracing.com/shop/sprocket/111/
Crash Cages:
Do you want to damage your bike on the first wheelie attempt? Get yourself a crash cash! Crash cages are designed to take the brunt of impact when the bike falls over on its side. It protects your fairings, frame, and clip-ons/handle bars from damage. Most cages have a crossmember that connects both left and right pieces of the cage so the impact force is distributed and reduces flexing and leverage on the mounting points.
The only company that I makes them is
www.Impaktech.com. I talked to Son, the owner and he currently still can make them for the new-gen Ninja 250. You're looking at $300+. Other compandy is E Pap shop out in Thailand. Doesn't look too complicate to fabricate if you know how throw down some strong welds.


 Sub Cage:
Designed to protect your subframe although the 250 does not have an separate frame as compared to it's bigger brothers. The subcage is attached to the the subframe at the rear passenger peg mounts. The cage generally a one piece unit tied together by a crossmember attaching both left and right pegs. The stock folding pegs are replaced with nonfolding ones for safety and durability.
Fork upgrades:
Your forks will need a modest upgrade since the front forks are really soft. When you first practice wheelies, the landings will be rough and you will bottom out your forks and eventually require a costly fork seal replacement. If you're already having to need a seal replacement, do yourself a favor and upgrade your springs! You can probably get away with going with a heavier weight fork oil, but the main game changer is upgrading to heavier rate springs. I would steer away from progressive rate springs which are found on ebay and go with straight rate springs from
www.racetech.com or
www.sonicsprings.com.
12 o Clock bar:
The 12 o' clock bar is attached to the rear of the tail section of the frame and extends out to prevent you from "looping" your bike should you go past balance point while doing a wheelie. Can be a round bar or flat so you can scrape along doing a wheelie. Typically a round bar is placed following the rear subframe line and us designed to prevent you from tearing up your plastics and frame. You will have to relocate your taillight.
Here's a cheap Home Depot bar made by @
ninja250:
http://www.ninjette.org/forums/showthread.php?t=81831
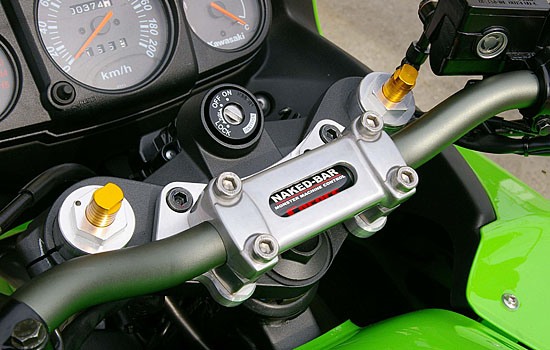
Dirt bike bars/risers:
Some stunters replace their clip-ons with dirt bike bars for durability, leverage, and clearance. Custom brackets will need to be made to fit the top triple for dirt bike bars. You can obtain universal brackets and just drill holes into the top triple to mount it. Sato Racing also has a bracket setup that attaches to the stock handle bar holes:
www.satoracing.com
 Hand brake/dual rear brake calipers:
Used to control speed and balance point while performing stunts during a wheelie. It is a secondary brake system (brake lever, master, reservoir, brake caliper) that is attached along with the rear brake caliper. Generally, another brake lever is placed alongside the clutch lever.
The bigger bike stunters use brake masters off 1000rr, R6, R1, F4i and flip it so it can be used on the left side. More expensive options are to get a Megura or Brembo brake masters. I have only seen one 250 stunt bike which utilized the stock 250 brake master to operate the rear brake with no issues.
Depending on your handlebar/clip-on setup, you may or may not have room for a hand brake. You can remove your left bar controls(lights/turn signals/horn) or shorten your grip to make room for the hand brake. A custom bracket will need to be fabricated to mount a second brake caliper to the rear wheel. Another option is to use an adapter and attach it to the rear brake master so you can still have a foot brake. GP Tech and Full Throttle Inc have adapters made for bigger bikes which may work on our bikes. A custom length rear brake line will be needed, generally 56" if you are using a junction valve or 80" if you are running a dual caliper setup.
How a Stunt 250 setup looks like:
Link to original page on YouTube.