
|
 July 16th, 2009, 09:28 PM
|
#1 |
|
ninjette.org guru
Name: Dan
Location: Chicago, il....
Join Date: Jun 2009 Motorcycle(s): 2007 Suzuki GSX-R750 Posts: 378
|
Wiring a DIODE for 4 L.E.D turn signals
If you have changed your 4 stock turn signals to 4 L.E.D. turn signals, you will need to wire a DIODE under your dash to keep the opposite side from flashing, when you activate your turn signal..Here is a link to a DIODE you can buy, http://www.cruisercustomizing.com/de...an_800_Classic ...You can even make your own if yer a cheap ass... This is only needed if you have L.E.D's in all four corners... I have proton flushmount L.E.D's in front and Bikemonkey L.E.D. integrated tail light in back..I also have a, acumen universal L.E.D. flasher relay...I noticed my opposite side flashing very lightly one night, when I activated my turn signal, and that can be confusing to a cager, and dangerous for us..My turn signal indicator light was also not as bright as it should have been, when I converted to 4 L.E.D's...But after I wired in this DIODE all works perfectly, and the indicator light is as bright as it was with the stock signals installed..
1. Get behind your dash...I had everything removed already, except for tail section, because I was removing the kleen air system (thanks 2 kkim's D.I.Y. thread) Basically you'll have to remove the front piece (headlight section) to access the back of your dash.... 2. Find your indicator light wires from the back of dash...They will be the GREEN and GRAY wires... 3. Cut both wires with enough slack to wire them again...Wire the BLUE wire from the DIODE to the GREEN wire on the indicator light 4.Then wire the 2 RED wires that branch off from the DIODE to the GREEN and GRAY wires that you cut, that are leading to the harnesses.. There should still be a GRAY wire coming from the back of the indicator bulb that is not connected to anything yet.....That GRAY wire is now the ground wire.. 5.What I did was splice into a ground wire with the GRAY wire that was coming from the back of the indicator light..The BLACK and YELLOW wire, right next to the indicator light is a ground wire. 6.Check to see if your signals are now working properly, and check to see if your indicator light is now brightly lit...If everything is fine, solder, shrink tube, electrical tape...... Hopefully this will help some one...I give credit to novak2k9 for all pics, I put together his posts, when he was trying to figure out how to wire in a DIODE.. If it wasnt for his posts trying to figure out how to do this, and what he ended up coming up with, I would be screwed because it is confusing with no direction on this...So thanks 2 novak2k9.... Maybe some 1 can put this together better than I can, but I think this should be added to the D.I.Y. threads for those looking to convert fully to L.E.D. |

|

|
|
July 17th, 2009, 06:40 AM
|
#2 |
|
self wrencher
Name: john
Location: houston
Join Date: Dec 2008 Motorcycle(s): 08 250r and 07 600r Posts: A lot.
|
nice DIY man...
|
|
|
|
|
July 17th, 2009, 07:44 AM
|
#3 |
|
ninjette.org certified postwhore
Name: Kim
Location: mundo de ensueño
Join Date: Nov 2008 Motorcycle(s): '08 250 Posts: A lot.
|
thanks for posting this! You might want to type it up for the wiki as well!
__________________________________________________
Progrip tank pad, blue rim stripes, blue Pazzos, Roaring Toyz lowering kit, Puig DB in dark smoke, Cortech sport tail, super mini tank, and saddlebags, OES swingarm spools and Intuitive frame sliders |
|
|
|
|
July 17th, 2009, 01:30 PM
|
#4 |
|
ninjette.org member
Name: Justin
Location: illinois
Join Date: May 2009 Motorcycle(s): 08 ninja 250r Posts: 158
|
Hey thats A good Idea but I have a less complicated one...simply leave the stock signals connected to their wires and hide them within the bike and cover them....put the Led or what ever aftermarket signals you are going with where you want them and walla your good to go...I can post pictures of how I did this if you all want as Im working on my fronts right now...(i turned the rears into strips along time ago) I am going to have a strip for the front lights and I am also going to put a strip on the side fairings on the lower right portion near the small vent/ indentation.
|
|
|
|
|
July 17th, 2009, 02:04 PM
|
#5 |
|
ninjette.org guru
Name: Dan
Location: Chicago, il....
Join Date: Jun 2009 Motorcycle(s): 2007 Suzuki GSX-R750 Posts: 378
|
I dont know anything about doing it that way, never heard of that or tried it..
I know this way definitely works as I have done it, and novak2k9 has done it. And its actually the recommended way to do it on metric bikes, with a single indicator..Also this way prevents you from having to install resistors, that can melt plastics...Your way sounds easier though..But if you have a diode, and the front piece off, its actually not that hard to do it this way..  Plus I've already sold 1 of my stock signals, and am trying to sell the rest..lol...Need to get cash for more upgrades...... |
|
|
|
|
July 17th, 2009, 08:26 PM
|
#6 |
|
ninjette.org member
Name: Justin
Location: illinois
Join Date: May 2009 Motorcycle(s): 08 ninja 250r Posts: 158
|
lol ok well in that case you need the di0de but my way does work and has been flawless for two months.....I think its because the Leds consume such little power that they are able to actually blink in sink wit the front signals even though they are hooked up to the same power source.
|
|
|
|
|
February 18th, 2010, 12:51 PM
|
#7 |
|
ninjette.org sage
Name: aj
Location: New York / PA
Join Date: Jul 2009 Motorcycle(s): Red 09 Ninja 250r aka Sheila (RIP), Red '10 Ninja 250r aka Sasha (Sold), White '13 Ninja 300 (To be Purchased) Posts: 855
|
Will be using this soon enough, Thanks in advance! I'm sure its less complicated than it looks. Hm.. i bought the diode, but hell if i remember where i put it... oh and thanks for the link!
__________________________________________________
|
|
|
|
|
February 18th, 2010, 04:53 PM
|
#8 | |
|
IC2(SW)
Name: Kerry
Location: Pensacola
Join Date: Nov 2008 Motorcycle(s): . Posts: A lot.
|
Quote:

|
|
|
|
|
|
February 18th, 2010, 06:43 PM
|
#9 |
|
ninjette.org certified postwhore
Name: Paul
Location: Roanoke, VA
Join Date: Jun 2009 Motorcycle(s): 2008 Candy Plasma Blue 250R Posts: A lot.
|
aj, make sure you use 2 diodes; one for each blinker side/circuit.
__________________________________________________
Proud member of the Blue Army |
|
|
|
|
February 18th, 2010, 07:12 PM
|
#10 | |
|
ninjette.org sage
Name: Jon
Location: Usa
Join Date: Jan 2010 Motorcycle(s): magHitVE Posts: 649
|
Quote:
1N4001 should be OK i guess, we know that the bulb is a 3.4W and pulls 272 mA @ 12.5V as long as the total current on the circuit isn't over 1A you should be alright just make sure you have no incandescent bulbs on the circuit as they will draw much more current than LEDs |
|
|
|
|
|
February 18th, 2010, 07:25 PM
|
#11 |
|
ninjette.org certified postwhore
Name: Paul
Location: Roanoke, VA
Join Date: Jun 2009 Motorcycle(s): 2008 Candy Plasma Blue 250R Posts: A lot.
|
Yeah, I've got a pair of those 1N4001's in my dash, but I'm using stock rears in combination with my bikemonkey integrated rear... may find out I blew the diodes when I switch out the rears to LED. Might step up to 1N4004's if you're not sure.
__________________________________________________
Proud member of the Blue Army |
|
|
|
|
February 18th, 2010, 09:41 PM
|
#12 | |
|
self wrencher
Name: john
Location: houston
Join Date: Dec 2008 Motorcycle(s): 08 250r and 07 600r Posts: A lot.
|
Quote:
Posted via Mobile Device |
|
|
|
|
|
February 18th, 2010, 10:03 PM
|
#13 |
|
ninjette.org member
Name: Kevin
Location: MN Metro
Join Date: Feb 2010 Motorcycle(s): '94 Vulcan 1500, '06 Katana 600, '08 FZ1 Posts: 133
|
The 2 diodes for the dash ind. bulb DON'T pass the current for the blinkers, just for the ind. bulb, so just milliamps go through them. Keep in mind the diodes just eliminate the "LED 4-way syndrome" they don't help with flashing. What they charge for that pre-made diode isolator seems like a fair deal but you can get diodes (black round resistor-like things with a silver band at one end) out of most any old trash electronic device (car stereos, ghetto blasters, etc.) for free, if one would be so inclined and is OK with soldering. Also 1N4004 are just a higher voltage rating than 1N4001, still only 1 Amp.
Sorry but hiding stock incandescent bulbs in leu of adding 2 simple diodes and an LED flasher seems kinda weird, but maybe that's just me. Last futzed with by kevlar250; February 19th, 2010 at 08:41 AM. |
|
|
|
|
February 19th, 2010, 01:27 PM
|
#14 |
|
ninjette.org sage
Name: aj
Location: New York / PA
Join Date: Jul 2009 Motorcycle(s): Red 09 Ninja 250r aka Sheila (RIP), Red '10 Ninja 250r aka Sasha (Sold), White '13 Ninja 300 (To be Purchased) Posts: 855
|
I ordered the diode that is shown on the link provided in the OP. I assumed it was all i needed, do I need another one? I hvent tried to install it yet as im waiting for the taillight first to start this project
also out of curiosity, what are my other options for wiring the ground wire? another edit: the diode instructions say to disconnect the battery, is that necessary and how should i do that?
__________________________________________________
|
|
|
|
|
February 19th, 2010, 01:54 PM
|
#15 |
|
ninjette.org sage
Name: Jon
Location: Usa
Join Date: Jan 2010 Motorcycle(s): magHitVE Posts: 649
|
You should always disconnect the battery before attempting work on your bike, short circuits are easily encountered when working on the electrical system. The battery is under the riders seat. After unbolting it, (2 bolts) slide it towards the rear end and it should come out easily. Then there are a couple of screws ...
|
|
|
|
|
February 19th, 2010, 03:10 PM
|
#16 | |
|
ninjette.org certified postwhore
Name: Paul
Location: Roanoke, VA
Join Date: Jun 2009 Motorcycle(s): 2008 Candy Plasma Blue 250R Posts: A lot.
|
Quote:
Regarding the ground wire (the old gray or green depending on which you decide to use on the diode), I suppose you could lengthen the cable and find an unpainted part of the frame to ground to (there's one near the thermostat sensor housing I know), but that seems excessive to me. I'd suggest simply following the OP and crimping a small ring connector on the end and putting it on the same bolt as the other ground. I couldn't find a ring connector small enough, so I just stripped ~1" of the new grounding wire, made a loop, soldered it (that way it wouldn't come undone) and put it on the existing grounding bolt.
__________________________________________________
Proud member of the Blue Army Last futzed with by Momaru; March 2nd, 2010 at 08:08 PM. |
|
|
|
|
|
February 19th, 2010, 07:57 PM
|
#17 |
|
ninjette.org member
Name: Kevin
Location: MN Metro
Join Date: Feb 2010 Motorcycle(s): '94 Vulcan 1500, '06 Katana 600, '08 FZ1 Posts: 133
|
As for myself I'm not real big on unhooking the battery unless I'm working on the starter relay, an area that is basically unfused. Keep the key off and you should be fine. If one is uneasy around electrical systems by all means disconnect one of the leads.
The easiest ground is one of the blk/yel wires going to the dash illum. bulbs, an easy splice. |
|
|
|
|
February 19th, 2010, 08:09 PM
|
#18 |
|
ninjette.org sage
Name: aj
Location: New York / PA
Join Date: Jul 2009 Motorcycle(s): Red 09 Ninja 250r aka Sheila (RIP), Red '10 Ninja 250r aka Sasha (Sold), White '13 Ninja 300 (To be Purchased) Posts: 855
|
I feel like flushmounts and an integrated tail light is such an awesome look, im surprised more people havent needed to do this. I guess safety issues in moving the turn signals from being seen clearly
__________________________________________________
|
|
|
|
|
February 19th, 2010, 08:30 PM
|
#19 |
|
ninjette.org sage
Name: Jon
Location: Usa
Join Date: Jan 2010 Motorcycle(s): magHitVE Posts: 649
|
thats why i use the integrated tail light + led flashers my bike has no incandescent bulbs 100% LED
|
|
|
|
|
March 2nd, 2010, 06:11 PM
|
#20 |
|
ninjette.org sage
Name: aj
Location: New York / PA
Join Date: Jul 2009 Motorcycle(s): Red 09 Ninja 250r aka Sheila (RIP), Red '10 Ninja 250r aka Sasha (Sold), White '13 Ninja 300 (To be Purchased) Posts: 855
|
Hey, guys, just got the bm tail light installed, no diode yet, but i have a question.
the lights light up once when i put the signals on, and yes there is backflow to the other side, will putting in the diode allow the lights to continually work in addition to fixing the over flow? becuase im not sure if anyone else had this problem. let me restate what exactly is happening. -hts flushmounts -bm integrated tail light using the DIY on this board hit the turn signal left, left side (front and back) light up, then over flow to right, and everything stops. I push it right, same thing, then it stops. any ideas? bout to do an oil change so ill brb for answers, thanks
__________________________________________________
|
|
|
|
|
March 2nd, 2010, 08:16 PM
|
#21 | |
|
ninjette.org certified postwhore
Name: Paul
Location: Roanoke, VA
Join Date: Jun 2009 Motorcycle(s): 2008 Candy Plasma Blue 250R Posts: A lot.
|
Need 2 things to fix that as it's two separate problems. The overflow to the other side blinker pair is remedied by the diode fix mentioned in this thread. The fact that the blinkers are not continuing to blink is the relay not working properly. If my limited knowledge of the operation of the relay is correct, essentially it's not getting enough load on the system due to the decreased resistance from the LED lights all 'round. In theory, if you'd just replaced one of the flasher sets with LEDs, you'd be getting the fast-flash symptom instead of the single flash due to a 'closer to correct' electrical load on the system.
A new electronic flasher relay should fix that issue. Here's a copy of a PM I sent to someone else on the subjects, don't feel like editing atm, been a long day Quote:
__________________________________________________
Proud member of the Blue Army Last futzed with by Momaru; March 3rd, 2010 at 01:55 AM. Reason: Fixed links, flasher spec & theory correction |
|
|
|
|
|
March 2nd, 2010, 08:32 PM
|
#22 |
|
ninjette.org sage
Name: aj
Location: New York / PA
Join Date: Jul 2009 Motorcycle(s): Red 09 Ninja 250r aka Sheila (RIP), Red '10 Ninja 250r aka Sasha (Sold), White '13 Ninja 300 (To be Purchased) Posts: 855
|
First of all: Thank you for your help.
Second: I have an electronic flash relay that i bought when I got the flush mounts, do I need a more powerful one or something? im not sure I understand what the flasher relay has to do with it considering I replaced the thermal one with an electric one.
__________________________________________________
|
|
|
|
|
March 2nd, 2010, 09:56 PM
|
#23 |
|
ninjette.org sage
Name: aj
Location: New York / PA
Join Date: Jul 2009 Motorcycle(s): Red 09 Ninja 250r aka Sheila (RIP), Red '10 Ninja 250r aka Sasha (Sold), White '13 Ninja 300 (To be Purchased) Posts: 855
|
WOW...
both the front and back LED's work with the old flasher relay after the DIODE has been installed. I have some good pictures of the diode installation which i would love to contribute, also a video of my old flasher relay working with the led's, yet it makes a REALLy weird noise. let me get those off my camera.
__________________________________________________
|
|
|
|
|
March 2nd, 2010, 10:02 PM
|
#24 |
|
ninjette.org sage
Name: Jon
Location: Usa
Join Date: Jan 2010 Motorcycle(s): magHitVE Posts: 649
|
The BM LEDs do have built in resistors, 5W per side. My guess is that they are blinking faster?
|
|
|
|
|
March 2nd, 2010, 10:35 PM
|
#25 |
|
ninjette.org sage
Name: aj
Location: New York / PA
Join Date: Jul 2009 Motorcycle(s): Red 09 Ninja 250r aka Sheila (RIP), Red '10 Ninja 250r aka Sasha (Sold), White '13 Ninja 300 (To be Purchased) Posts: 855
|
Pictures of Diode Installation, it's pretty straight forward once you get under the dash, which is also very simple. I HIGHLY suggest anyone that wants to do this, to order the diode provided in the link in the OP.
You need splicing equipment/soldering tools. From left to right and then dowards.. 1.Location where ground wire will be grounded. 2. Diode and wires from link in OP. 3.Wire used for grounding (black wire). 4. Crimp a ring connector to one end of the black wire (ground wire). 5. Take the turn signal bulb out from it's hole in the dash, it has a green and gray wire. (top middle hole in picture) 6. Cut the green and gray wires with enough slack to solder. 7. Solder the black (ground wire) to the gray wire on the back of the bulb. Solder the blue wire to green wire on the back of bulb. 8. Solder one red wire to the green wire that you disconnected from the bulb. Solder the other red wire to the gray wire that you disconnected from the bulb. 9. Plug the bulb back into the back of the dash with the blue and black wires now soldered on. 10. Unscrew the screw in the first picture and then screw back together with the black wire with the ring connector, IN ADDITION to the black and yellow wire that was just unscrewed. 11. Check your red wires are correct. 12. Check your black and blue wires are correct.
__________________________________________________
|
|
|
|
|
March 2nd, 2010, 10:39 PM
|
#26 |
|
ninjette.org sage
Name: aj
Location: New York / PA
Join Date: Jul 2009 Motorcycle(s): Red 09 Ninja 250r aka Sheila (RIP), Red '10 Ninja 250r aka Sasha (Sold), White '13 Ninja 300 (To be Purchased) Posts: 855
|
they bm lights seem to blink faster. the flasher relay makes a really funny noise
ignore the ghostface killah album playin in the back
__________________________________________________
Last futzed with by DarkNinja52; March 2nd, 2010 at 10:44 PM. Reason: video fixed |
|
|
|
|
March 2nd, 2010, 11:13 PM
|
#27 |
|
ninjette.org sage
Name: Jon
Location: Usa
Join Date: Jan 2010 Motorcycle(s): magHitVE Posts: 649
|
hum, you did connect the bike monkey correctly right?
I hear that sound, definitely sounds weird, the relay I have doesn't make a sound. yellow to gray blue to green What are the ratings on your electronic relay? |
|
|
|
|
March 2nd, 2010, 11:25 PM
|
#28 |
|
ninjette.org sage
Name: Jon
Location: Usa
Join Date: Jan 2010 Motorcycle(s): magHitVE Posts: 649
|
oh and, why isn't your red light coming on?
It should always be on when you turn the key. take a look at my vid. |
|
|
|
|
March 2nd, 2010, 11:55 PM
|
#29 | |
|
ninjette.org member
Name: Kevin
Location: MN Metro
Join Date: Feb 2010 Motorcycle(s): '94 Vulcan 1500, '06 Katana 600, '08 FZ1 Posts: 133
|
Quote:
Not all flashers marked "electronic" will work correctly with LED's. Get an LED specific flasher. |
|
|
|
|
|
March 3rd, 2010, 12:18 AM
|
#30 |
|
ninjette.org sage
Name: aj
Location: New York / PA
Join Date: Jul 2009 Motorcycle(s): Red 09 Ninja 250r aka Sheila (RIP), Red '10 Ninja 250r aka Sasha (Sold), White '13 Ninja 300 (To be Purchased) Posts: 855
|
i have no idea why the red light isnt coming on
__________________________________________________
|
|
|
|
|
March 3rd, 2010, 01:14 AM
|
#31 |
|
ninjette.org sage
Name: aj
Location: New York / PA
Join Date: Jul 2009 Motorcycle(s): Red 09 Ninja 250r aka Sheila (RIP), Red '10 Ninja 250r aka Sasha (Sold), White '13 Ninja 300 (To be Purchased) Posts: 855
|
so i prob wired the bm taillight wrong, thought i did it right, johnthecrhon, you seem to know pretty much everything about the bm tail light, how did you set it up so you can run both the stock and integrated signals?
__________________________________________________
|
|
|
|
|
March 3rd, 2010, 01:35 AM
|
#32 | ||
|
ninjette.org certified postwhore
Name: Paul
Location: Roanoke, VA
Join Date: Jun 2009 Motorcycle(s): 2008 Candy Plasma Blue 250R Posts: A lot.
|
Quote:
http://www.ninjette.org/forums/showp...8&postcount=80 This setup hasn't given me any trouble in 5,000mi Jon, I'm sure you've got a cleaner/more electrically correct way of doing it. Any chance BM changed the electrical setup on the light to not have the running red lights come on between amber blinks? Or, god forbid, perhaps a blown component within the light itself? Quote:
I agree that's how the stock flashers work (relying on a relatively high minimum current to light the incandescents and total resistance to keep the signal on just one side of the bike) but don't see how that specifically precludes another arrangement of diodes than the 'most common solution'. However on further thought, I agree that a diode per flasher probably wouldn't work as well, as that arrangement would cause the indicator lamp to be unpowered.
__________________________________________________
Proud member of the Blue Army |
||
|
|
|
|
March 3rd, 2010, 07:44 AM
|
#33 | |
|
ninjette.org member
Name: Kevin
Location: MN Metro
Join Date: Feb 2010 Motorcycle(s): '94 Vulcan 1500, '06 Katana 600, '08 FZ1 Posts: 133
|
Quote:
I also want to know why the BM red is not lighting up, keep us informed! |
|
|
|
|
|
March 3rd, 2010, 11:45 AM
|
#34 | |
|
ninjette.org sage
Name: aj
Location: New York / PA
Join Date: Jul 2009 Motorcycle(s): Red 09 Ninja 250r aka Sheila (RIP), Red '10 Ninja 250r aka Sasha (Sold), White '13 Ninja 300 (To be Purchased) Posts: 855
|
Quote:
__________________________________________________
|
|
|
|
|
|
March 3rd, 2010, 11:47 AM
|
#35 | |
|
ninjette.org sage
Name: aj
Location: New York / PA
Join Date: Jul 2009 Motorcycle(s): Red 09 Ninja 250r aka Sheila (RIP), Red '10 Ninja 250r aka Sasha (Sold), White '13 Ninja 300 (To be Purchased) Posts: 855
|
Quote:
I'll hit up autozone when i get chance for an LED specific flasher. Do you know the name of any that have the two prongs the way they would fit into the plug so i dont have to man-handle it so it works right?
__________________________________________________
|
|
|
|
|
|
March 3rd, 2010, 01:42 PM
|
#36 |
|
ninjette.org member
Name: Kevin
Location: MN Metro
Join Date: Feb 2010 Motorcycle(s): '94 Vulcan 1500, '06 Katana 600, '08 FZ1 Posts: 133
|
Not offhand, they do need to be wired in properly polarity-wise, if they don't work just turn it around. The LF1-S-Flat from superbrightleds.com is the one I like. You can remove the spade terminals from the plastic connector and swap them if the polarity is wrong, or just insert them w/o the plastic connector and tape it up. I used an "electronic" flasher from Autozone and it still wouldn't flash the LED's on my Zuk until I used a loading resistor. Since I did the diode mod and used an LED for the dash ind. bulb I put the resistor across the dash LED which would load it if either side were selected. Instead of a huge 8 to 10 ohm resistor I only needed a 1000 ohm 1/2 watt one. If I would have left the incand. bulb in the dash it would have worked fine.
|
|
|
|
|
March 3rd, 2010, 02:10 PM
|
#37 | |
|
ninjette.org sage
Name: Jon
Location: Usa
Join Date: Jan 2010 Motorcycle(s): magHitVE Posts: 649
|
Quote:
But its basicly the same, the blue from the BM tail light into the green going to the stock left turn signal and the yellow from the BM tail light going into the gray right turn signal. But for the flashers to work, the stop light must receive power, or at least be grounded.. If you have a problem with the red stop light not working, changing the relay wont help, as its a whole different circuit. I would take pics of my setup, but it wont help you as I am plug and play. I would really like to see pics of your setup up close. |
|
|
|
|
|
March 3rd, 2010, 02:15 PM
|
#38 |
|
ninjette.org sage
Name: aj
Location: New York / PA
Join Date: Jul 2009 Motorcycle(s): Red 09 Ninja 250r aka Sheila (RIP), Red '10 Ninja 250r aka Sasha (Sold), White '13 Ninja 300 (To be Purchased) Posts: 855
|
I'll post some pics later. Out of curiosity, what exactly did you do to make it plug and play? Also, what did you do to make the stock signals work with the integrated ones? i know you offered both options with your group buy, but i was really interested in doing it all myself. what spare parts did you have to order to make it plug and play?
__________________________________________________
|
|
|
|
|
March 3rd, 2010, 02:23 PM
|
#39 |
|
ninjette.org sage
Name: Jon
Location: Usa
Join Date: Jan 2010 Motorcycle(s): magHitVE Posts: 649
|
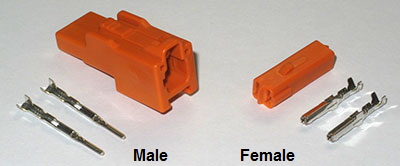 2 sets of these connectors, one from each side. This would allow them to be plug and play while also allowing stock signals to function. See page 2 >> |
|
|
|
|
March 3rd, 2010, 02:25 PM
|
#40 |
|
ninjette.org sage
Name: aj
Location: New York / PA
Join Date: Jul 2009 Motorcycle(s): Red 09 Ninja 250r aka Sheila (RIP), Red '10 Ninja 250r aka Sasha (Sold), White '13 Ninja 300 (To be Purchased) Posts: 855
|
Thats what i figured but i can't figure out how you would set that up in order for everythign to work correctly
__________________________________________________
|
|
|
|
 |
 Similar Threads
|
||||
| Thread | Thread Starter | Forum | Replies | Last Post |
| Need wiring help for new turn signals | Insane Pie | 2008 - 2012 Ninja 250R Tech Talk | 15 | May 24th, 2014 02:26 PM |
| wiring for flush mount front turn signals for 07 ninja 250 | james250ninja | 1986 - 2007 Ninja 250R Tech Talk | 2 | October 4th, 2013 01:35 PM |
| Wiring LED strips as brake lights, turn signals, and "day-time lights" | blackninja18 | 2008 - 2012 Ninja 250R Farkles | 32 | August 7th, 2013 03:41 PM |
| Wiring things to turn on/off with the key | karlosdajackal | 2008 - 2012 Ninja 250R Tech Talk | 10 | August 16th, 2010 11:49 PM |
|
|


