
|
 October 24th, 2010, 01:55 AM
|
#1 |
|
Miz and Buzz
Name: Miz
Location: Canberra, Australia
Join Date: Oct 2010 Motorcycle(s): 09 Kawasaki Ninja 250r Posts: 15
|
Everyone meet Buzz, my '09 250r
I'll put it in the Pictures section (Mods, feel free to move) cause ts got sooo many pics!
 Enjoy the read, it is a little long... I picked this up in August of 2009. Its my gorgeous '09 Kawasaki Ninja 250R. My dad has an 88/90 GPX250 and all I know is from the moment i jumped on the back of his bike, I had to have a bike. I wanted a Green Ninja. - I was 8, didnt care how big, but it had to be Green and it HAD to be a Ninja.. Bought her from the guys at CMC in Fyshwick, along with my legendary helmet.. The guys were more awesome and so helpful, I couldnt ask for more. The day I paid my deposit.  Plans are: Flush mount indicators, opaque aftermarket windscreen, Rear pillion passenger eliminator, New rear LED Taillight [DONE], Shortened rear fender Eliminator, Yoshimura Pipes or a custom design system and Custom Lime Green Number plates. I dont know much about bikes, but I do know is I'm learning and I dont need to go fast all at once. This thing will haul with a less than 55kg rider and a full tank of juice. New LED Taillight  New Fender Eliminator  Old Vs New  Dummy Fit..  And again   And the obligatory skid pic    Orrright, bear with me here.. I finally got around to replacing the rear Eliminator. For a change the Instructions that came with it were readable and I was able to follow pretty well for a drunk. Few beers were had with Edo - as you can see here. Casualties: 1 drill hole in my left thumb and my fav No fear T-shirt has a huge slash across the front, and so does my tummy. Before:  All Pulled down:  Had to cut up the stock Fender - Like a hot knife thru butter, a Stanley knife did the job.  All Finished! Plate lights are single LED's in the Plate Mounting Bolts. Indicators alternate with the brake light LED's when switched on.  LED Replacement light is a metric ****load brighter than stock!  Remember those HORRIBLE reflectors?  Well they are no more!  More pics:   20 April 2010 - Crash Report - TL;DR version: After a spirited LongWayHomeRide through the Cotter and Mt Mac, I lost two riders behind me. After slowing right down and not having them appear behind me I knew I had lost at least one, and better hurry my ass up to let the boys know. In my haste, I stopped concentrating on where i was going and what I was doing and off into the gravel we went...  As you can see by the slide mark in the bottom left hand corner, as the front washed out i lept off the bike, but not far enough to get out from underneath it My Right ankle is re-broken and is a lovely shade of purple,... AGAIN!! Buzz Slid down the road and left a lovely Kawa Green Skid mark for about 3 or 4 feet. I landed on my hands and heavily on my left knee and chest thank god for Draggins or I'd probably be in need of a new knee cap. It was only at 20-25km but it was fast enough for me to not even realise wtf was going on before I had slid halfway across the road on my face.  [/QUOTE] [/QUOTE]Damage to Buzz: snapped the LH Peg and Rear Brake Lever Mount clean in half, Ripped the left indicator off, grazed up the bar and lever ends and gave the LH-Mirror a bit of roughage. LH Fairings took most of the damage, LH Side fairing got ripped out of the connecting mount to the front piece, Front rim is chipped, Headlight surround is grazed pretty bad, Exhaust Can is Dented and scratched pretty bad (pity, i REEEEEEEEEEAAAAAALLY (not) liked the stock can). Bent the LF Handlebar clip on and threw the steering outta whack and Front wheel guard-fairing-thingy is chipped too.      Steering straightened by the CMC Guys for nothing, LH Peg and Rear Brake Lever Mount - REPLACED, LH Indicator rewired and fitted, New TwoBros Shorty Can ordered, Front wheel goes in soon to be fixed/Replaced if needed and powdercoated a Metallic GlitterBlack (rear to match). New RHSide Clip on ordered, Shorty Levers and new bar ends on their way. The Fairings won't be replaced for some while! Street Cred BABY! As they're incredibly expensive and after my initial drop on the RHSide some months ago, I have to buy a total full set.!!! Damage to Me: ReBroken right Ankle after the rear end of buzz landed on it, Knee was bruised and sore, Velcro tab on gloves got a bit melted after I decided to slide on my hands across the road. Bruised Sternum after I bounced flat on my Chest, Wrists a bit tender, but fine. To be honest, Id be so much worse off if I didn't have all my gear on. My Boots saved my ankle from being crushed further. Doc says seeing how accident prone I am I should wear them 24/7, jacket did what it was supposed to do, Not a scratch or mark on me or the Jacket, and the Draggins held up perfectly. MASSIVE thanks go to my buds who were with me and watched me come off apprantly it happened in slow-mo.. MickLC and MStevo for Picking up Buzz and getting her on two wheels, Avartie for my non-invasive body cavity search to ensure nothing was broken, To Lee for staying with me she was loaded up on the Ute and to especially to Joe and his Ute for getting us Broken Little Ninjas home, with not so much as a complaint about having to go out of his way. But Everyone else whos offered a hand with the Repairs and getting Buzz to and from CMC for assessing, youre all WONDERFUL and I owe you all heaps. The bruises have all healed and the ankle can bear some weight again now so Im back on the bike with confidence now. Am still waiting for my one piece Texport Replica Suit to turn up, one month and counting  [/QUOTE] [/QUOTE]Anyways, After a few too many beers the other night, I decided its time to get cracking with her transformation. Maybe a little overzealous before looking at the credit card bill, but none the less, i made a wish list (which i have CC'd to my mother for my birthday - hehe) for what Buzz WILL look like!! New Fairings + Lime Bolts 2009 Race Stickers Repair and Powdercoat Rims Metallic Black + Rim Tapes and Clear Coat Black Double Bubble Screen LED Mirrors Gold Bar Ends Gold Shorty Levers Slimline Indicators Rear Hugger SDemon Exhaust Yes I know shes a 250 and before you all jump on the "Just hurry up and get your P's and a bigger bike" Bandwagon - I don't think i'm anywhere near ready for a bigger bike. Yes i may be able to keep up with the coast rides, but its the simple things (Like that damn U turn for the P's test) and perfecting my cornering that i want to get down and dusted before i even look at getting my Ducati 1198s Corse. And yes I WILL have one, one day, just not today. Seriously considering keeping the little Ninja and quite possibly turning it into a track bike of sorts. But hey, Who knows!! In other news, I Passed a bit of a milestone on the weekend - 10 000km! Taken halfway along Macs Reef Road at 7.00pm in pitch black, just after it had rained!!!  Mt Mac + Cotter Road As you can see Ive got my Suit!!!        As it stands, she's now got a Ventura rack and I'm planning a Track Day at Eastern Creek on 18 December and a Ride from Canberra to Hobart for Chrsitmas. Will post more reent updates from now on.. I Promise!!! Whilst While I'm Sitting Watching Top Gear Aus, I'll throw up a few more pics from the Album.. First CanberraRiders Wank Factor Ride (essentially a ride to get pics of you on your bike)  On Stands  Off To Work - thats right, i Commute every day!  Next Weekends Project! 12 months without them has been hell!  The Miz  Off for an Evening spin...  The New Ventura Rack - Yes, thats ANOTHER green 250r parked behind me!!  New Pics from Today's CanberraRiders Wank Factor Ride IV - Live Free or Wank Hard! I'll post more as they're processed BIG Thanks do to Whickle and MickLC, you guys ROCK!!   [/QUOTE] [/QUOTE]
__________________________________________________
http://canberrariders.org.au "Every garage needs a Ninja, even if it is only a little one" http://mizrx3.livejournal.com/ |

|

|
|
October 24th, 2010, 05:00 AM
|
#2 |
|
ninjette.org certified postwhore
Name: Rick
Location: Alexandria, Louisiana
Join Date: Jan 2009 Motorcycle(s): 05 Blue Ninja 250 Posts: Too much.
MOTY - 2017, MOTM - Jan '19, Oct '16, May '14
|
Those are some great pics. Sorry to hear about you going down but at least you have all the gear.
|
|
|
|
|
October 24th, 2010, 05:40 AM
|
#3 |
|
ninjette.org certified postwhore
Name: Sean
Location: Mary Esther, FL
Join Date: Jan 2009 Motorcycle(s): 2008 Ninja 250 1998 HD Road King Posts: A lot.
|
Great pics! Please do a review of your heated grips when you get them installed.
|
|
|
|
|
October 24th, 2010, 08:37 AM
|
#4 |
|
ninjette.org certified postwhore
Name: Scott
Location: Carlise Ohio
Join Date: Apr 2010 Motorcycle(s): Yahama v star 650 classic Posts: A lot.
|
Sweet pics! Bike looks good too!
|
|
|
|
|
October 24th, 2010, 08:50 AM
|
#5 |
|
ninjette.org sage
Name: Cindy
Location: Wethersfield, CT
Join Date: Apr 2010 Motorcycle(s): 2010 Ninja 250R Posts: 691
|
Great pics!!
|
|
|
|
|
October 24th, 2010, 10:53 AM
|
#6 |
|
ninjette.org newbie
Name: Obie
Location: Florida
Join Date: Oct 2010 Motorcycle(s): 2010 Ninja 250R Posts: 5
|
Great post, great pictures! I hope your ankle heals up quick.
|
|
|
|
|
October 24th, 2010, 01:00 PM
|
#7 |
|
ninjette.org dude
Name: 1 guess :-)
Location: SF Bay Area
Join Date: Jun 2008 Motorcycle(s): '13 Ninja 300 (white, the fastest color!), '13 R1200RT, '14 CRF250L, '12 TT-R125LE Posts: Too much.
Blog Entries: 7
|

__________________________________________________
Montgomery Street Motorcycle Club / cal24.com / crf250l.org / ninjette.org ninjette.org Terms of Service Shopping for motorcycle parts or equipment? Come here first. The friendliest Ninja 250R/300/400 forum on the internet! (especially Unregistered) |
|
|
|
|
October 24th, 2010, 07:32 PM
|
#8 |
|
ninjette.org member
Name: Chris
Location: New York
Join Date: May 2010 Motorcycle(s): 2008 Kawasaki Ninja 250R, 2006 Suzuki Boulevard C50T Posts: 90
|
Great pics...sorry about the drop but it's gonna happen eventually and to come away as undamaged as you did (broken ankle is pretty minor considering) you're very lucky. Although I prefer the blue one on the other side of your Buzz at the dealer... ;-) Enjoy!
|
|
|
|
|
October 24th, 2010, 10:34 PM
|
#9 |
|
Mr. 988
Name: Jeff
Location: Sandy, Utah
Join Date: Aug 2009 Motorcycle(s): One Posts: A lot.
Blog Entries: 1
|
Wow Miz, your post has everything in it. DIY mods, crash report, ride report, pic of new bike, post your lid, and a couple of shots for the Girls On Bikes Rock thread. Well done

__________________________________________________
"I'm the one that's got to die when it's time for me to die, so let me live my life, the way I want to" - Jimi Hendrix  Cancer Cancer
|
|
|
|
|
November 11th, 2010, 02:38 AM
|
#10 |
|
noob motovlogger
Name: Gareth
Location: Austin, TX
Join Date: Dec 2009 Motorcycle(s): Black 2009 250r Posts: 328
|
LOOK OUT! You're driving on the wrong side of the road!!!
nah I'm just kiddin. Australia seems like it would have some cool places to ride
__________________________________________________
My Motovlog "Damn, either shimming the needles fixes 90% of any problems with the 250Rs, or kkim owns stock in a washer manufacturer." -DmbShn41 |
|
|
|
|
November 19th, 2010, 08:16 PM
|
#11 |
|
seeking twisties
Name: Bill
Location: Houston, TX
Join Date: Nov 2010 Motorcycle(s): '07 Ninja 650R, '09 250R special edition Posts: 199
|
Hi Miz. Nice bike and pictures. Can you post some pics of a side view of the Ventura rack? I would like to see how it mounts-may get one for mine.
__________________________________________________
Bill |
|
|
|
|
November 19th, 2010, 08:43 PM
|
#12 |
|
.
Name: rock
Location: greenville, south carolina
Join Date: Jun 2009 Motorcycle(s): black Posts: A lot.
|
This is just hawtness
Nice wheels!
__________________________________________________
Always get a second opinion because most of these people are makin' this stuff up
|
|
|
|
|
November 19th, 2010, 10:06 PM
|
#13 | |
|
Miz and Buzz
Name: Miz
Location: Canberra, Australia
Join Date: Oct 2010 Motorcycle(s): 09 Kawasaki Ninja 250r Posts: 15
|
Quote:
__________________________________________________
http://canberrariders.org.au "Every garage needs a Ninja, even if it is only a little one" http://mizrx3.livejournal.com/ |
|
|
|
|
|
November 21st, 2010, 08:17 PM
|
#14 | |
|
seeking twisties
Name: Bill
Location: Houston, TX
Join Date: Nov 2010 Motorcycle(s): '07 Ninja 650R, '09 250R special edition Posts: 199
|
Quote:
__________________________________________________
Bill |
|
|
|
|
|
November 22nd, 2010, 02:36 PM
|
#15 |
|
ninjette.org member
Name: m
Location: metro area
Join Date: Mar 2009 Motorcycle(s): 2009 black Ninja 250R Posts: 177
|
It's always great running into other females w a passion for riding too. Great Picts! Sorry about the spill but looks like u came out ok n that's what counts.
|
|
|
|
|
February 20th, 2011, 07:00 PM
|
#16 |
|
Miz and Buzz
Name: Miz
Location: Canberra, Australia
Join Date: Oct 2010 Motorcycle(s): 09 Kawasaki Ninja 250r Posts: 15
|
This is what i got for Valentines day: My BF spotted it at a VERY reduced price at CA Cycleworks and instead of flowers - its the perfect gift!
I couldnt help myself and when it arrived I opened the box for a peek - HOLY MOLY there was some bits an pieces in there!! 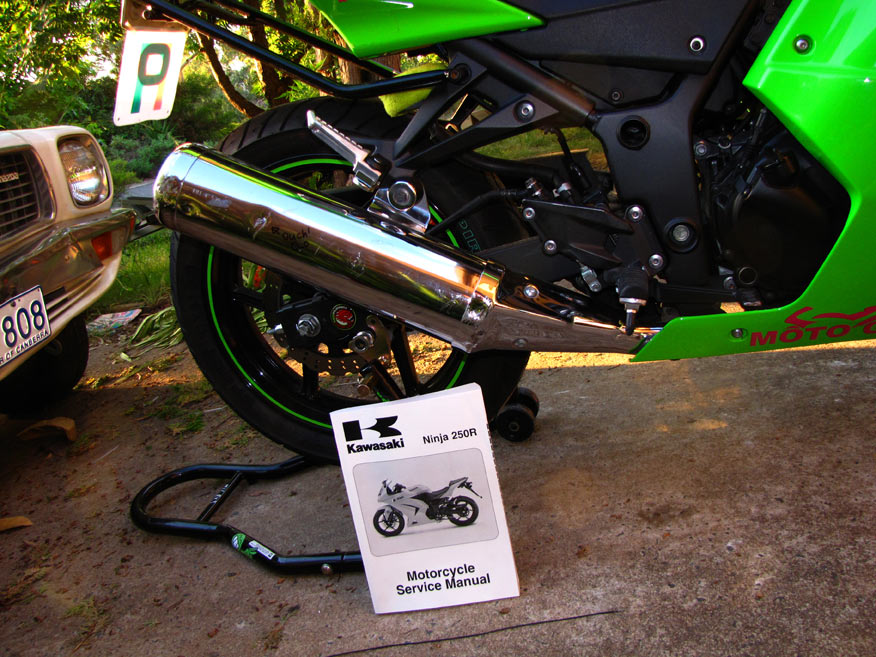 BEFORE shot, Ninja 250r Workshop manual. Not required but can be useful 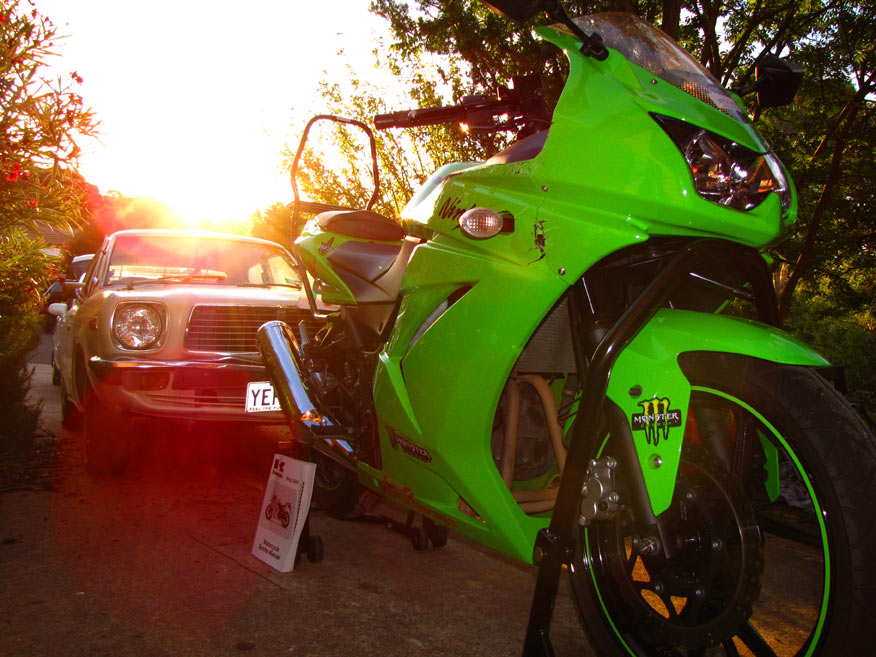 Buzz and a sunset lol 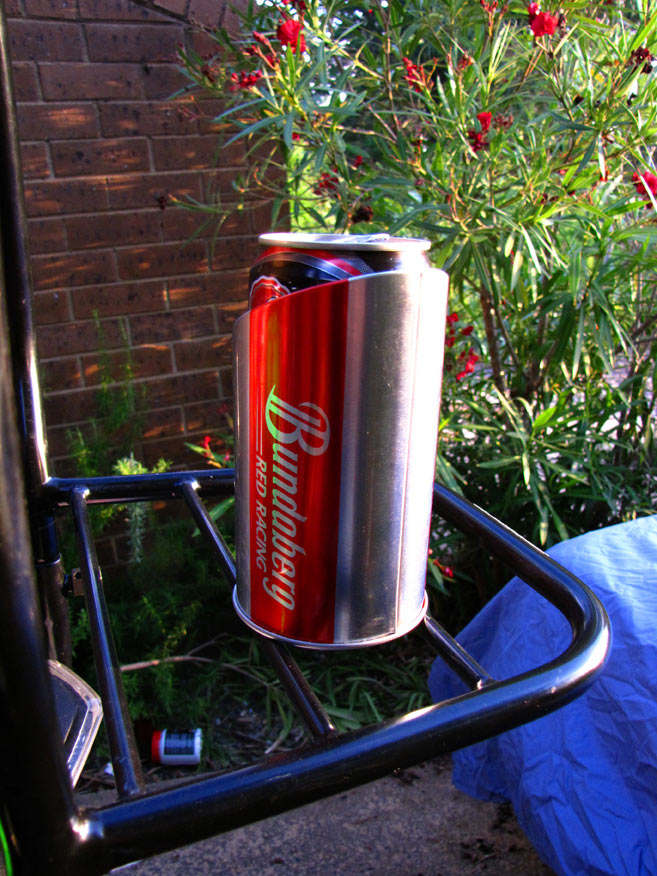 Preparations begin... 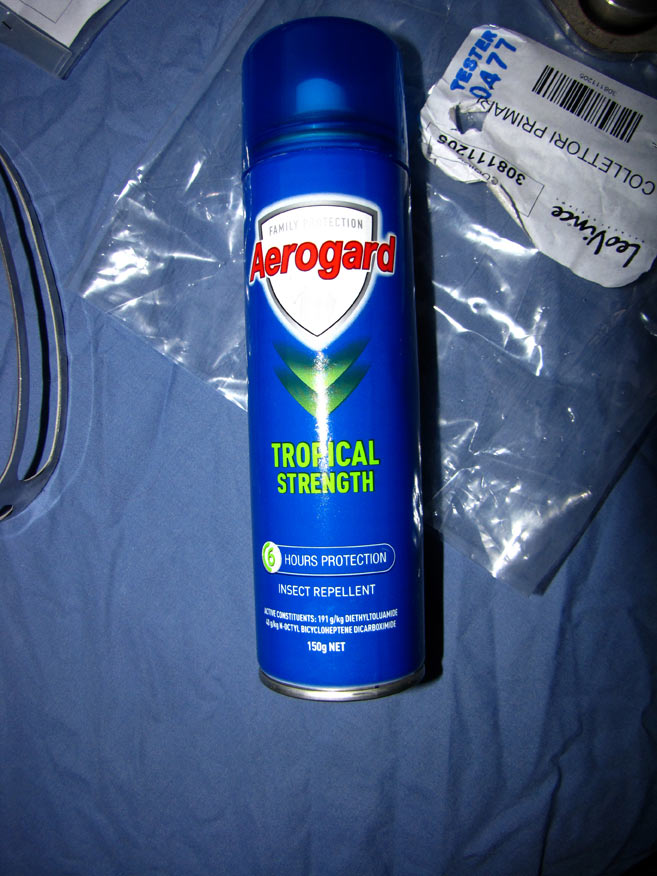 A crucial part of any aftermarket instalation session. Aerogard ! 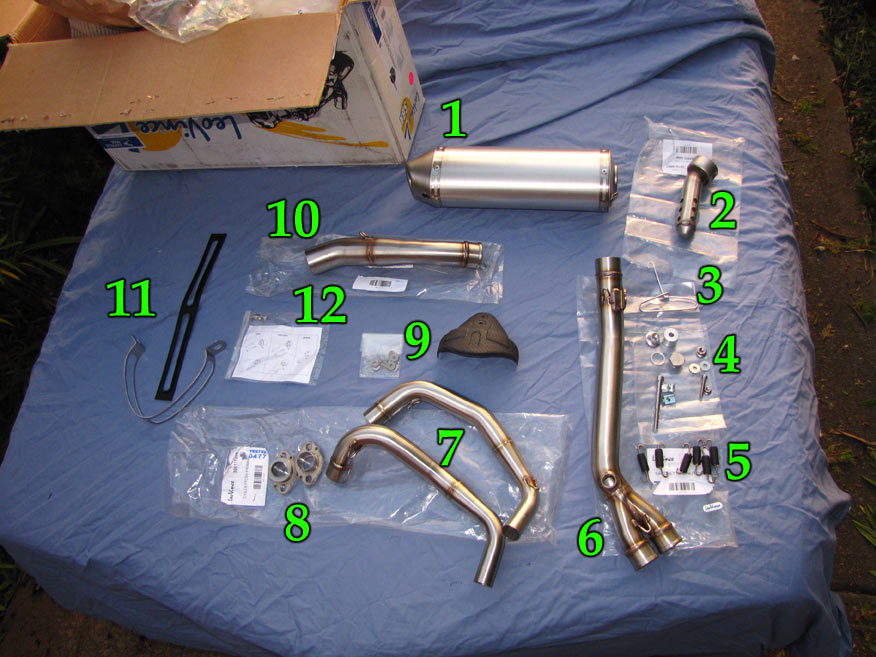 Supplied parts 1. Muffler (race baffle is installed in it when it is delivered) 2. Road baffle 3. Spring puller 4. Assorted nuts and bolts 5. Springs to hold everything together 6. Collector pipe 7. Header pipes 8. Exhaust flanges 9. Heat shield 10. Collector to muffler link pipe 11. Exhaust hanger strap 12. Worlds most useless instructions  Undoing fairings. There are bolts and plastic rivets and screws that need to be undone. 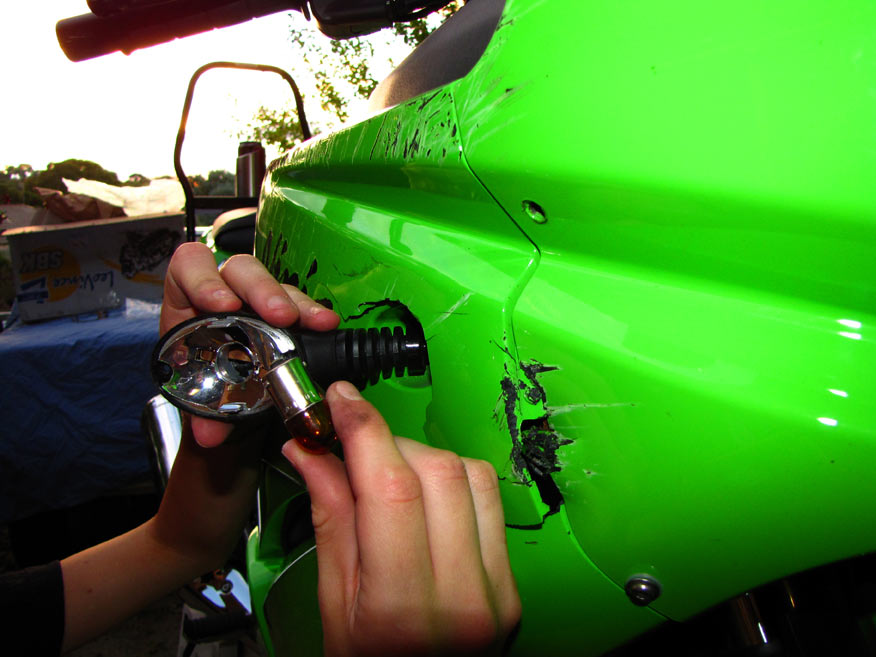 Indicators also have to come off - Pretty simple, just make sure you dont lose the tiny screw. 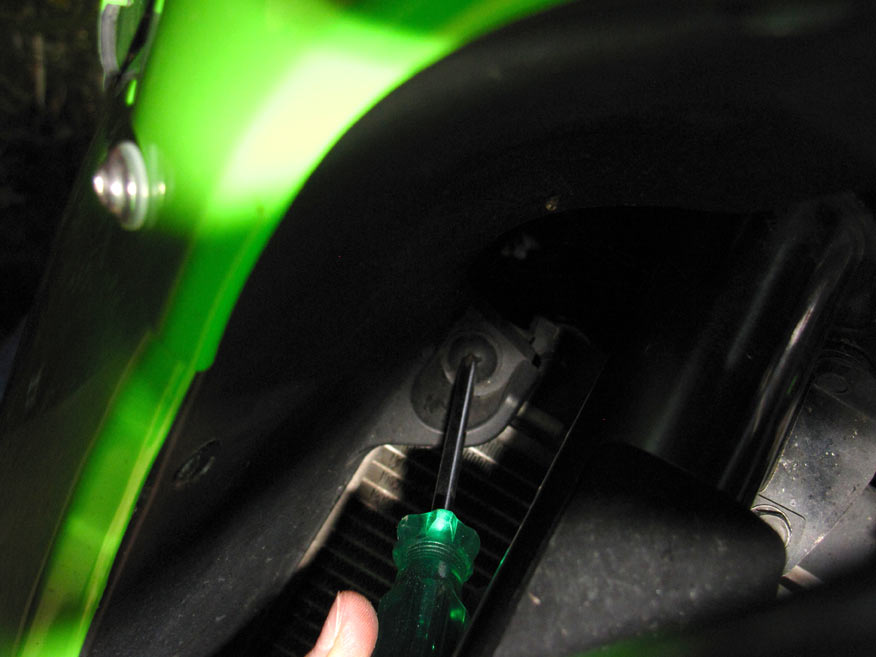 Radiator shroud screw - Dont forget this one!! 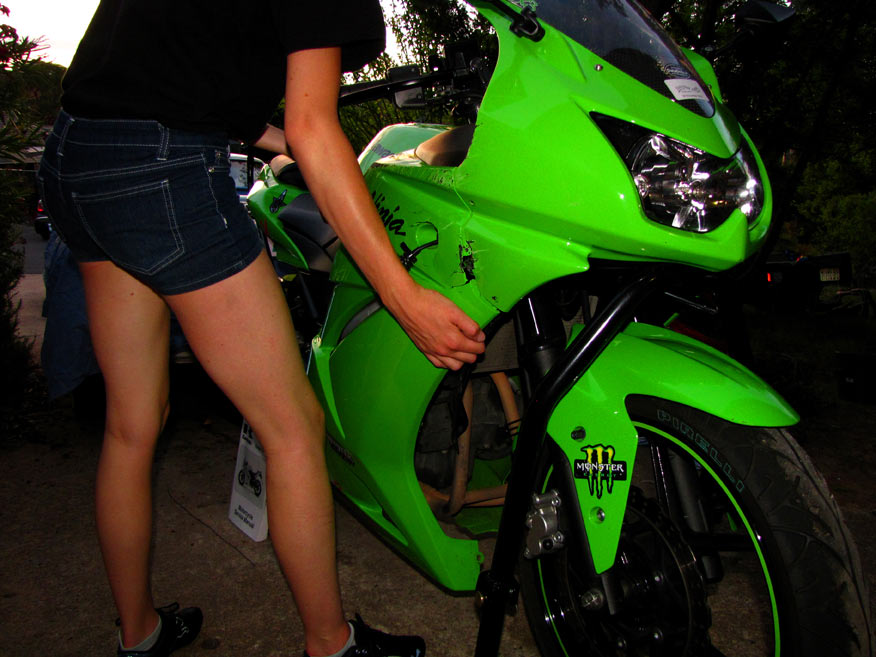 Lifting off the fairing. Becareful and make sure you unclip the indicator wiring. If you try to pull the fairing away too hard, You'll pull the wiring out and or fk it up 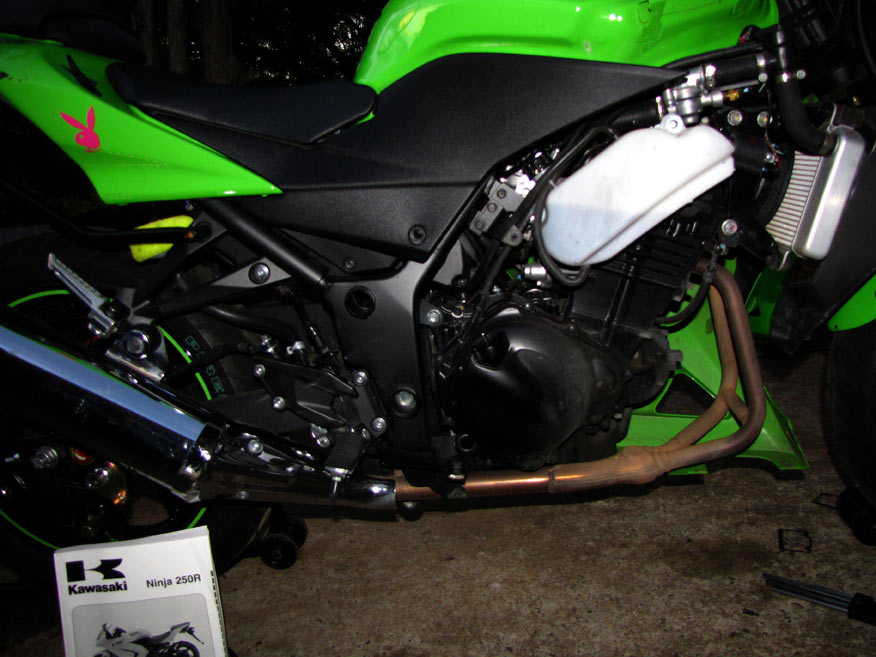 Fairing removed. Bit dirty, might do a bit of a clean while I've got it off. 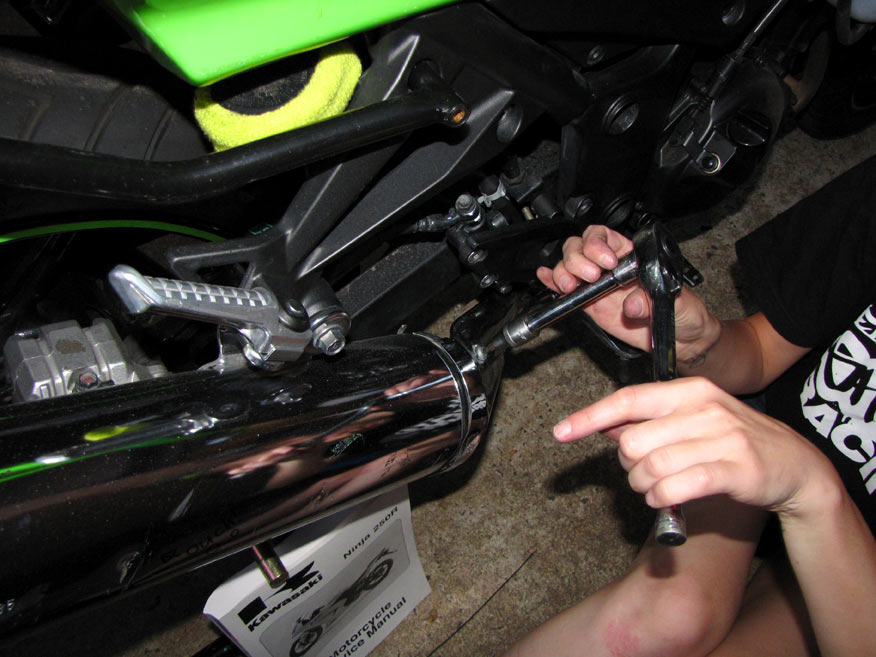 Removing standard heat shroud. 2 x 5mm allen key bolts 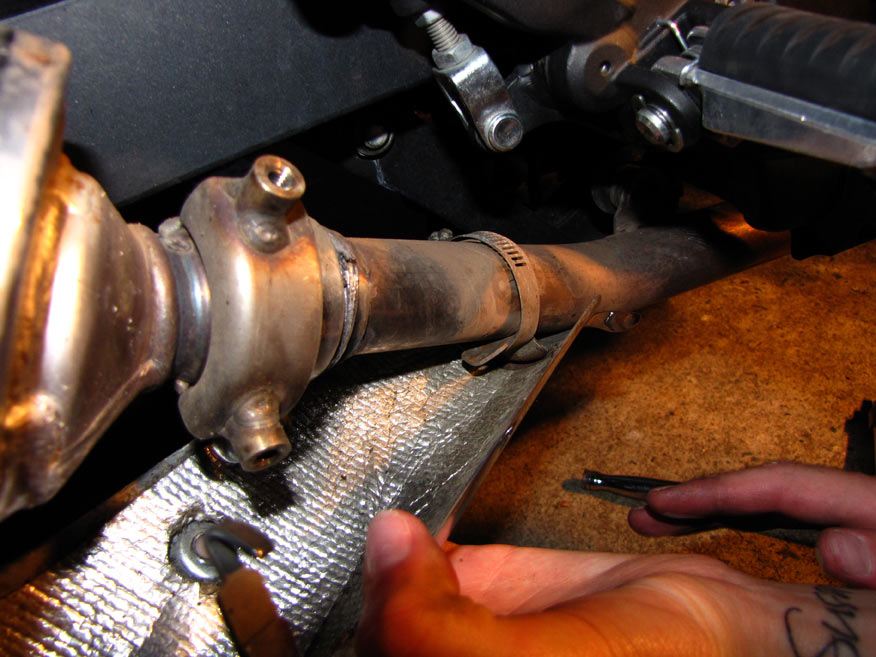 Heat shroud is also retained by a hose clamp which has to be loosened. Just a simple phillips head screwdriver does the trick. You have to loosen it enough the Shroud pretty much falls in your lap. 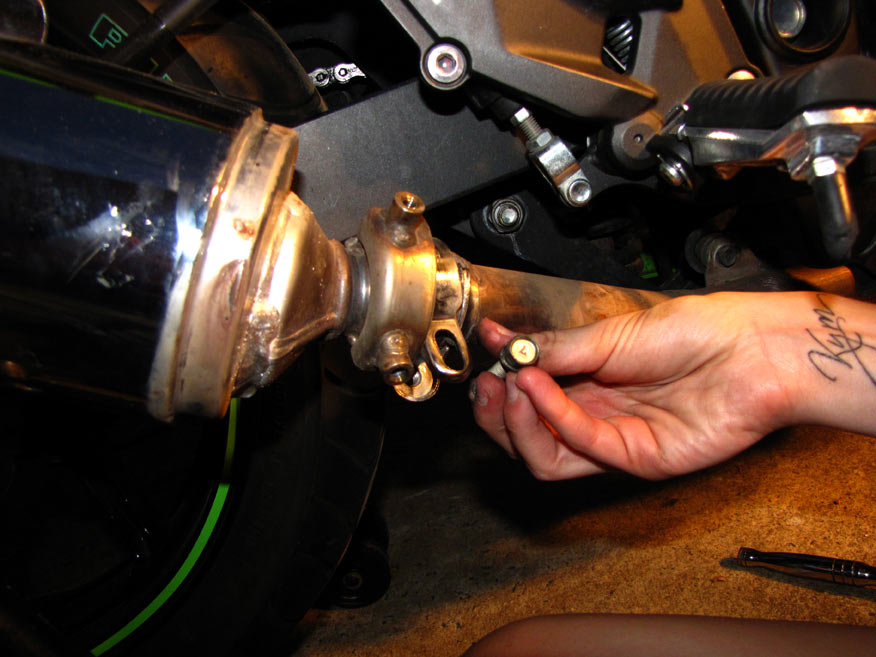 Remove bolt on muffler clamp 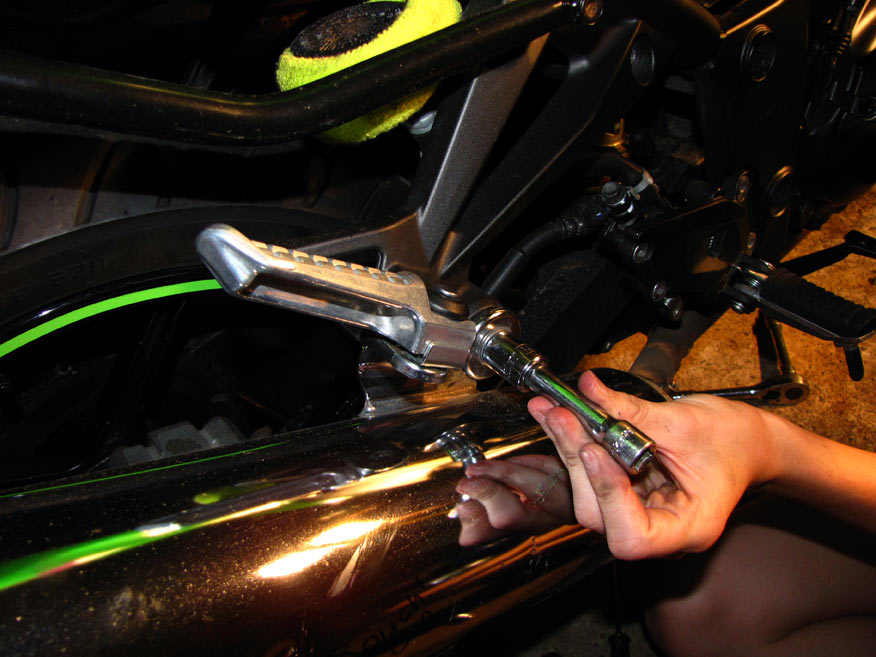 Remove bolt on muffler hanger 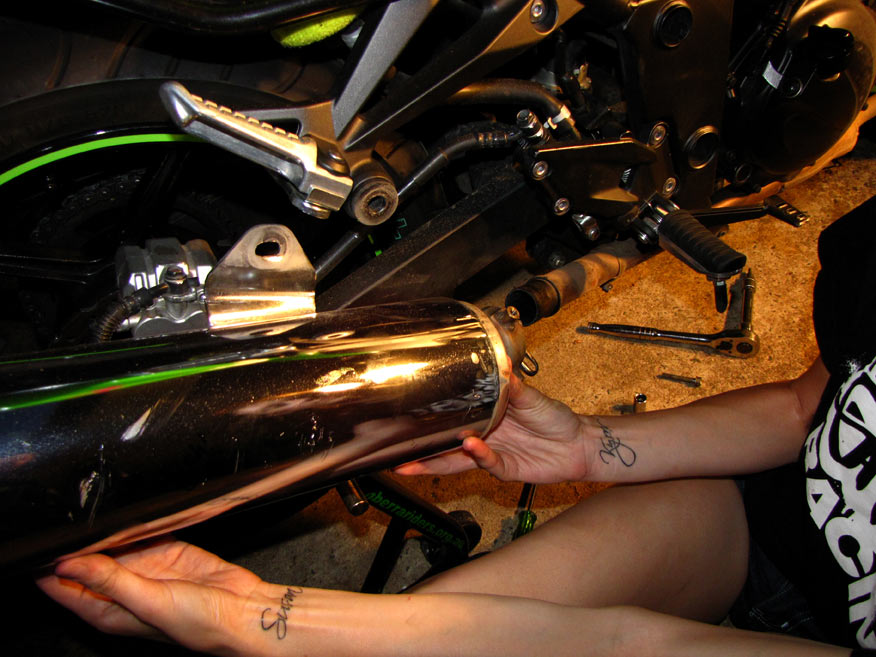 Muffler slides off! Simple! 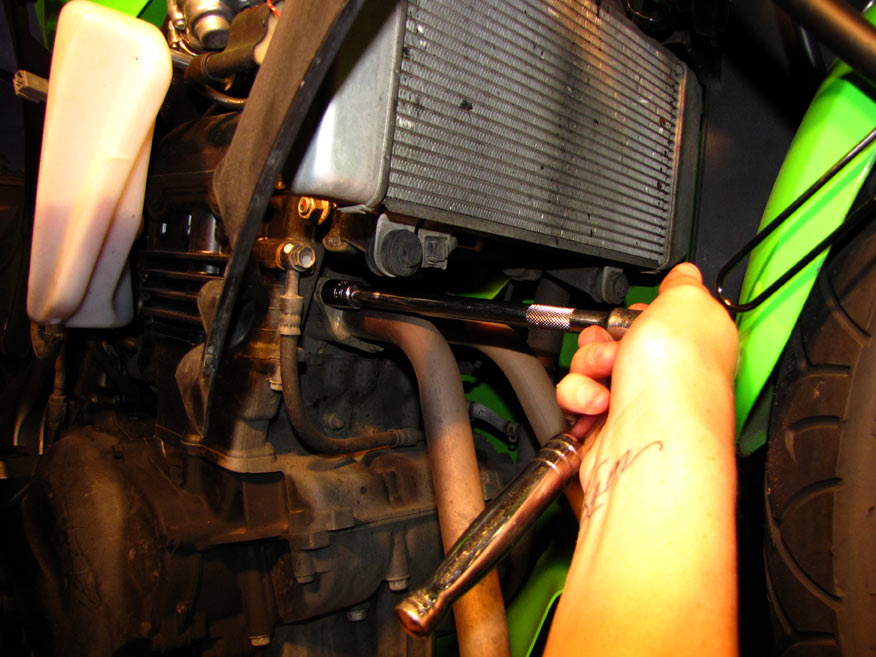 2 nuts per exhaust flange - 10mm socket in use... 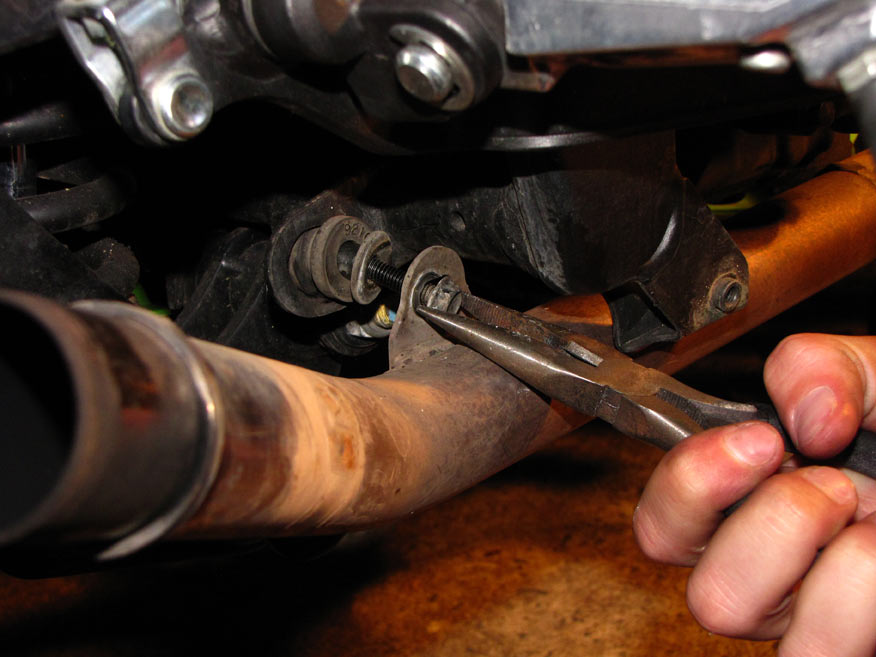 Headers also held on with a bolt in the hanger at back of motor 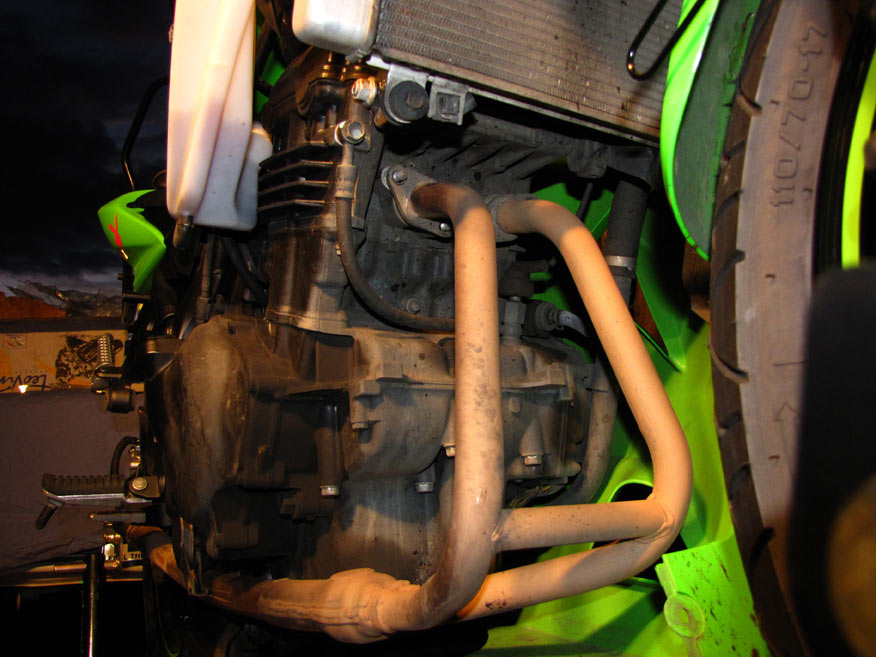 With nuts and bolt undone, headers slide forward to remove them from the motor. This could easily be done by hand one undone, but i used the trusty parrot Grips only because we thought it would be funny to terrorise the Weirdo lady next door with no exhaust on... hehehe 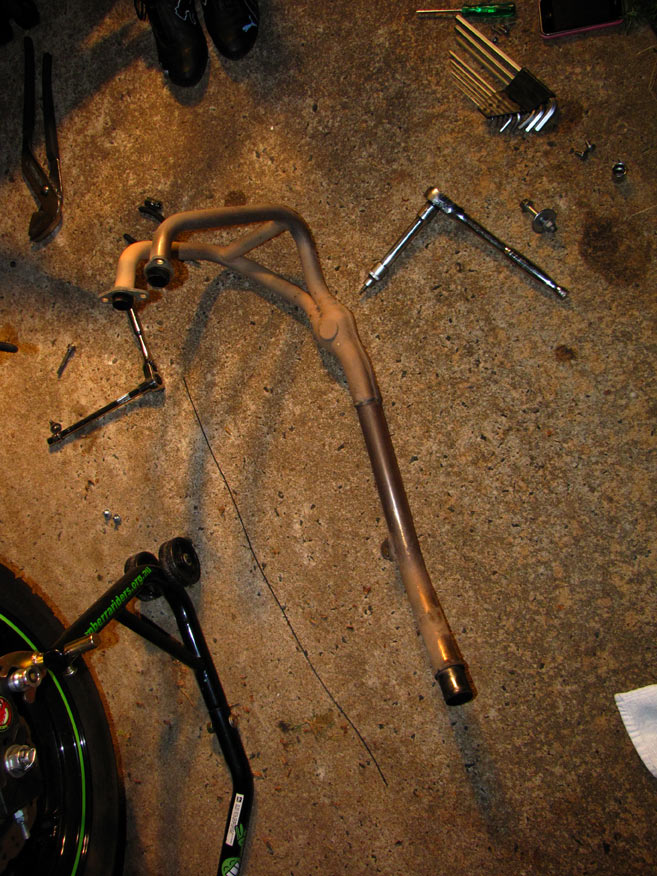 Headers removed 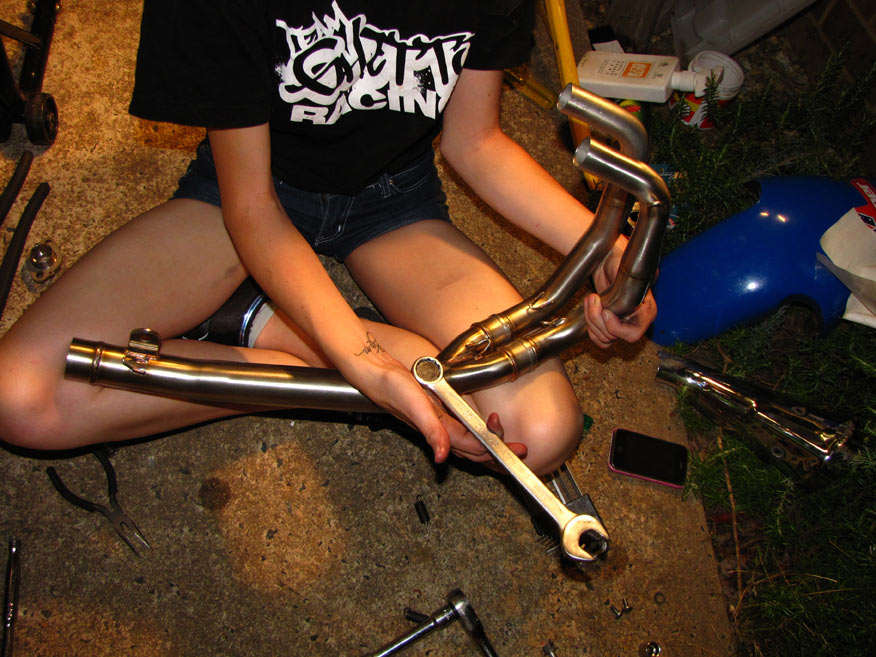 Test fitting of header pipes to collector. Best idea I've ever had. Test fitting every part means you can twist and jiggle pieces if they don't quite fit, 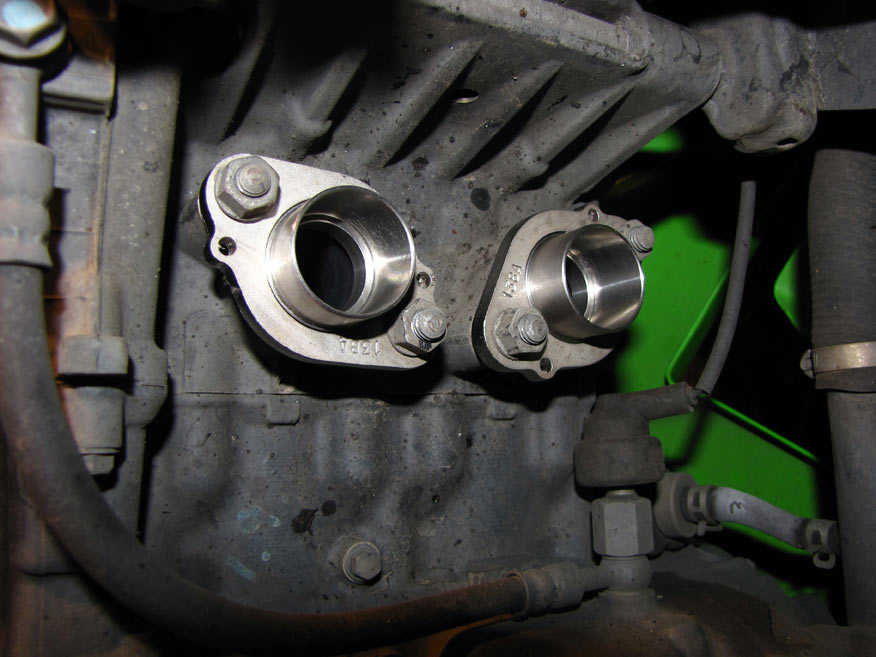 Bolt up exhaust flanges - Tight enough to hold them, but not so tight theres ZERO play in them. If you look closely you can see inside the exhaust ports! 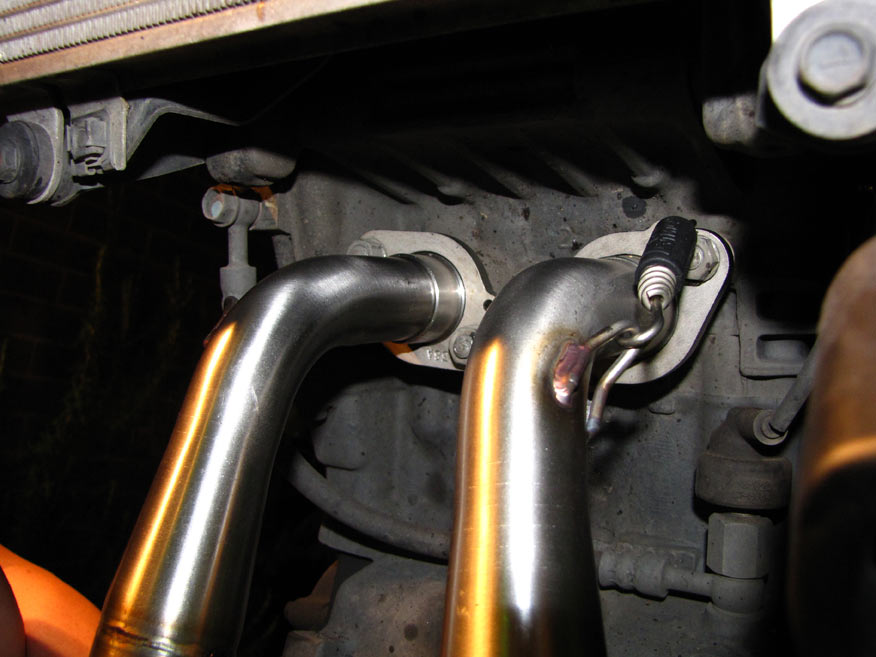 Use springs to hold header pipes to exhaust flanges. This is a bitch of a job. If you have skinny weedy arms like i do, I'd suggest maybe phoning a friend to give you a hand! 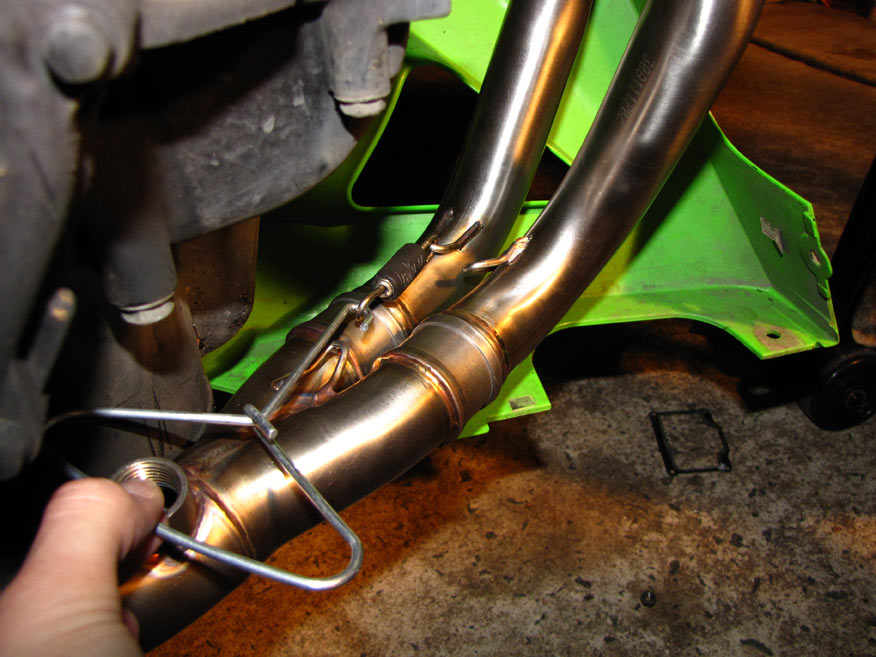 Springs also hold headers to collector. O2 sensor bung bolt needs to be removed to enable springs to be pulled on. Trust me. Do this up last! 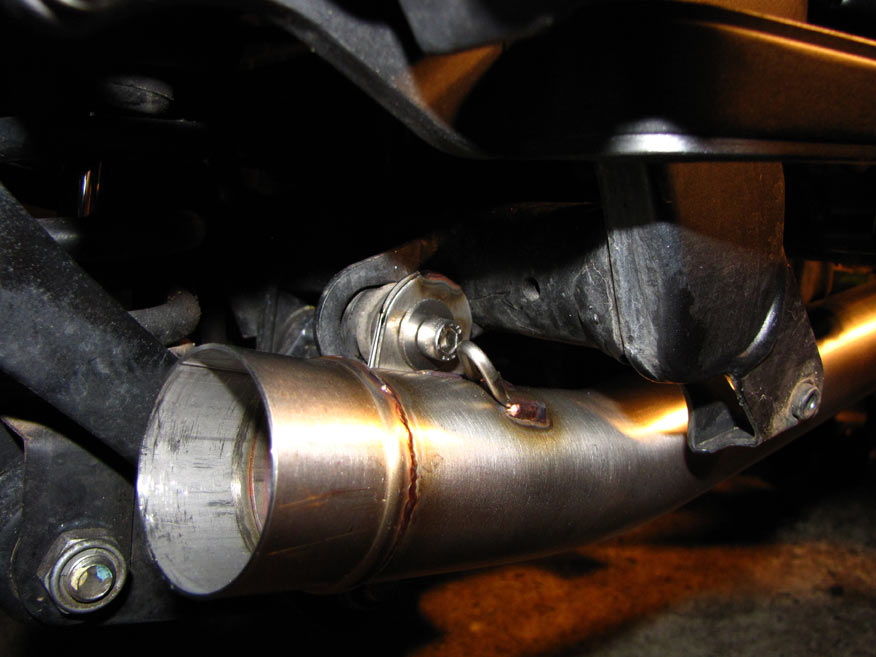 Loosely bolt up end of collector pipe. 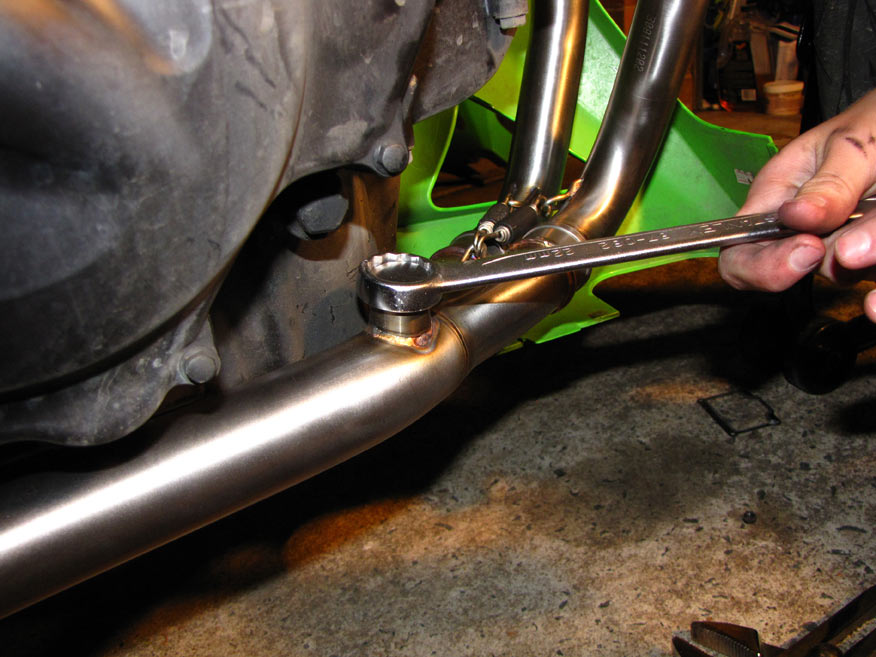 O2 sensor bung needs to be put in tight - 18mm socket works great! 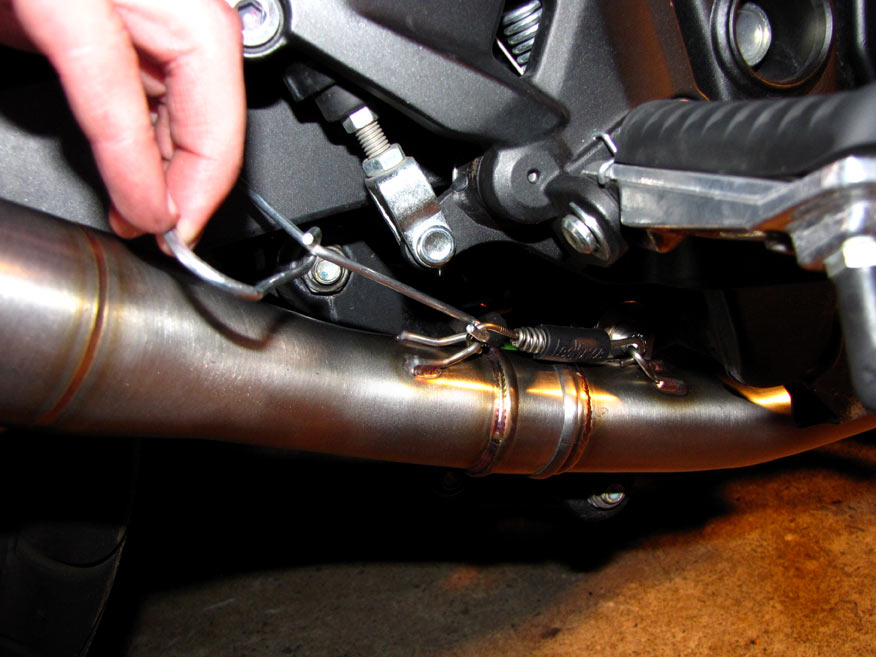 Spring to clamp muffler link pipe to collector pipe. 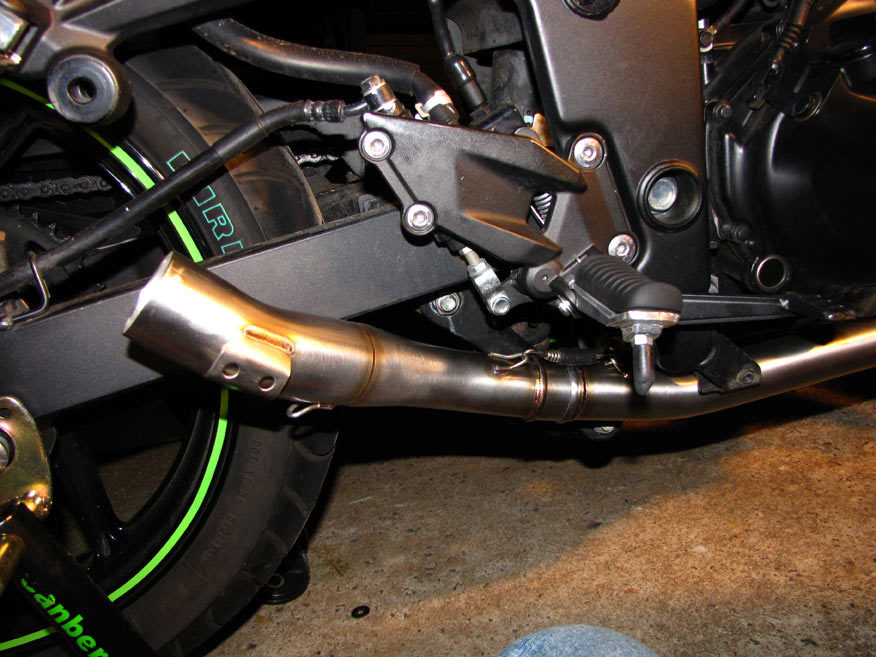 Ready for muffler. 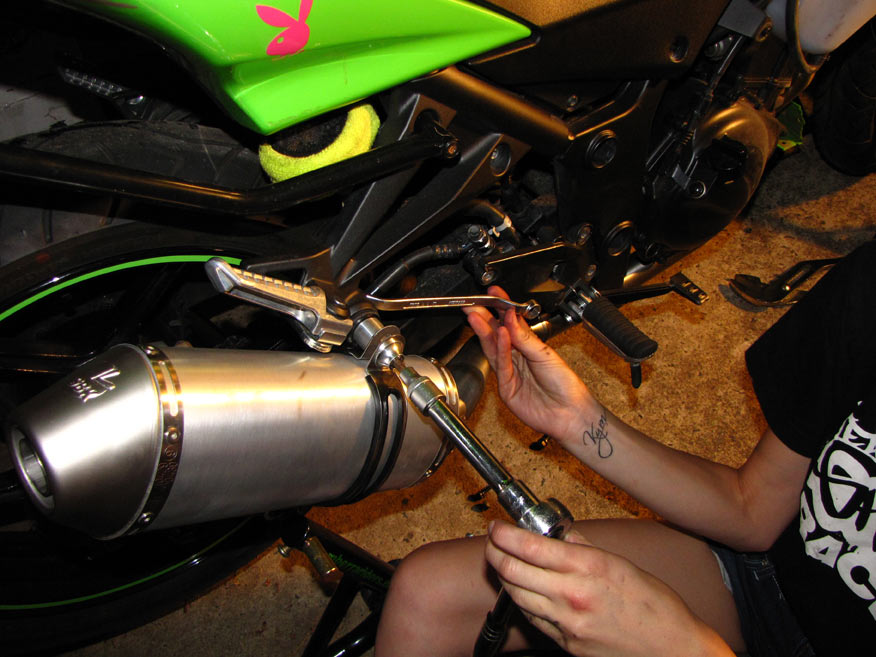 Muffler slips on link pipe and is held to bike with clamp. Note there is a spacer used between clamp and muffler hanger. Bit of a fight to get the long-ass bolt in, bit again, jiggle it til it fits and slide the can on as far as it'll go - this helps ALOT! 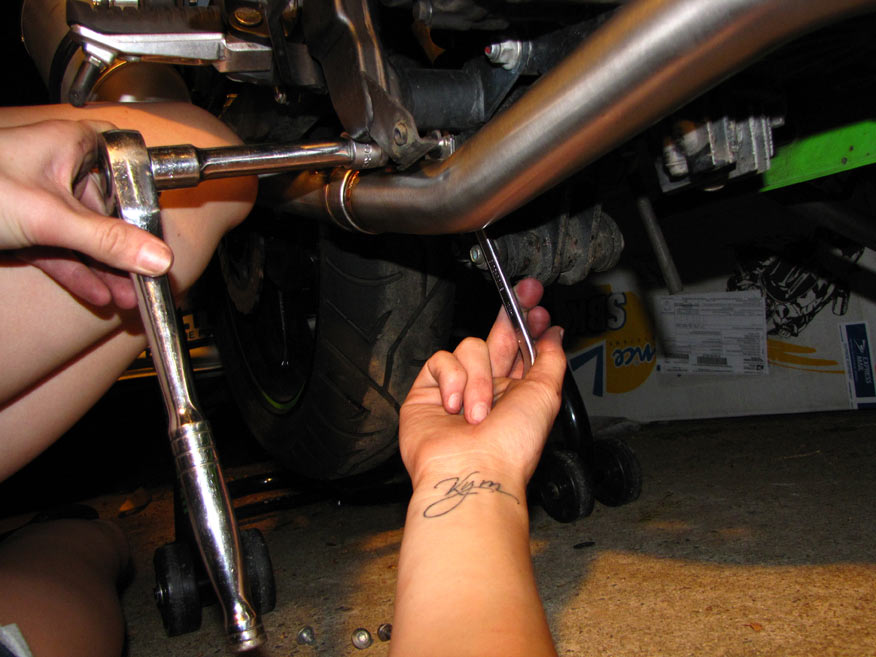 Working backwards from the muffler, tighten up all bolts to super tight. 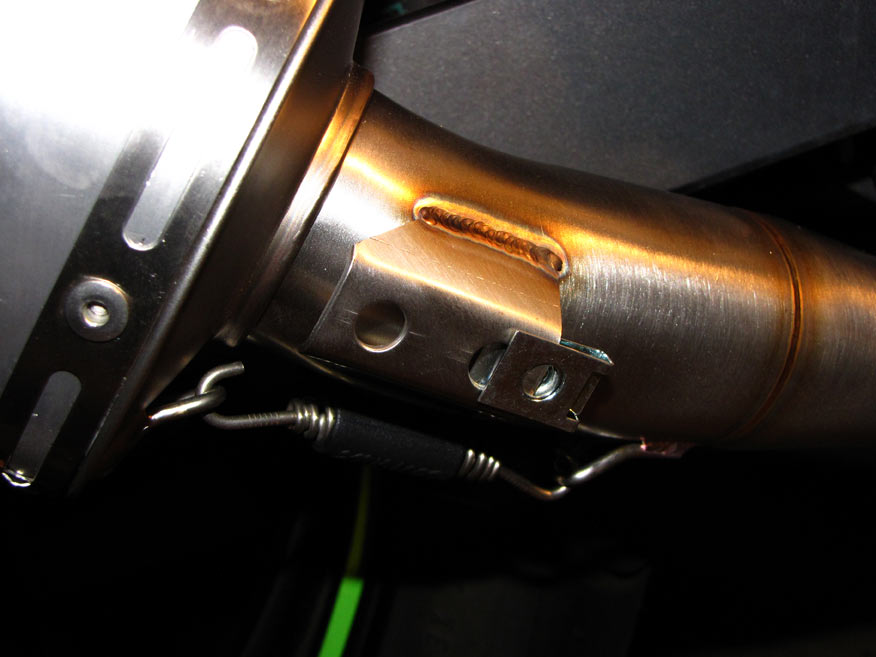 Speed nuts go onto muffler link pipe to retain the heat shield. 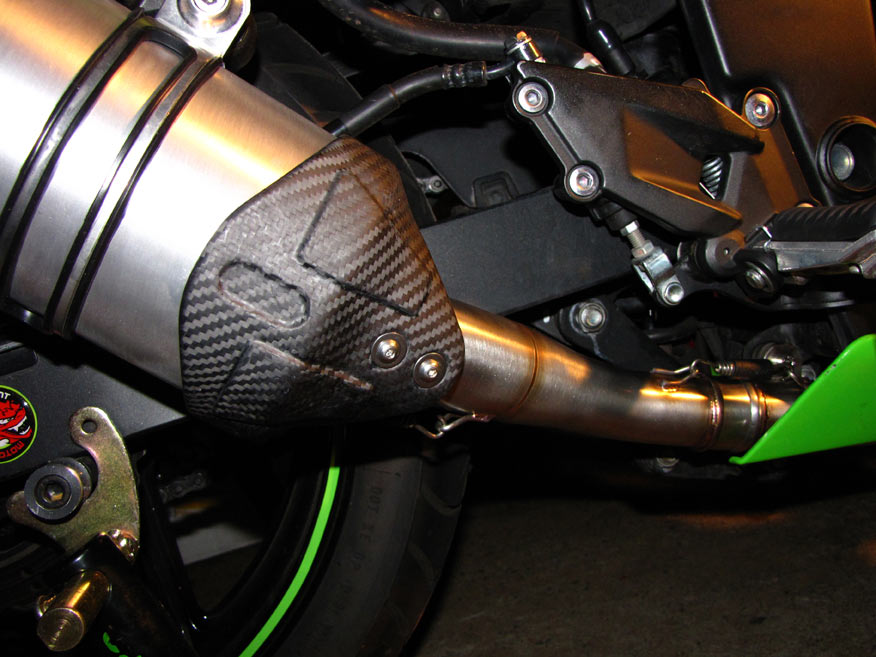 Heat shield screws on; it has heatproof cushioning washers to stop it rattling 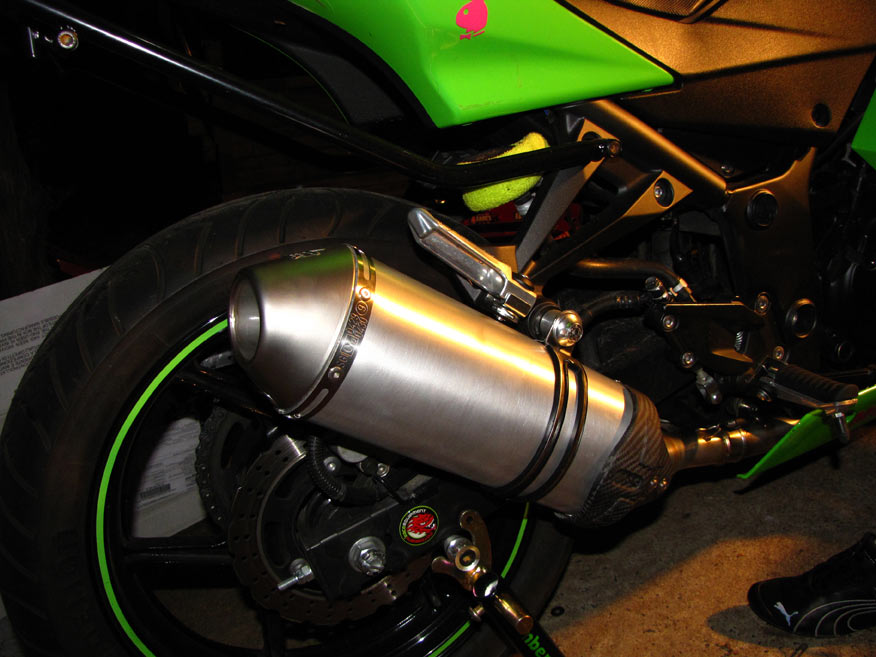 All fitted! Total time taken:  ...two cans. 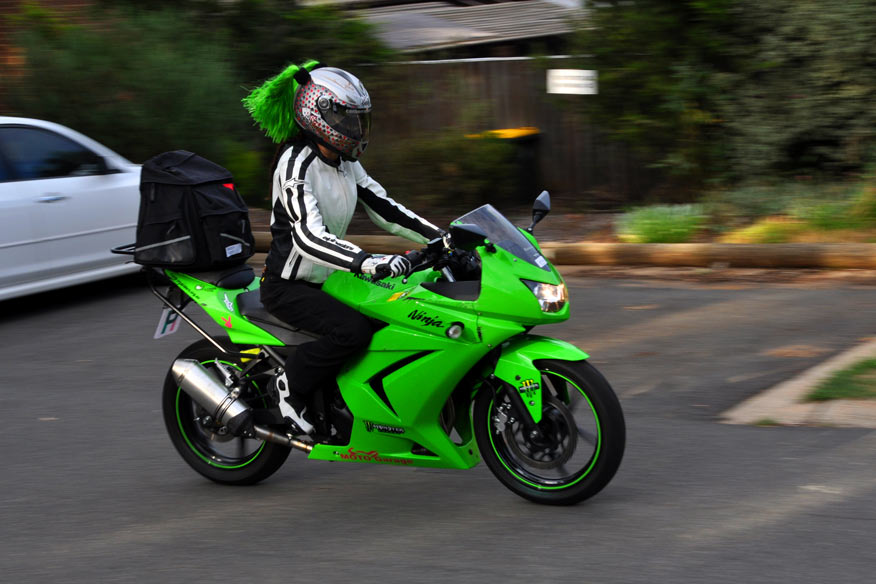 In action this morning Sounds beaut! You can now tell it's on!! Loud Pipes Save lives, and they'll make that Volvo driver think twice about merging on top of me!!
__________________________________________________
http://canberrariders.org.au "Every garage needs a Ninja, even if it is only a little one" http://mizrx3.livejournal.com/ |
|
|
|
|
February 20th, 2011, 07:09 PM
|
#17 |
|
Miz and Buzz
Name: Miz
Location: Canberra, Australia
Join Date: Oct 2010 Motorcycle(s): 09 Kawasaki Ninja 250r Posts: 15
|
Kawasaki – Japanese for “we put your horn in such a place that it makes it impossible to put it on a headstem stand”. I swear – look it up!
 [/FONT] [/FONT]After months of messing around having to take it off everytime I needed/wanted to put it up on stands we bought one of these: 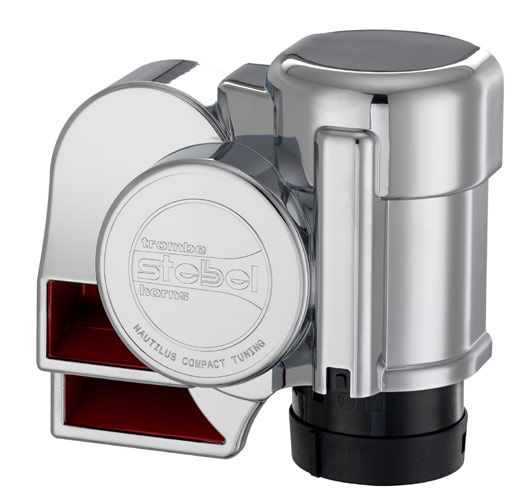 [/FONT] [/FONT]Hehehehehhehehe – Youtube/Google ‘Stebel compact nautilus horn’ it’s full of win! When I first got my bike, my wonderful Mom (brownie points for mentioning her) bought me a Motorcycle GPS. It’s the same as your regular Navman or TomTom, except it’s waterproof, comes with a handlebar mount and the screen is able to be used whilst wearing gloves! It had lived in the box since the day I got it, only ever pulling it out of the box to have a play. Nifty little thing it is, really voids the whole “I need a clear tank bag so I can put maps in it” thing. WIN! My BF bought me a set of Oxford Heated grips months and months ago and it was one of those ”oh next weekend” jobs, that we never got around to.. So this weekend just passed it was time to install the GPS, the heated grips and the Stebel Compact Nautilus horn and tinker with the wiring to provide power (only when the bike is on) for my GPS. The Plan - made entirely of win… The plan was to install two relays. One would provide switched power for the heated hand grips and the GPS. The other would work for the horn: Stebel horns pull so much more power than normal horns they need upgraded wiring & switching. For those that don't know, relays take a signal of a low power (which can go through a switch), and bring in a high-power source (usually a BIG FAT lead from the battery). They are useful for devices that require more power than can go through switches. I’m a complete numpty when it comes to this electrical gizmo stuff, but apparently its really simple and it helps to know a couple of techniques. So here's how I soldered wires to join them, and how to do crimp connectors. Some people love them, some people hate them... This is not the only way to do electrical stuff, just how I did it. 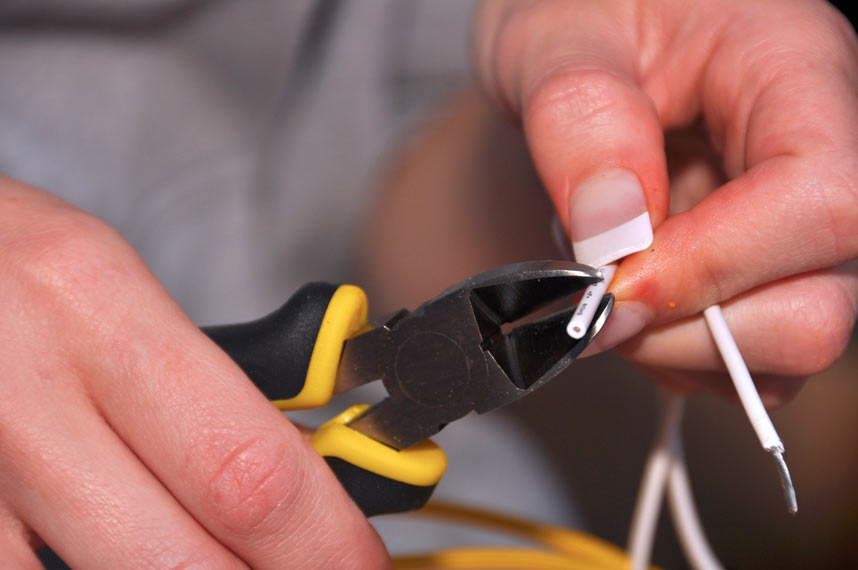 Stripping the ends of wires isn't hard, just use side cutters to cut through the insulation. Or your teeth (not recommended!) 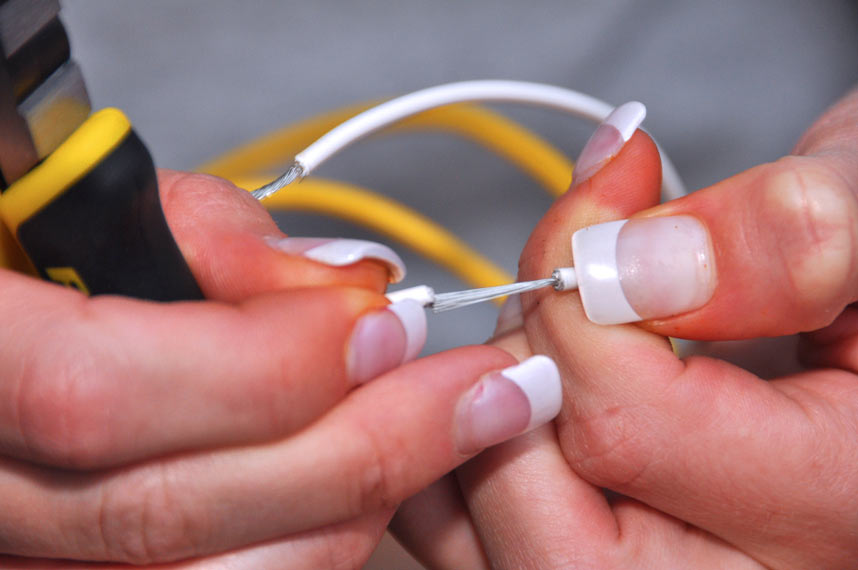 Pull the end off and twist, to bring the wires together. 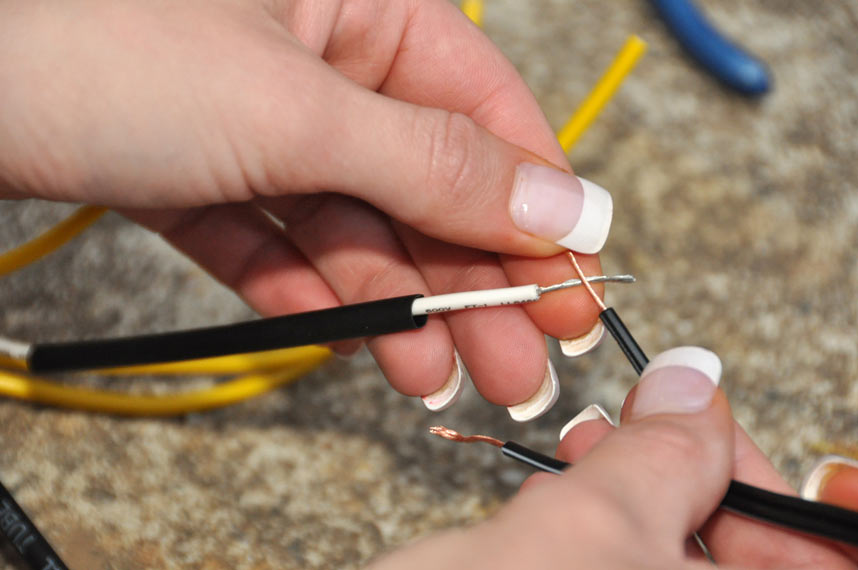 To solder, twist the ends of the two wires together. You can also tin the wires - this is where you put solder on each end of the wire, then solder them together. Twisting can work well too. Note the black heatshrink on the white wire, this is to act as insulation. 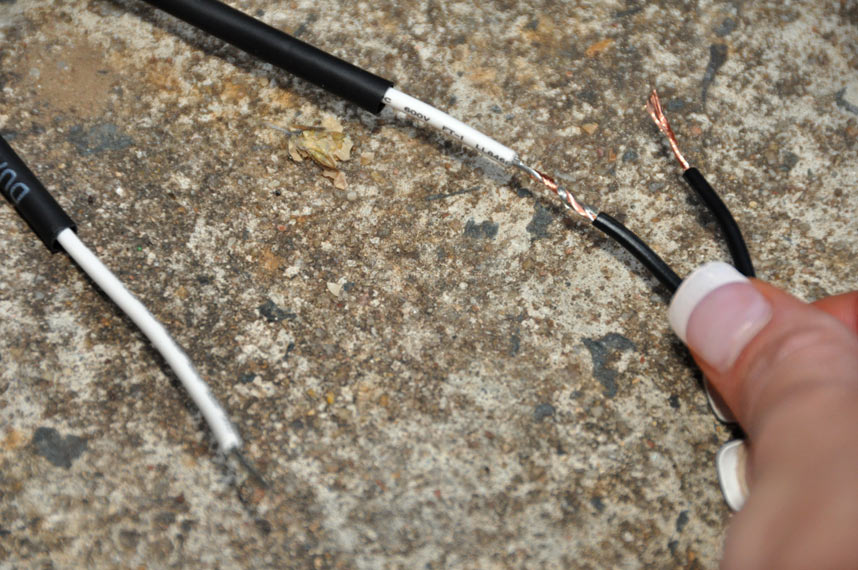 Wires twisted together. 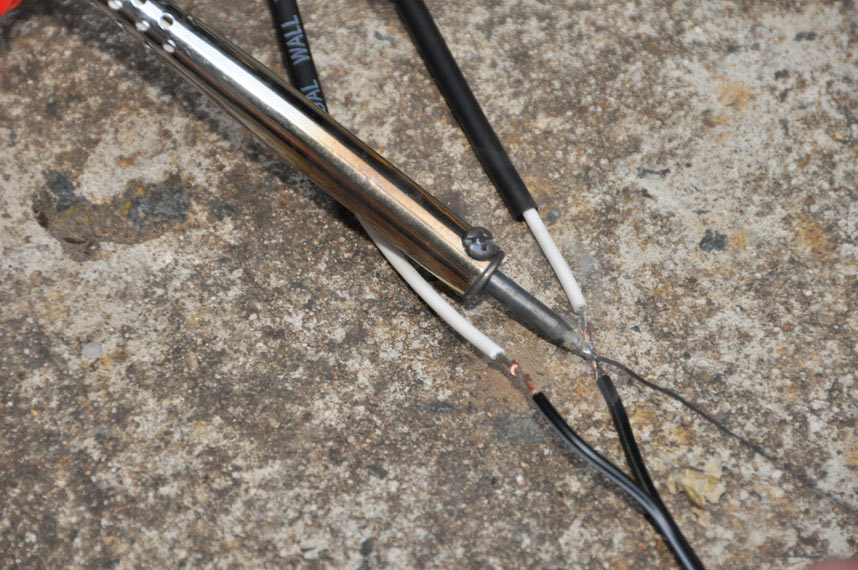 Soldering iron heating up the wires, and solder being fed in to join the wires. [note: I didn’t burn myself once – so it’s really easy – think welding on a tiny scale! 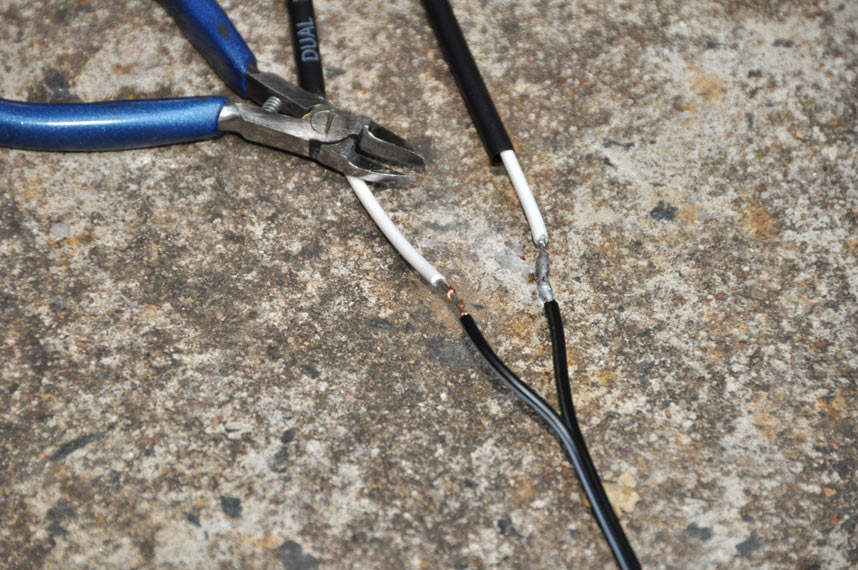 Completed joint. Not the best soldering job in the world, but it is solid and will do the trick. This wire won't move around much so it should work just fine.[/FONT] 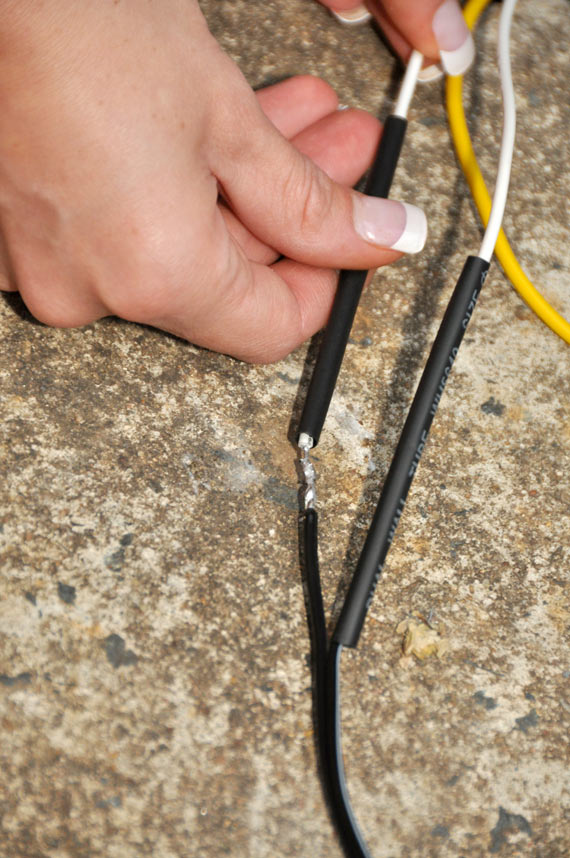 Heat shrink tubing pushed down over the joint. Now it needs to be shrunk down to my size! 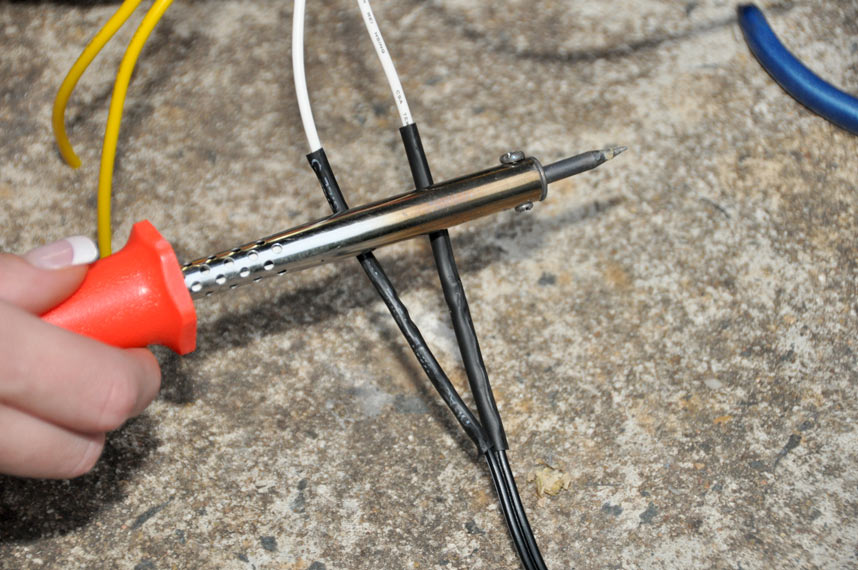 Heat shrink tubing is, well, duh, shrunk by heat . Back of the soldering iron is warm enough to do this. Cigarette lighters also work well. The BF wanted to use the blowtorch…. *facepalm*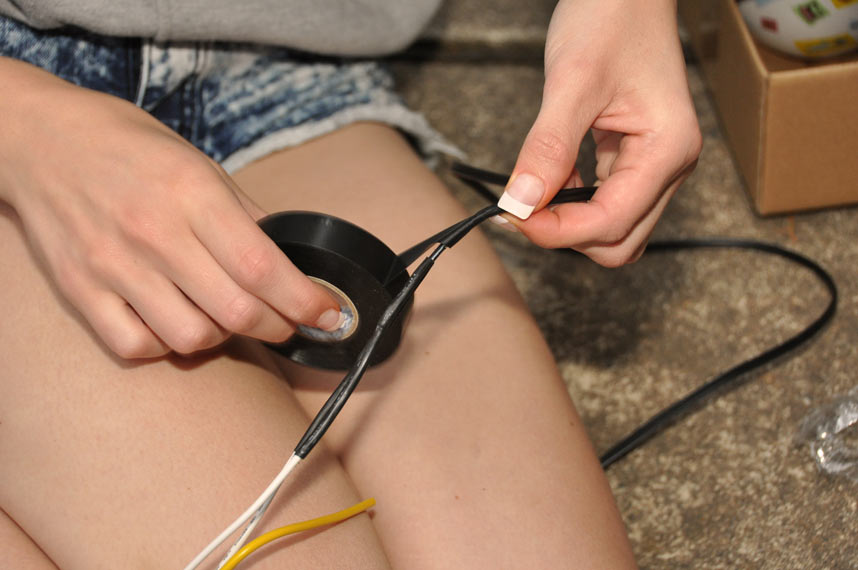 Taping it all up so that the connection is nice and firm and 100% water tight. Use good electrical tape, crap stuff never sticks properly. Nitto tape FTMFW!!! 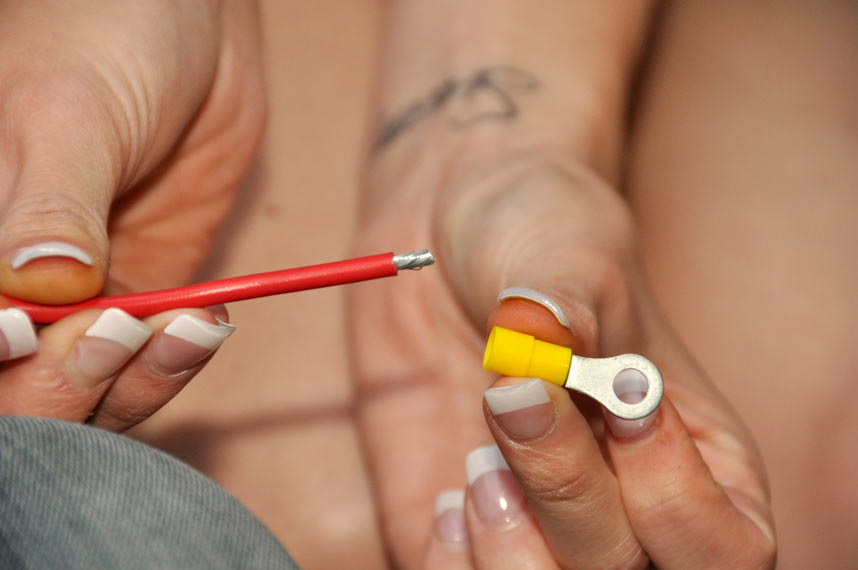 Crimp connector: strip the end of the wire (don’t use your teeth), and push it into the connector. The colours of the connectors indicates the wire sizes used in them. Yellow is the biggest wire size, then blue is medium, and red is Small. Or Miz. hahahaha 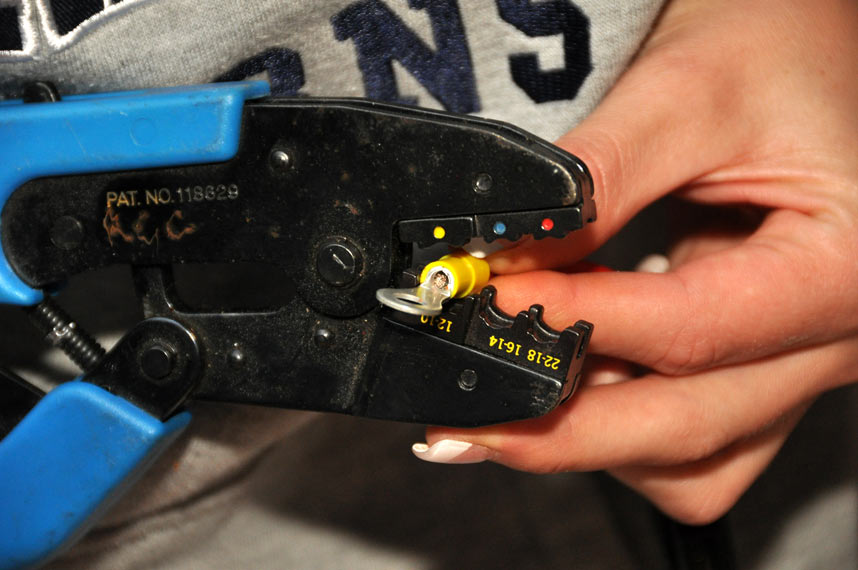 Using a pair of crimp pliers, crimp it. They are a lot easier to use than soldering, but if they are not done properly they can easily come undone. Trust me, much frustration occurs when you plug it all together and **** don’t work It can be useful to solder in them, too. To start with, you have to hide the relays somewhere. I chose under the tail. 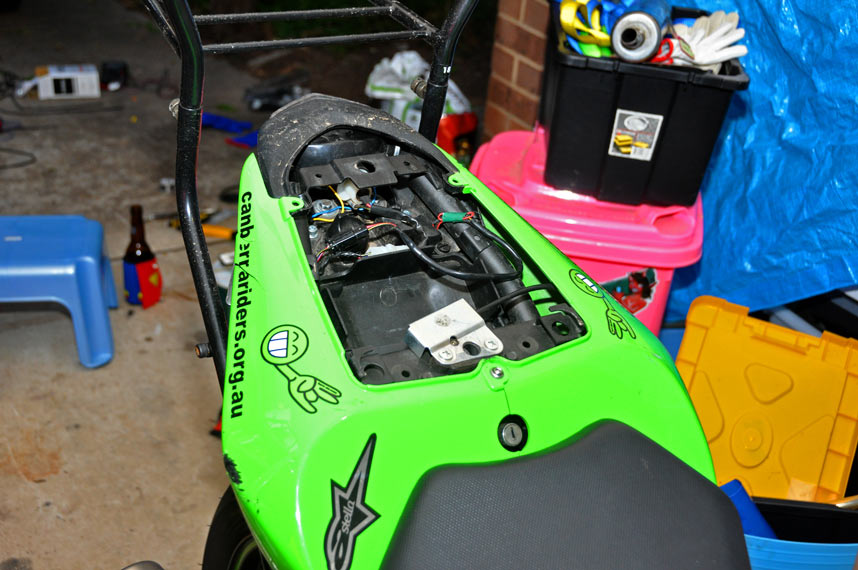 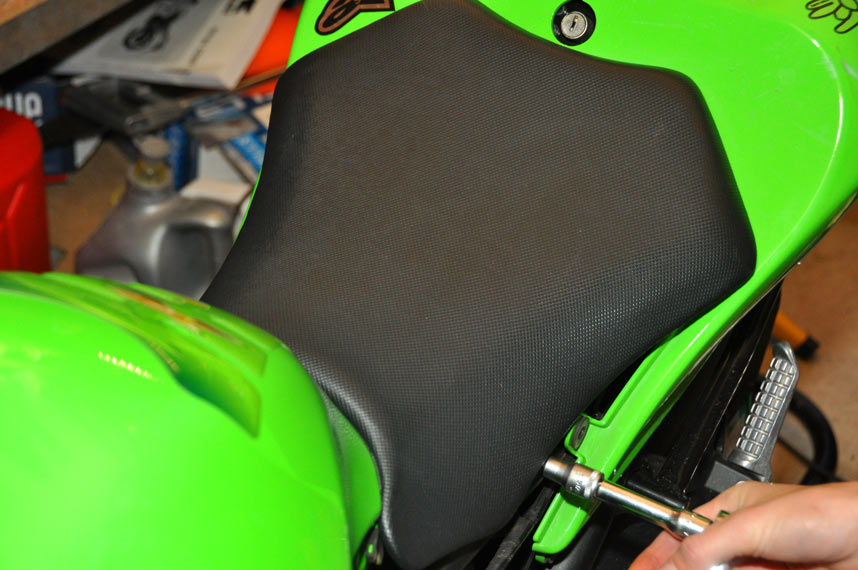 The black side panels have to be removed, then remove the seat. 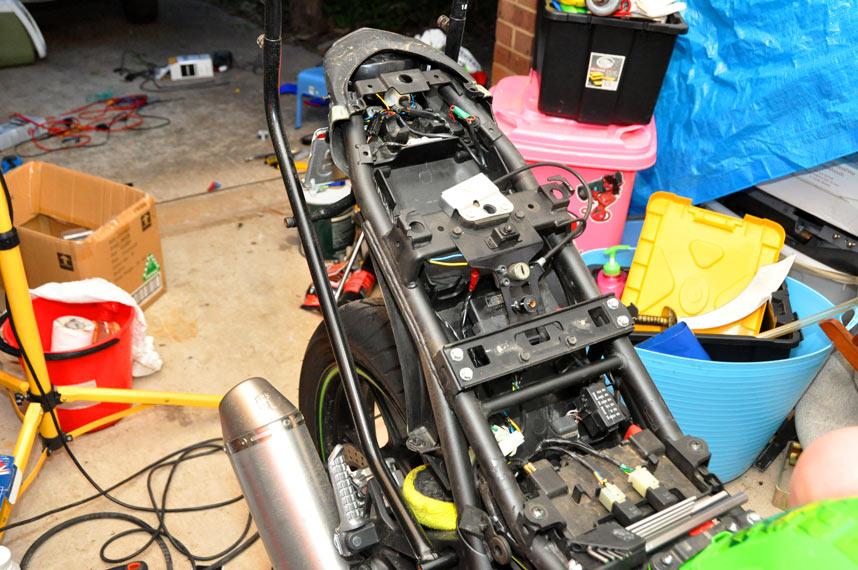 Remove the two sides of the tail, and the whole back end of the bike is exposed. To mount the relays, I decided to use some bolts through the plastic undertray. There was already a hole which had the indicator flasher unit mounted to it, but on the other side, the drill had to come out. 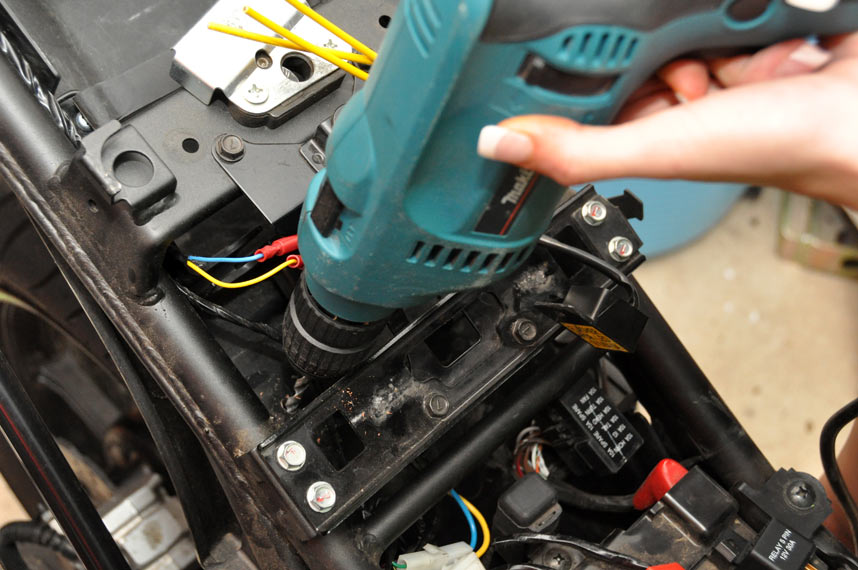 Drilling the hole for the relay. Note, I drilled ONE hole and one hole only, then put the power tool away! 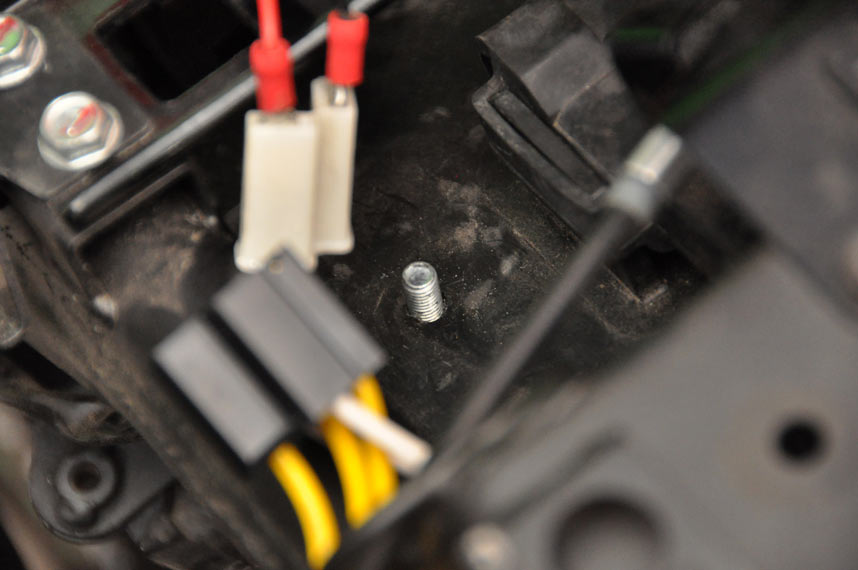 Bolt poking through the undertray. 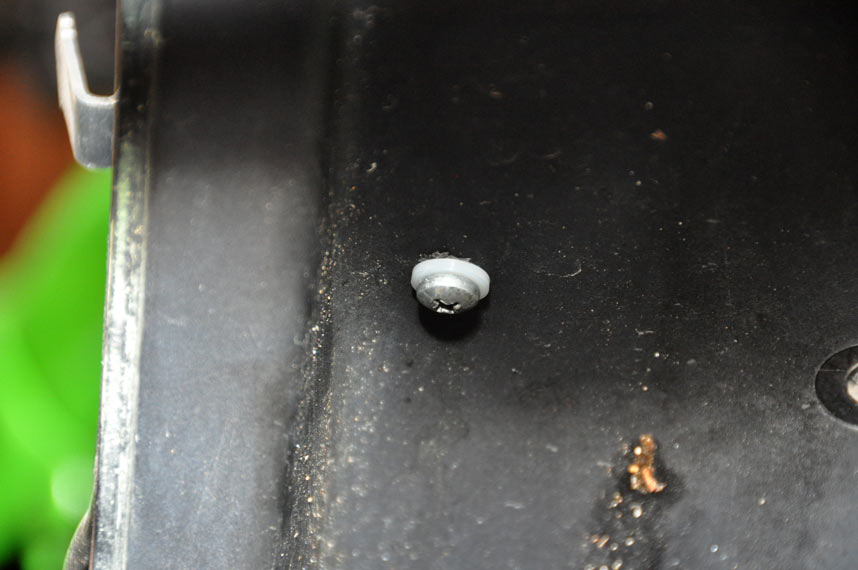 Bolt from underside. Nylon washer helps to not trash the undertray, and also helps for water sealing. 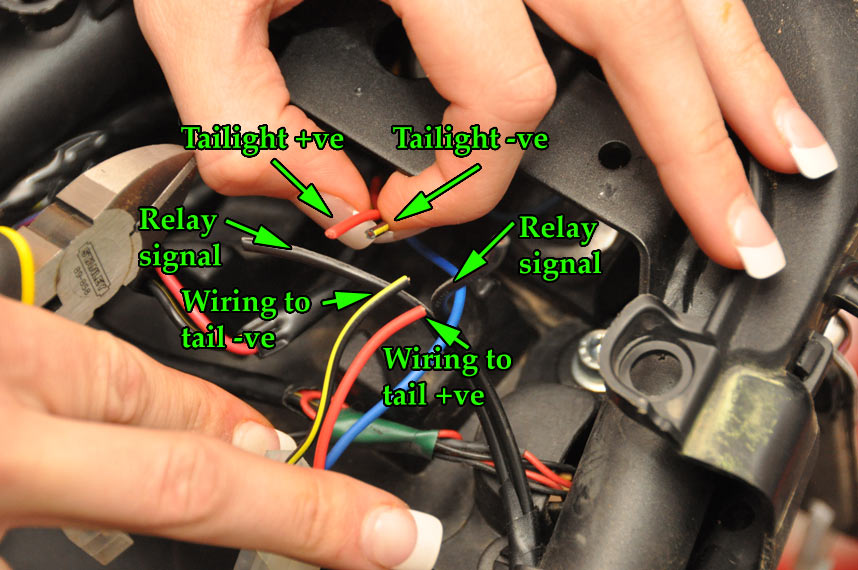 Wiring up the relay isn't hard. To get switched power that works when the ignition is on, easiest to use the tail light. What we want to do is here is connect the relay signal side to the tail light. After determining what wires are what, it's a case of joining them so that a circuit is made to both the tail light and to the relay signal. Got to play with the mutlimeter here! 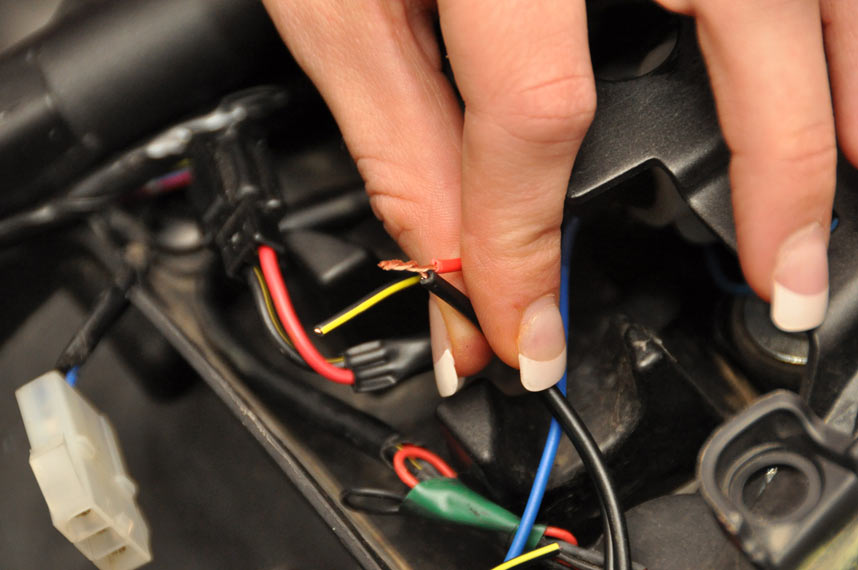 Tail light side and relay signal wire joined together. 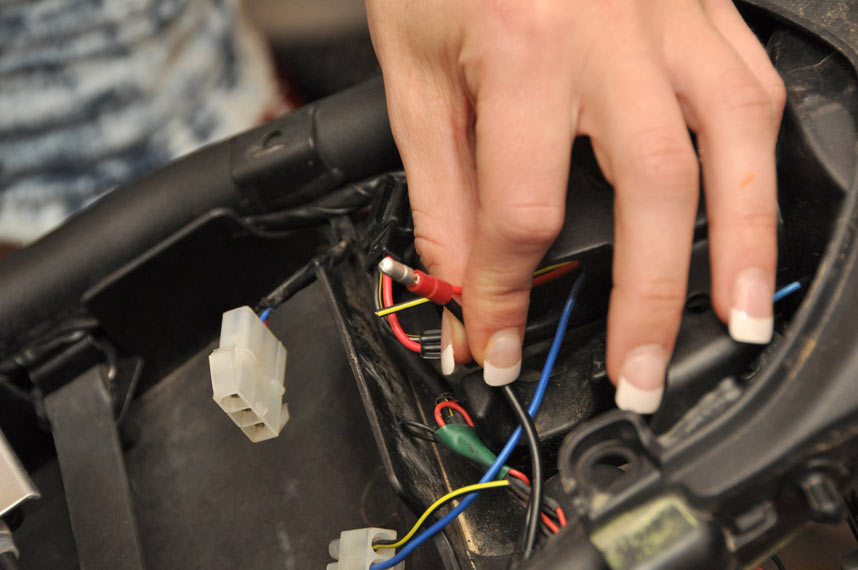 Crimp connector. Makes it easier to unplug if I really need to. 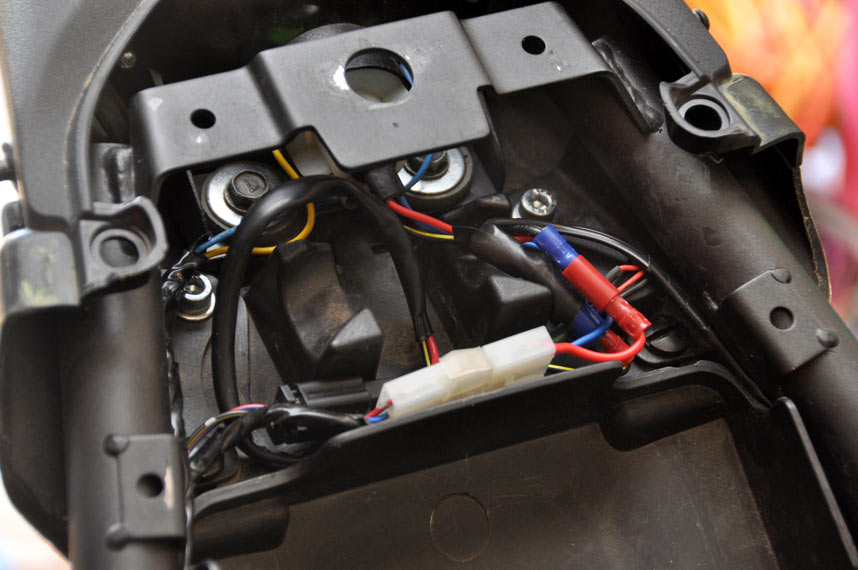 All the tail light wiring, all done up neatly. Black wires on the right-hand side go down to signal the relay. Signal to the horn relay is easier: just connect to the original horn wiring, and run them up to the horn relay in the tail. 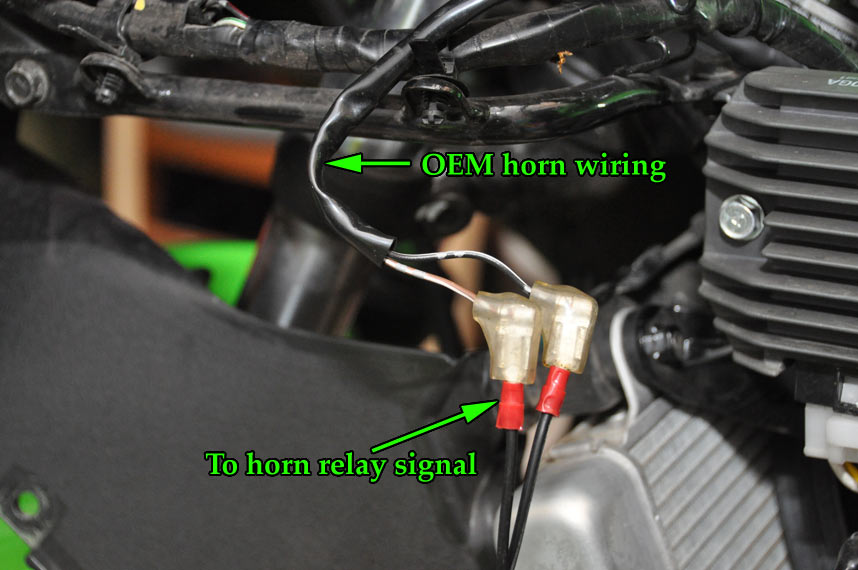 How to wire up the horn relay signal side. [img]http://www.wenga.net/miz_rx3/buzz/electrical/DSC_2901.jpg[/img All the relays installed. 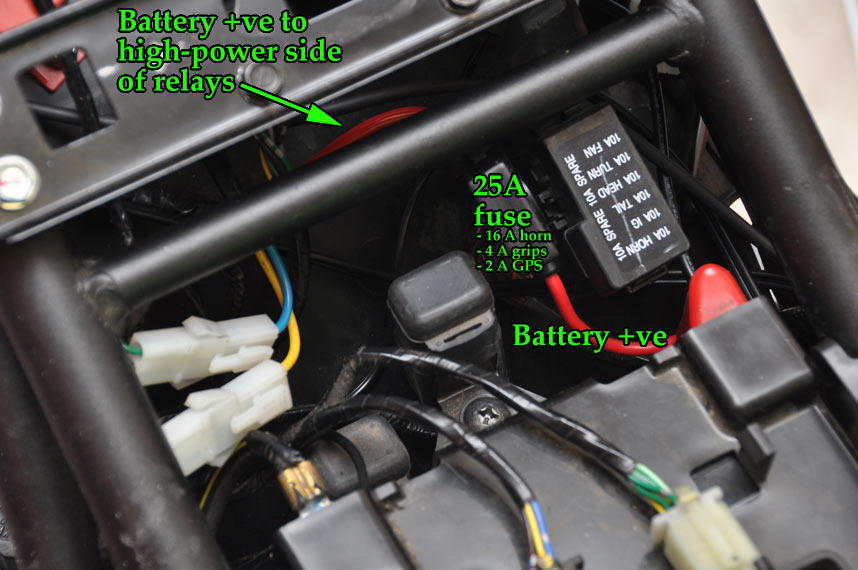 [The high-power sides of the relays are fed from a dedicated lead that is connected to the battery. A fuse sits inline to protect everything. I ran one lead, but it goes to both the input high power side of the horn and the accessories relay. 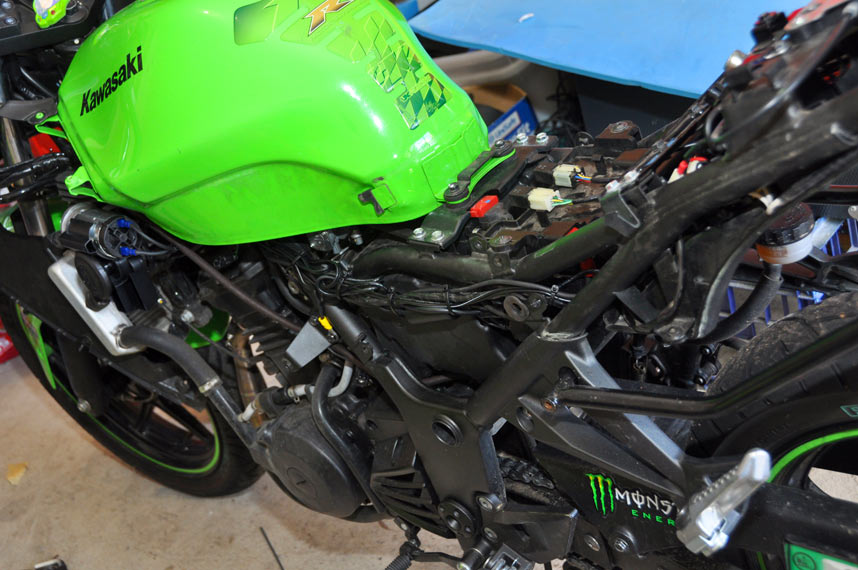 All the wiring, just needing to be taped up now.
__________________________________________________
http://canberrariders.org.au "Every garage needs a Ninja, even if it is only a little one" http://mizrx3.livejournal.com/ |
|
|
|
|
February 20th, 2011, 07:14 PM
|
#18 |
|
ninjette.org certified postwhore
Name: Cody
Location: NoVa
Join Date: Jan 2011 Motorcycle(s): 06 yzf r6r previously: 09 ninja 250r, black 07 zx6r Posts: A lot.
|
I'm diggin the pigtails
and that exhaust looks great too!
__________________________________________________

|
|
|
|
|
February 20th, 2011, 07:15 PM
|
#19 |
|
ninjette.org dude
Name: 1 guess :-)
Location: SF Bay Area
Join Date: Jun 2008 Motorcycle(s): '13 Ninja 300 (white, the fastest color!), '13 R1200RT, '14 CRF250L, '12 TT-R125LE Posts: Too much.
Blog Entries: 7
|
Nice work!
__________________________________________________
Montgomery Street Motorcycle Club / cal24.com / crf250l.org / ninjette.org ninjette.org Terms of Service Shopping for motorcycle parts or equipment? Come here first. The friendliest Ninja 250R/300/400 forum on the internet! (especially Unregistered) |
|
|
|
|
February 20th, 2011, 07:22 PM
|
#20 |
|
Miz and Buzz
Name: Miz
Location: Canberra, Australia
Join Date: Oct 2010 Motorcycle(s): 09 Kawasaki Ninja 250r Posts: 15
|
Stebel Compact Nautilus air horn
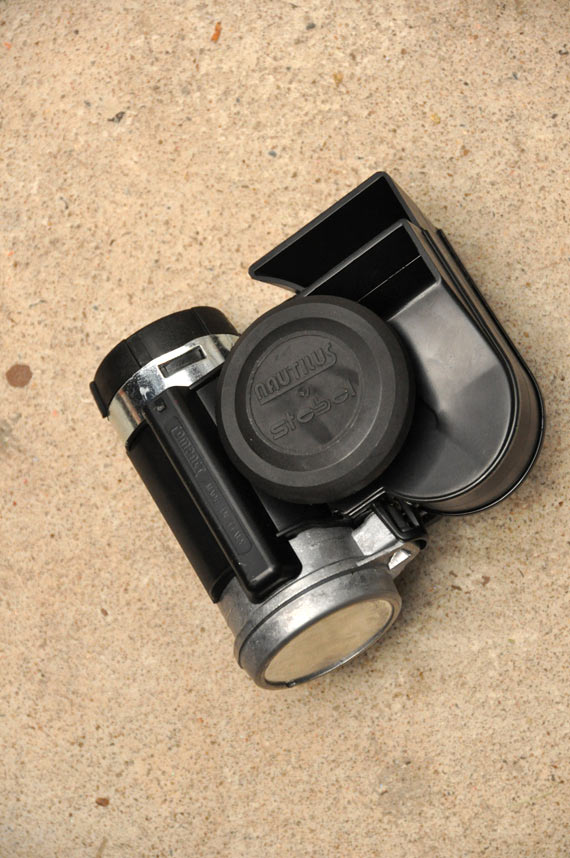 Look at my horn, my horn is amazing. 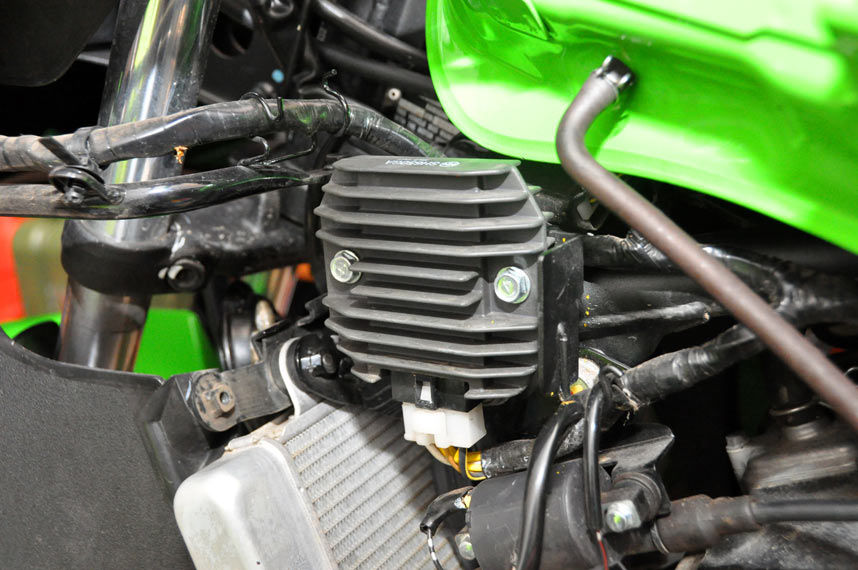 Best mounting point I could find was out this bracket poking out from the reg/rect. 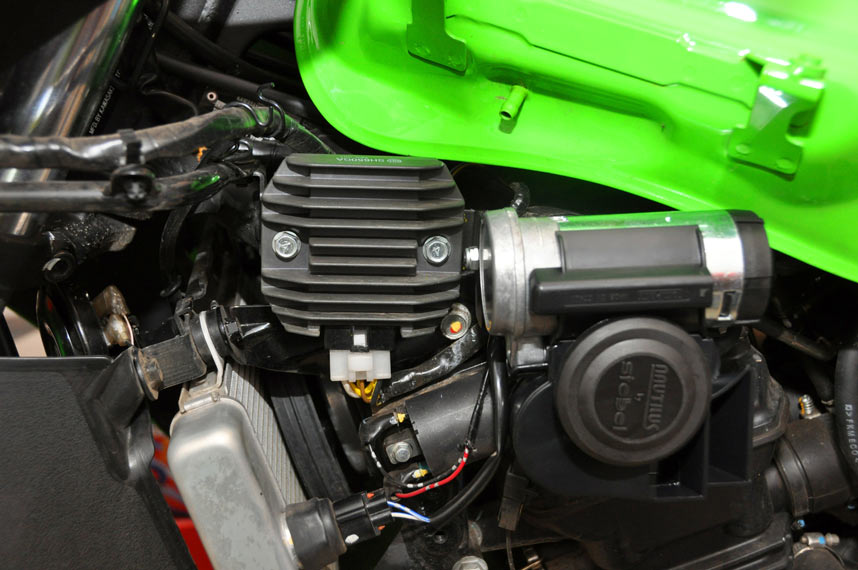 6mm hole drilled in bracket, then an M6 bolt and lock nut works perfectly here. Need to use extension to do up bolt, but it works. Bringing power to the horn isn't hard. 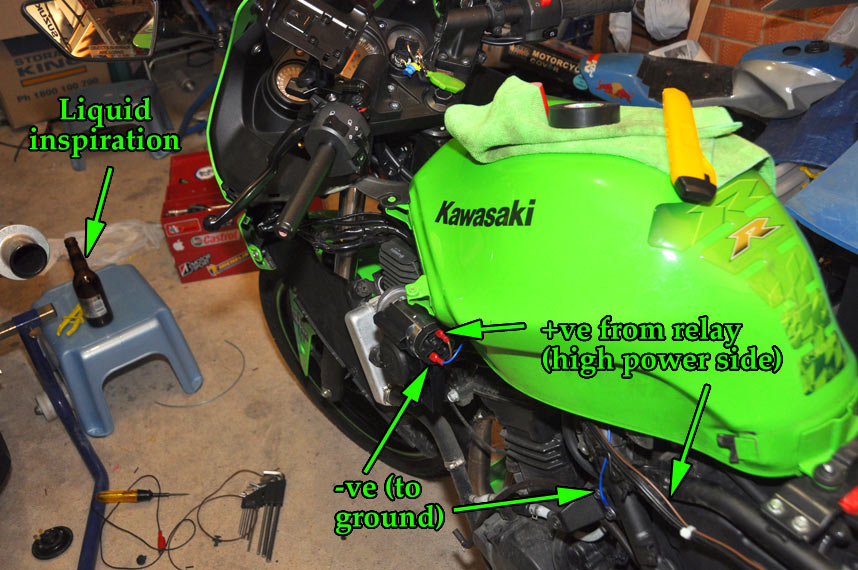 Note the wiring. I redid this with higher current wiring later, mainly to ensure it was absolutely going to handle the 16+ amps that the horn needs. 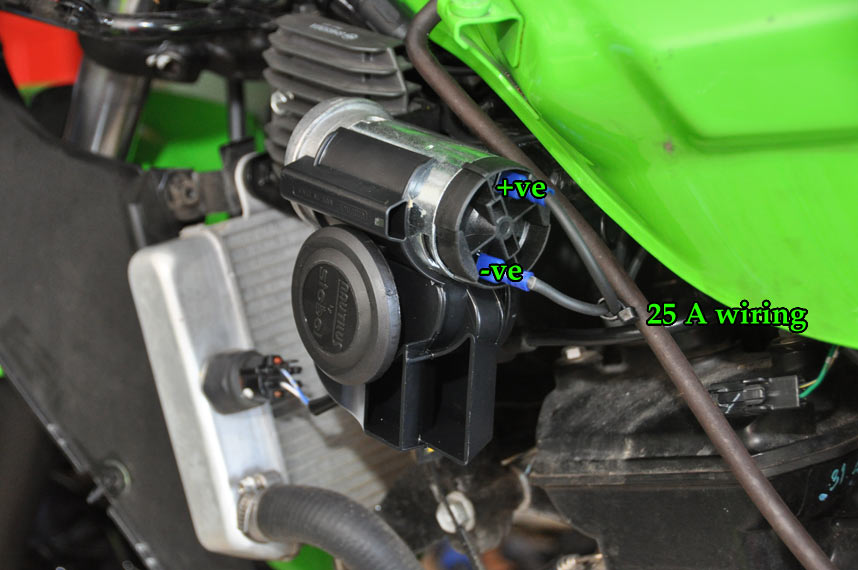 Redone wiring will help .With that done, the horn mounts perfectly. It just clears the tank and it also doesn't hit the fairing. It's a little bit visible in the cutout in the left-hand fairing but not too much. It's also VERY LOUD!
__________________________________________________
http://canberrariders.org.au "Every garage needs a Ninja, even if it is only a little one" http://mizrx3.livejournal.com/ |
|
|
|
|
February 20th, 2011, 07:24 PM
|
#21 |
|
Miz and Buzz
Name: Miz
Location: Canberra, Australia
Join Date: Oct 2010 Motorcycle(s): 09 Kawasaki Ninja 250r Posts: 15
|
Oxford heated grips (and power for my GPS)
Installing the grips isn't hard, especially once a switched power supply is obtained. Although Oxford say they can go through a normal set of wires etc, the piece of mind of them only being on when the ignition is on is a good thing. With the power sorted out by the relay switched by the tail light, it's time to get to the installation of the grips. 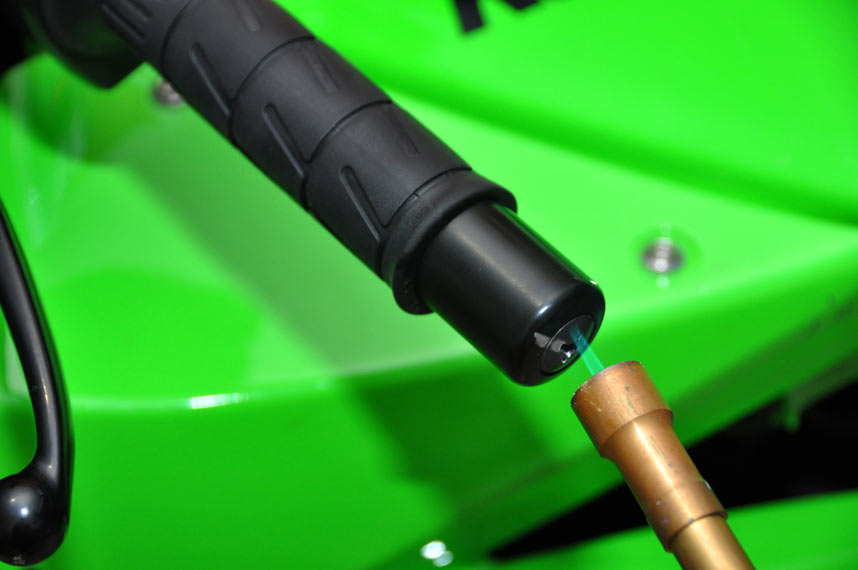 For some reason, Kawasaki thought using heaps of red loctite on the bar end screws was a good idea. Silver line is so you can tell if the screw is actually rotating. Heat them up with a blowtorch...(any excuse)  ... and use an impact driver bit with a big hammer to provide a shock to the bolt (tap it hard). Heat + shock pwns loctite. 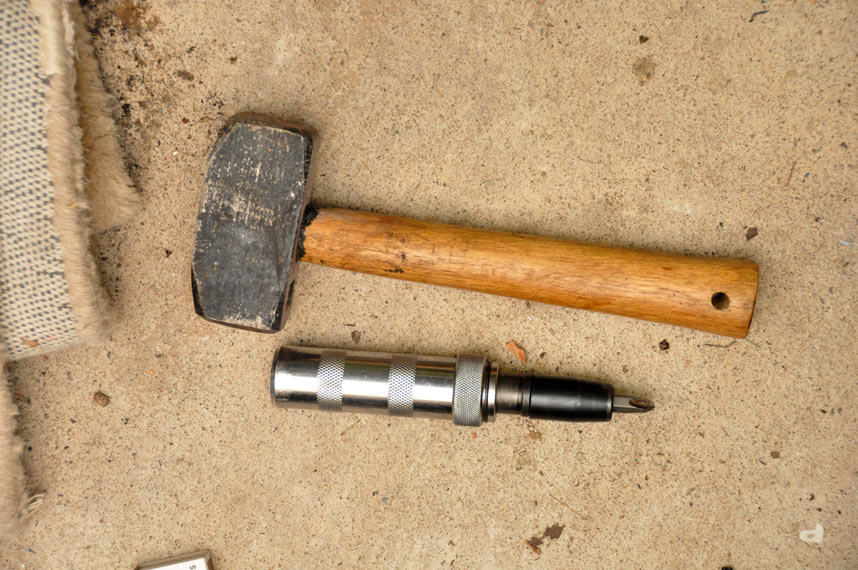 Speaking of an impact driver, you'll need one and a big hammer to do this job. For those who haven't used one, put it onto the screw, push it down and turn it to the left to preload the impact driver part. Then SMACK IT. SMACK IT so hard that if you missed, you'd break your hand. 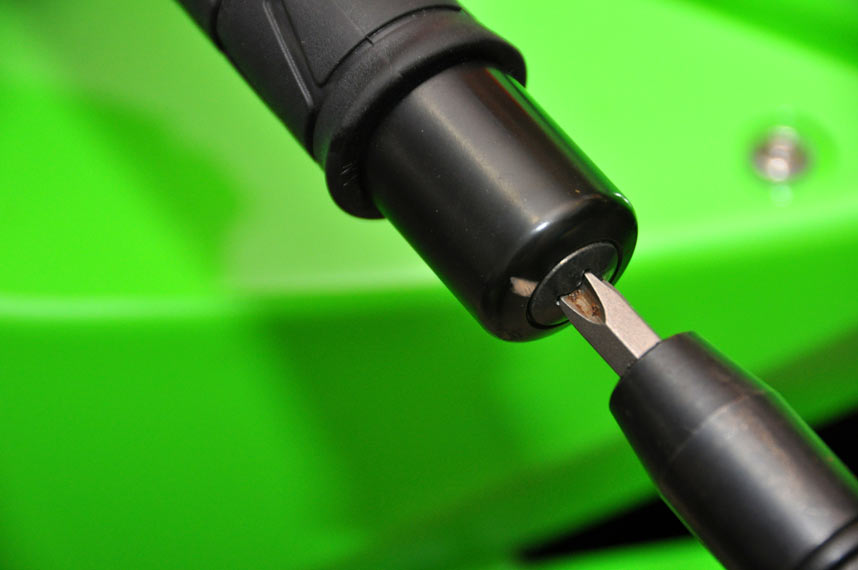 Screw is coming undone here. One hard tap turned it around, so the heat and shock did work. 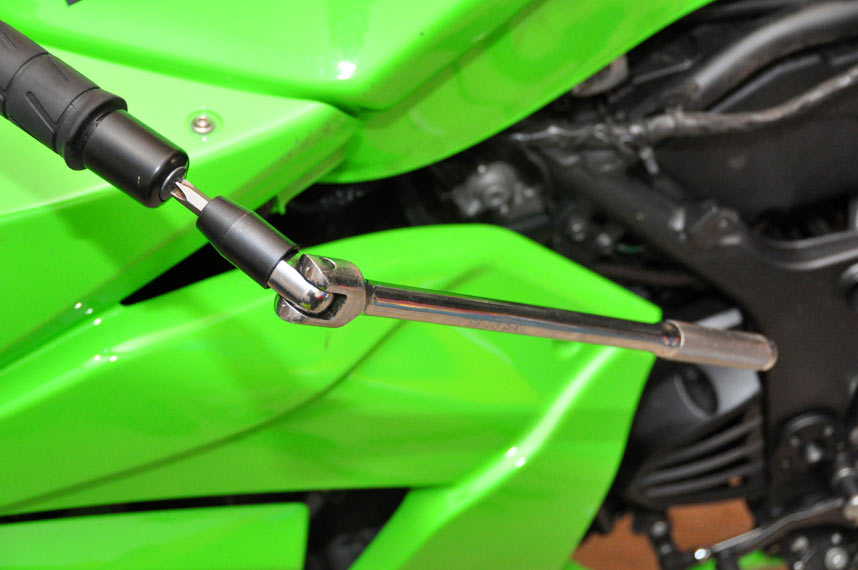 To finish up, use a breaker bar. Impact driver head that can go on a breaker bar is awesome. 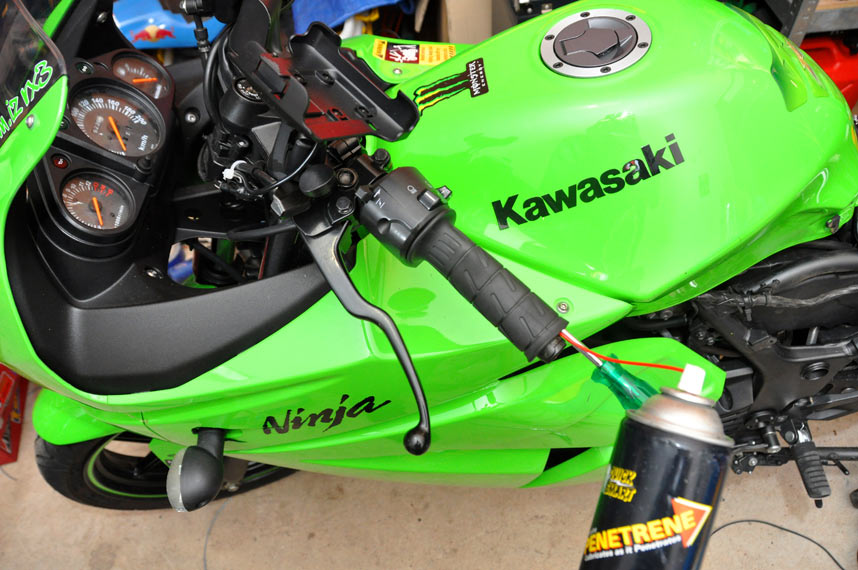 To release the grips, some people used compressed air, some people cut them off. Sliding a screwdriver (Phillips head works better - less likely to puncture the grip) helps, as does heaps of Penetrene. 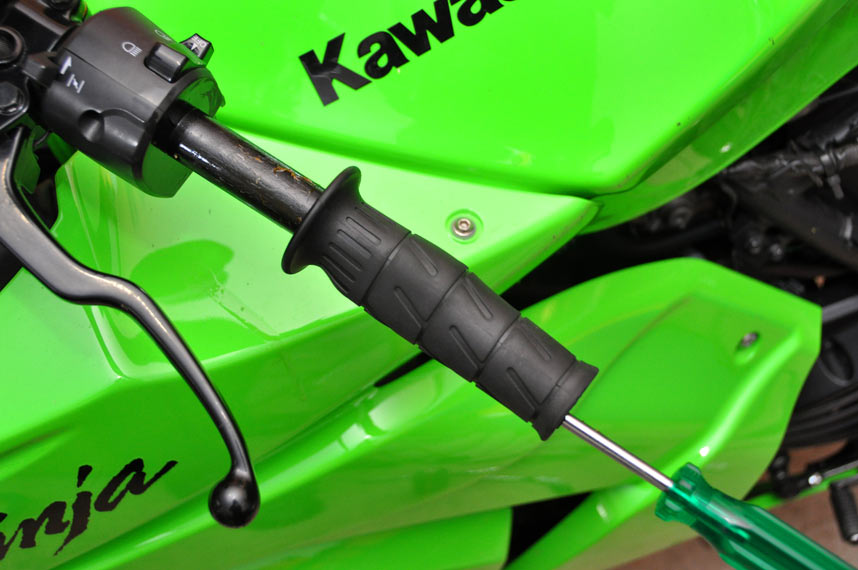 After working the screwdriver all the way around, the grips come off easily 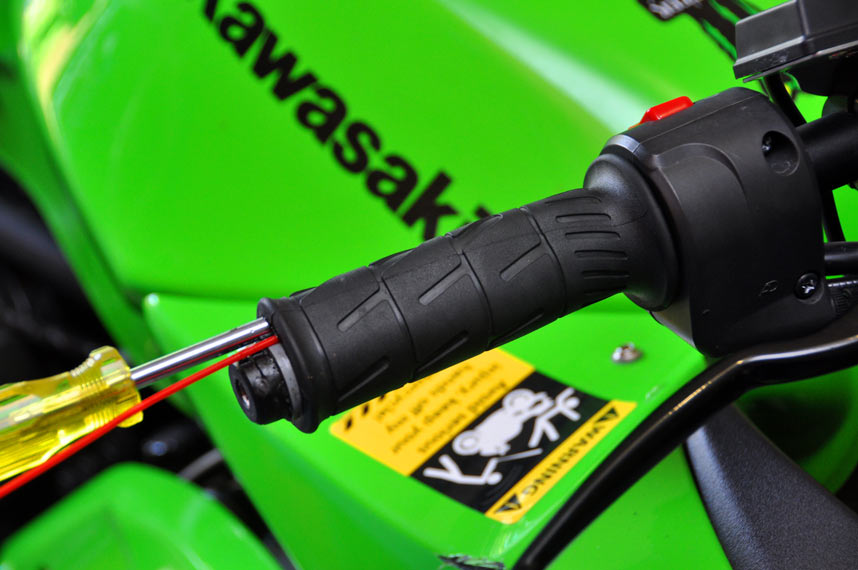 Same deal with the throttle - screwdriver plus lube removes them easily. There is a lip up near the switchgear that the grip needs to be lifted off, too. 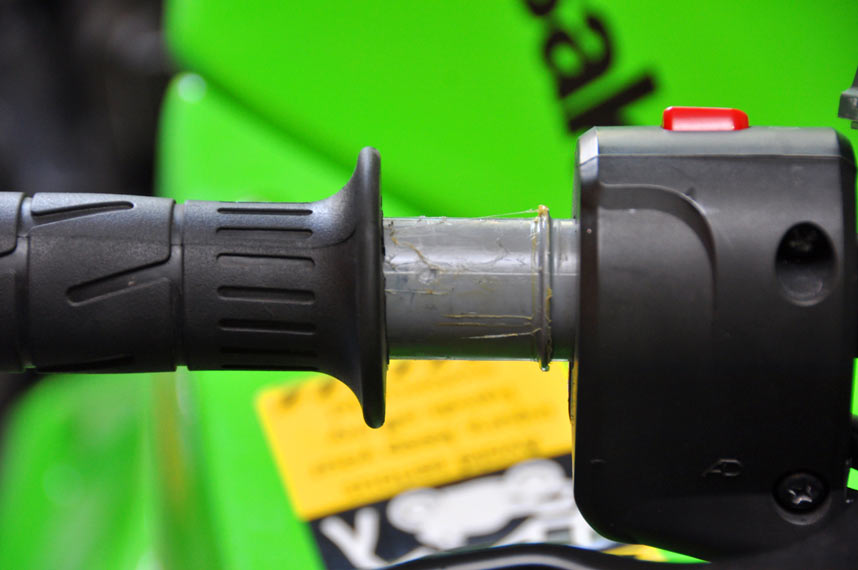 Grip being removed, showing the lip. 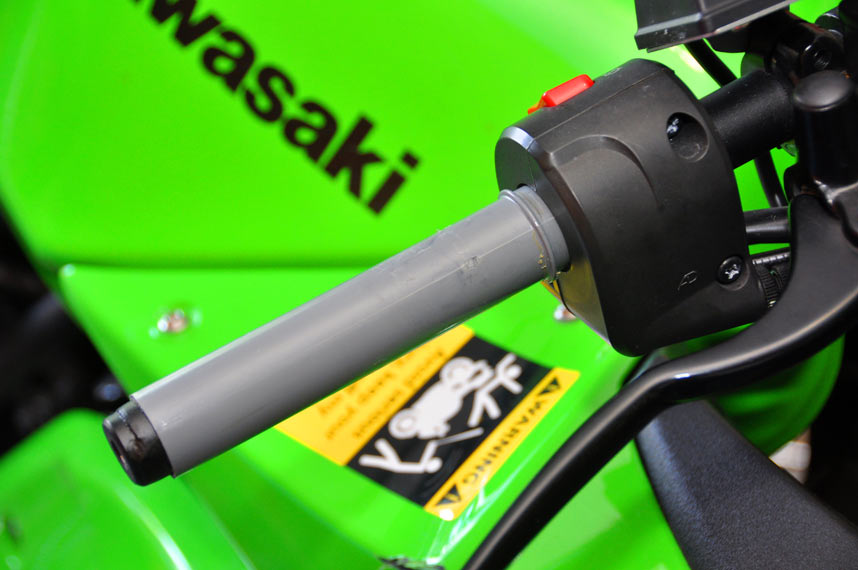 Throttle tube exposed. The heated grips come in two sizes: one has a bigger internal diameter, which goes on the throttle. On a lot of bikes, you have to remove ridges on the throttle tube so the grip goes on nicely. On the 250R you don't have to, but the throttle tube was a bit fat to let the grip go on, so it helps to shave it down with a file and some sandpaper. Grip shaved with a file and sandpaper 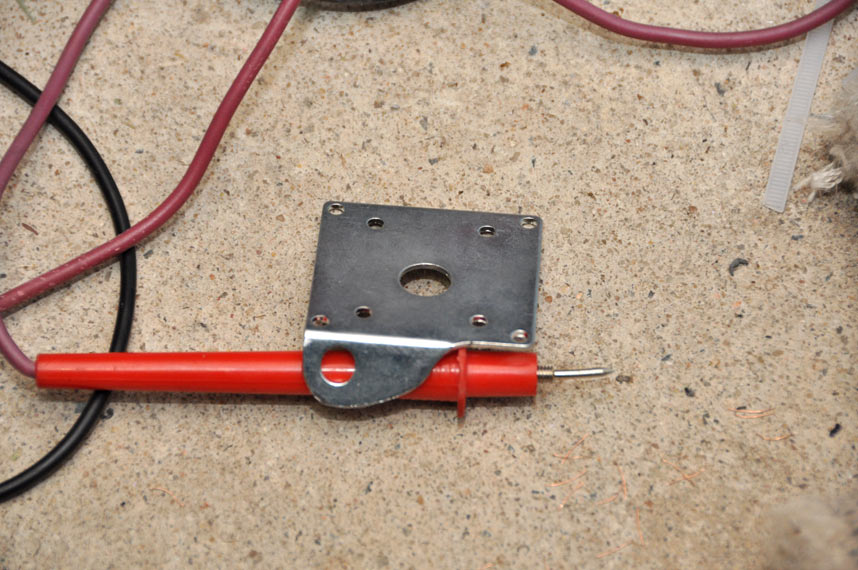 The mount for the heated hand grip controller is not exactly perfect for a 250R. The bolt holes are too far apart to work with the standard controls. Cutting the bottom off and shaping it so it looks ok is what is needed. 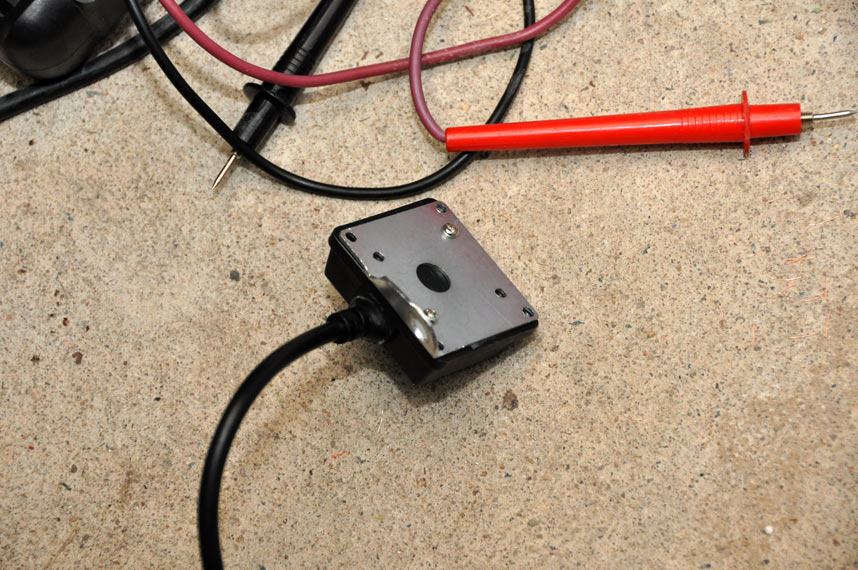 Grip controller screws to the supplied bracket. 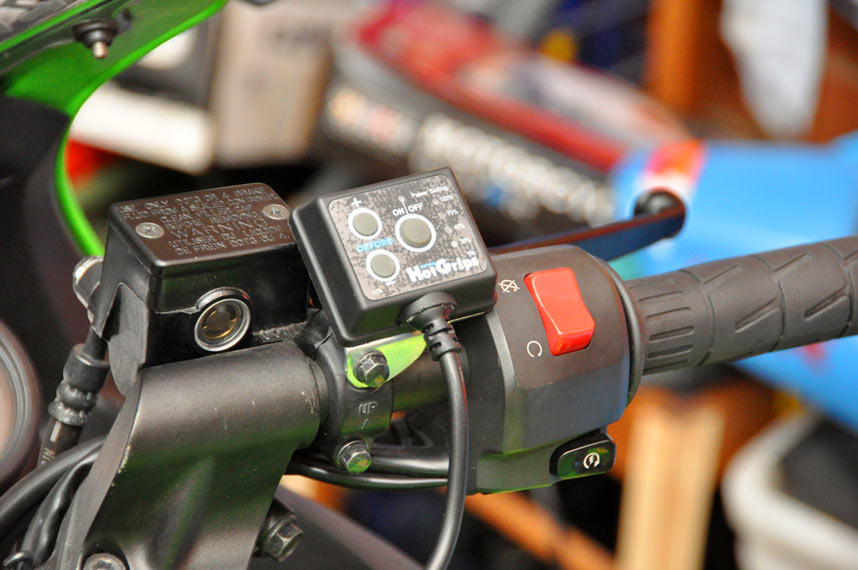 Grip controller mounts to the controls then. Could have spaced it out a bit but this kept it all nice and compact. It doesn't touch the switchgear, once the mount is bent a little 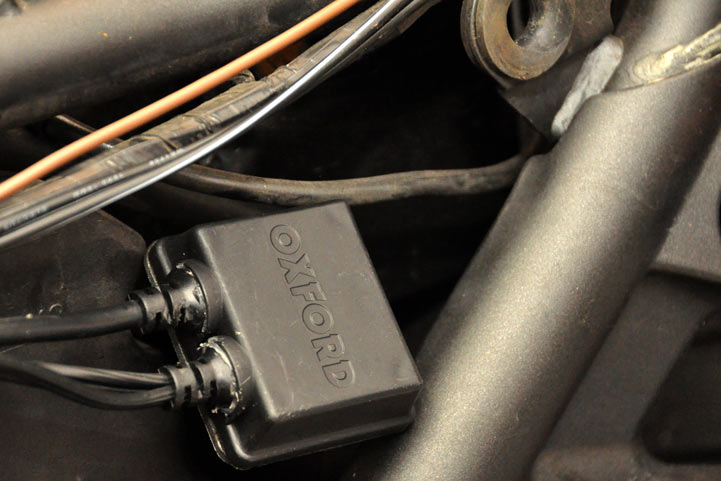 The other end of the controller - this is the bit that actually switches everything. It comes with double-sided tape to hold it somewhere. I stuck it to the side of the battery box. It'll be covered by the tail of the bike, and keeps it all out of the way. 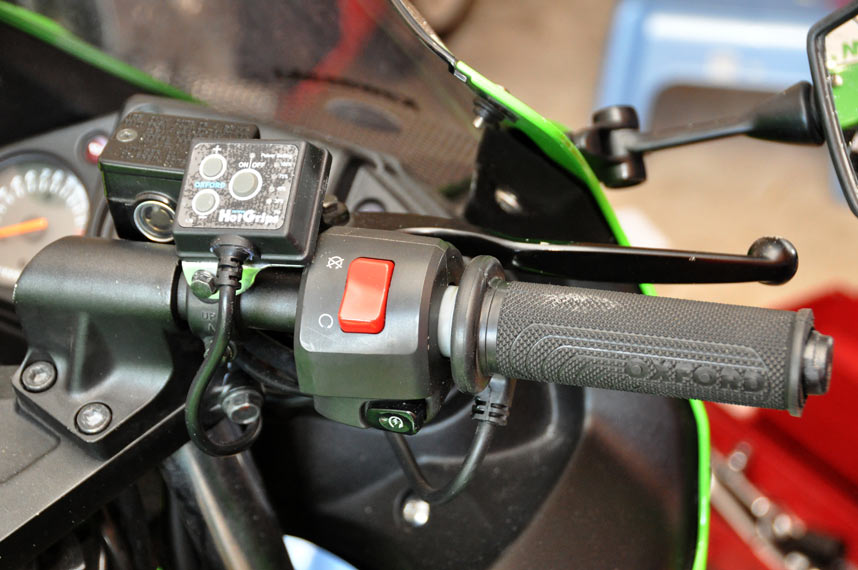 Grips are easy to install. You use some superglue: put most of it up the far end of the throttle tube or the bar, otherwise you'll only get the grip on halfway before the glue sets and you won't be able to finish the job. Trimming the ends isn't always necessary, but I did it on the throttle side so it wouldn't get caught on the bar end and stop the throttle returning properly.  There is a Y adapter that comes from the power controller of the heated grips (the one stuck to the side of the battery box). This goes up to provide power to the grips themselves. I stuck this underneath the ignition switch to keep it all neat. Make sure that the wires don't get pinched when the steering is turned! No final pics, after all, it just looks like the same bike: everything is all hidden, which is the mark of a good electrical installation! Oh and these were the other part of my Valentines Day present:  New cams are now at the top of the list, and i've also got K&N Filters on their way too  Time for a bit of porn... carb porn that is... [IMG]http://www.wenga.net/miz_rx3/buzz/cr31/DSC_2911.jpg[/IMG 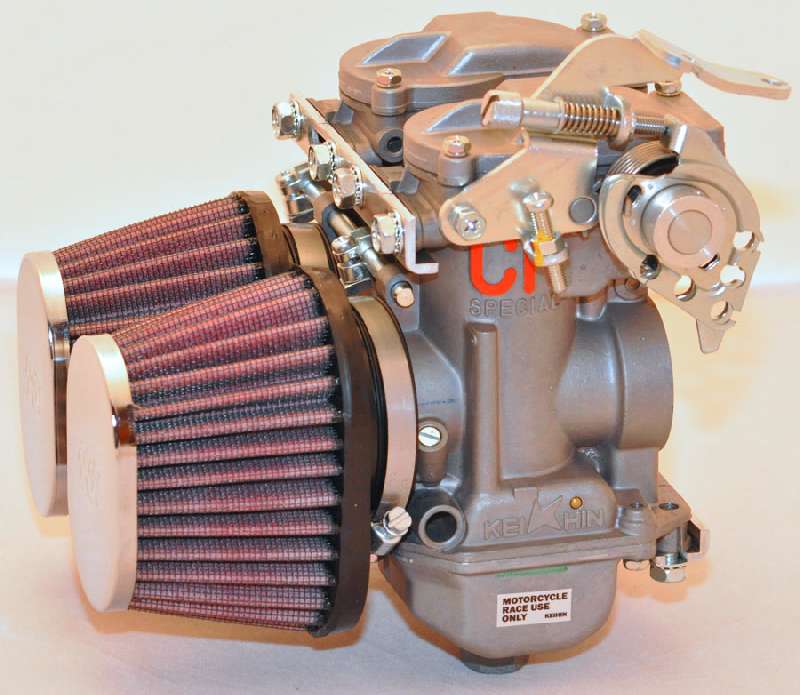 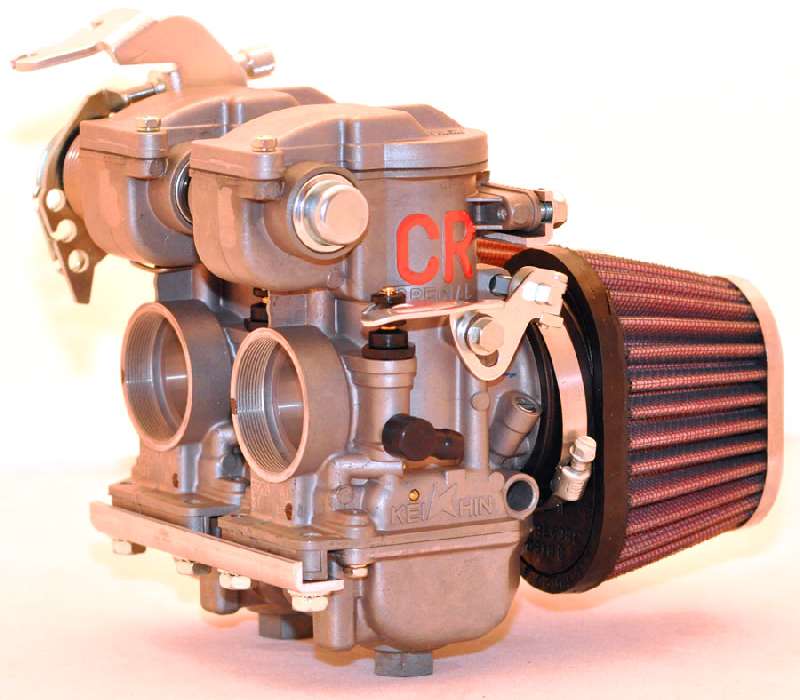 IMG]http://www.wenga.net/miz_rx3/buzz/cr31/DSC_2916.jpg[/IMG] 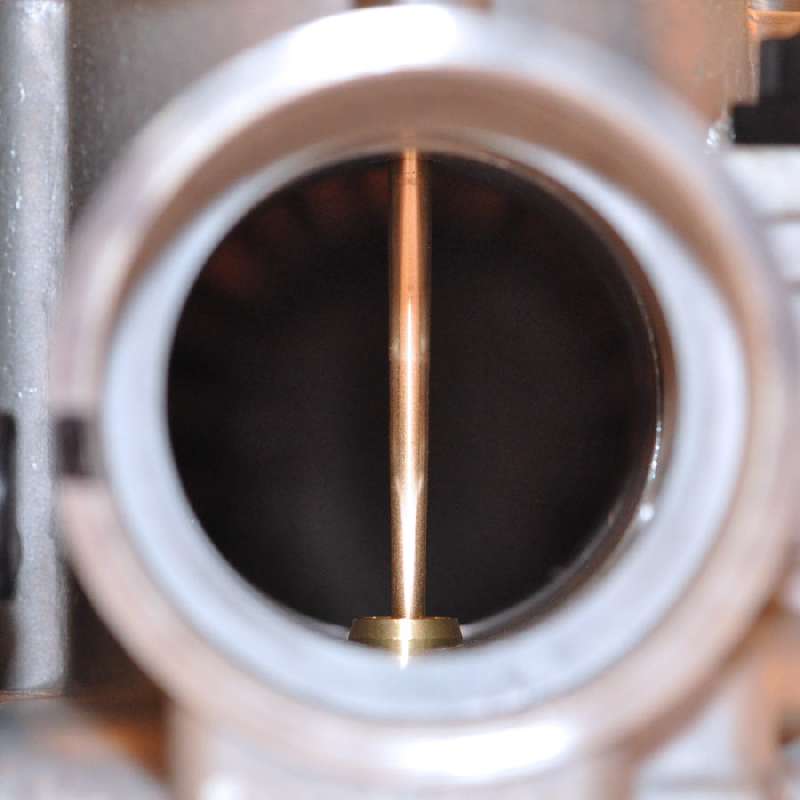   31mm Keihin smoothbores. Standard are CVK 30 mm Mikunis, iirc.
__________________________________________________
http://canberrariders.org.au "Every garage needs a Ninja, even if it is only a little one" http://mizrx3.livejournal.com/ |
|
|
|
|
February 21st, 2011, 10:53 AM
|
#22 |
|
User Title Free Since '12
Name: Floyd
Location: Barbados
Join Date: Dec 2010 Motorcycle(s): '10 Ninja 250R Special Edition Green Posts: A lot.
Blog Entries: 13
MOTM - Feb '12
|
Thanks for the detailed DIY for each project as you go. Really useful - wish I'd followed your example on how to get those damn bar end screws off. I stripped the heck out of mine getting them off. Especially good to know how many rum & cokes a project may take - one must be prepared.
__________________________________________________
 "Improvement makes straight roads, but the crooked roads without improvement, are roads of genius." William Blake Last futzed with by gfloyd2002; February 21st, 2011 at 06:14 PM. Reason: Added an l to "usefu", to make the word more useful. Hahaha! |
|
|
|
|
February 21st, 2011, 05:04 PM
|
#23 |
|
.
Name: rock
Location: greenville, south carolina
Join Date: Jun 2009 Motorcycle(s): black Posts: A lot.
|
A great thread! Keep it up
__________________________________________________
Always get a second opinion because most of these people are makin' this stuff up
|
|
|
|
|
February 21st, 2011, 05:50 PM
|
#24 |
|
Mr. 988
Name: Jeff
Location: Sandy, Utah
Join Date: Aug 2009 Motorcycle(s): One Posts: A lot.
Blog Entries: 1
|
Miz, awesome DYI.
How come you put the heated grip controls on the throttle side? Was it due to no room because of the GPS holder? Seems it would be a pain to operate crossing over with your left hand. BTW, I look at doing anything on my bike and my fingernails get instantly filthy. How the hell do you keep your hands so clean?
__________________________________________________
"I'm the one that's got to die when it's time for me to die, so let me live my life, the way I want to" - Jimi Hendrix Cancer
|
|
|
|
|
February 21st, 2011, 09:18 PM
|
#25 |
|
Moroccan Gold Imports
Name: RJ
Location: MT
Join Date: Sep 2010 Motorcycle(s): '03 ZX9R, '03 ZX7R & wife's '09 250R Posts: 136
|
Wow, I haven't seen any other threads where people are using aftermarket carbs. Can you give us more info? How will the bike be tuned for these carbs?
|
|
|
|
|
February 21st, 2011, 09:53 PM
|
#26 |
|
ninjette.org guru
Name: war
Location: north chicago burbs
Join Date: Jan 2011 Motorcycle(s): 2014 Ducati Panigale 899 Posts: 325
|
Haha, wow! Lots of toys! I've heard the Stebel nautilus before and it's loud! You can keep the stock horn for quick "beeps" at pedestrians as it takes just a little longer for the nautilus to build pressure. I removed the stock horn on my car and I always feel bad when I have to beep at dumb pedestrians with my supertones, because it always makes them jump.
|
|
|
|
|
February 22nd, 2011, 03:35 PM
|
#27 |
|
ninjette.org certified postwhore
Name: Alex
Location: Belfast, ME
Join Date: Jul 2008 Motorcycle(s): 2010 Honda NT-700-V, formerly, Green 2008 Ninja 250R Posts: A lot.
|
Miz, It is so nice to see a woman who rides well and enjoys wrenching. I see that you have also found that beer helps. I can't do a proper pinstriping job without a beer--steadies your hand. You are doing a great job.
__________________________________________________
Ninjette, Sold. New Bike: 2010 Honda NT-700V/VA, 73 Honda 550, 74 Honda 550 |
|
|
|
|
February 22nd, 2011, 08:12 PM
|
#28 |
|
ninjee two-fiddie
Name: Chance
Location: Ohio
Join Date: Oct 2009 Motorcycle(s): 2008 Ninja 250r Posts: 61
|
The Cotter Road pics are amazing!
|
|
|
|
|
February 22nd, 2011, 08:52 PM
|
#29 |
|
self wrencher
Name: john
Location: houston
Join Date: Dec 2008 Motorcycle(s): 08 250r and 07 600r Posts: A lot.
|
Miz, you are one cool chick. I love chick who works on her own bike.
Very nice bike (and the chick too)
|
|
|
|
|
February 23rd, 2011, 07:55 AM
|
#30 |
|
ninjette.org guru
Name: lux
Location: NY
Join Date: Jul 2010 Motorcycle(s): 2010 Ninja 250R Posts: 306
|
Thanks very much for the detailed write-up and pictures!
|
|
|
|
|
February 24th, 2011, 08:37 PM
|
#31 |
|
ninjette.org sage
Name: Peanut
Location: Senoia, GA
Join Date: Feb 2011 Motorcycle(s): Green 2013 ZX-6R Posts: 723
|
Where did you get the carbs?
|
|
|
|
|
February 24th, 2011, 09:09 PM
|
#32 | |
|
ninjee two-fiddie
Name: Chance
Location: Ohio
Join Date: Oct 2009 Motorcycle(s): 2008 Ninja 250r Posts: 61
|
Quote:
|
|
|
|
|
|
February 27th, 2011, 10:18 AM
|
#33 |
|
ninjette.org sage
Name: David
Location: Loves Park, IL
Join Date: Feb 2011 Motorcycle(s): Time will tell Posts: 969
|
If they are what I think they are, look up Keihin CR31
You'll find some sites. Like this one: http://www.aftermarketcycles.com/kei...250-ninja.html |
|
|
|
|
February 27th, 2011, 07:08 PM
|
#34 | |||||||||
|
Miz and Buzz
Name: Miz
Location: Canberra, Australia
Join Date: Oct 2010 Motorcycle(s): 09 Kawasaki Ninja 250r Posts: 15
|
Quote:
Quote:
Quote:
Quote:
Mmm I like your Style - I'm a Rum drinker but i may have to try this 'beer' you speak of *and no, i don't drink Fosters ike Croc Dundee - It tasts like goats p!ss* Quote:
Which is precisely why I've taken to the track Quote:
Quote:
Quote:
Quote:
Yep, Yep and Yep. Or power-barn.com
__________________________________________________
http://canberrariders.org.au "Every garage needs a Ninja, even if it is only a little one" http://mizrx3.livejournal.com/ |
|||||||||
|
|
|
|
February 27th, 2011, 07:11 PM
|
#35 |
|
Miz and Buzz
Name: Miz
Location: Canberra, Australia
Join Date: Oct 2010 Motorcycle(s): 09 Kawasaki Ninja 250r Posts: 15
|
Note: The below dyno sheet and video are PRE CARBS. They are still being tuned
.I've had a couple of people ask why bother with the carbs. Well, The BF kindly had a baseline dyno run done @ MotoGarage, and Buzz makes the same amount of power with the exhaust - but at higher revs. The midrange is lower mainly cause the exhaust scavenges so much more gas that it is richer.Could have rejetted the standard carbs, but it wasn't much more for the CR31s! Onto the dyno run. 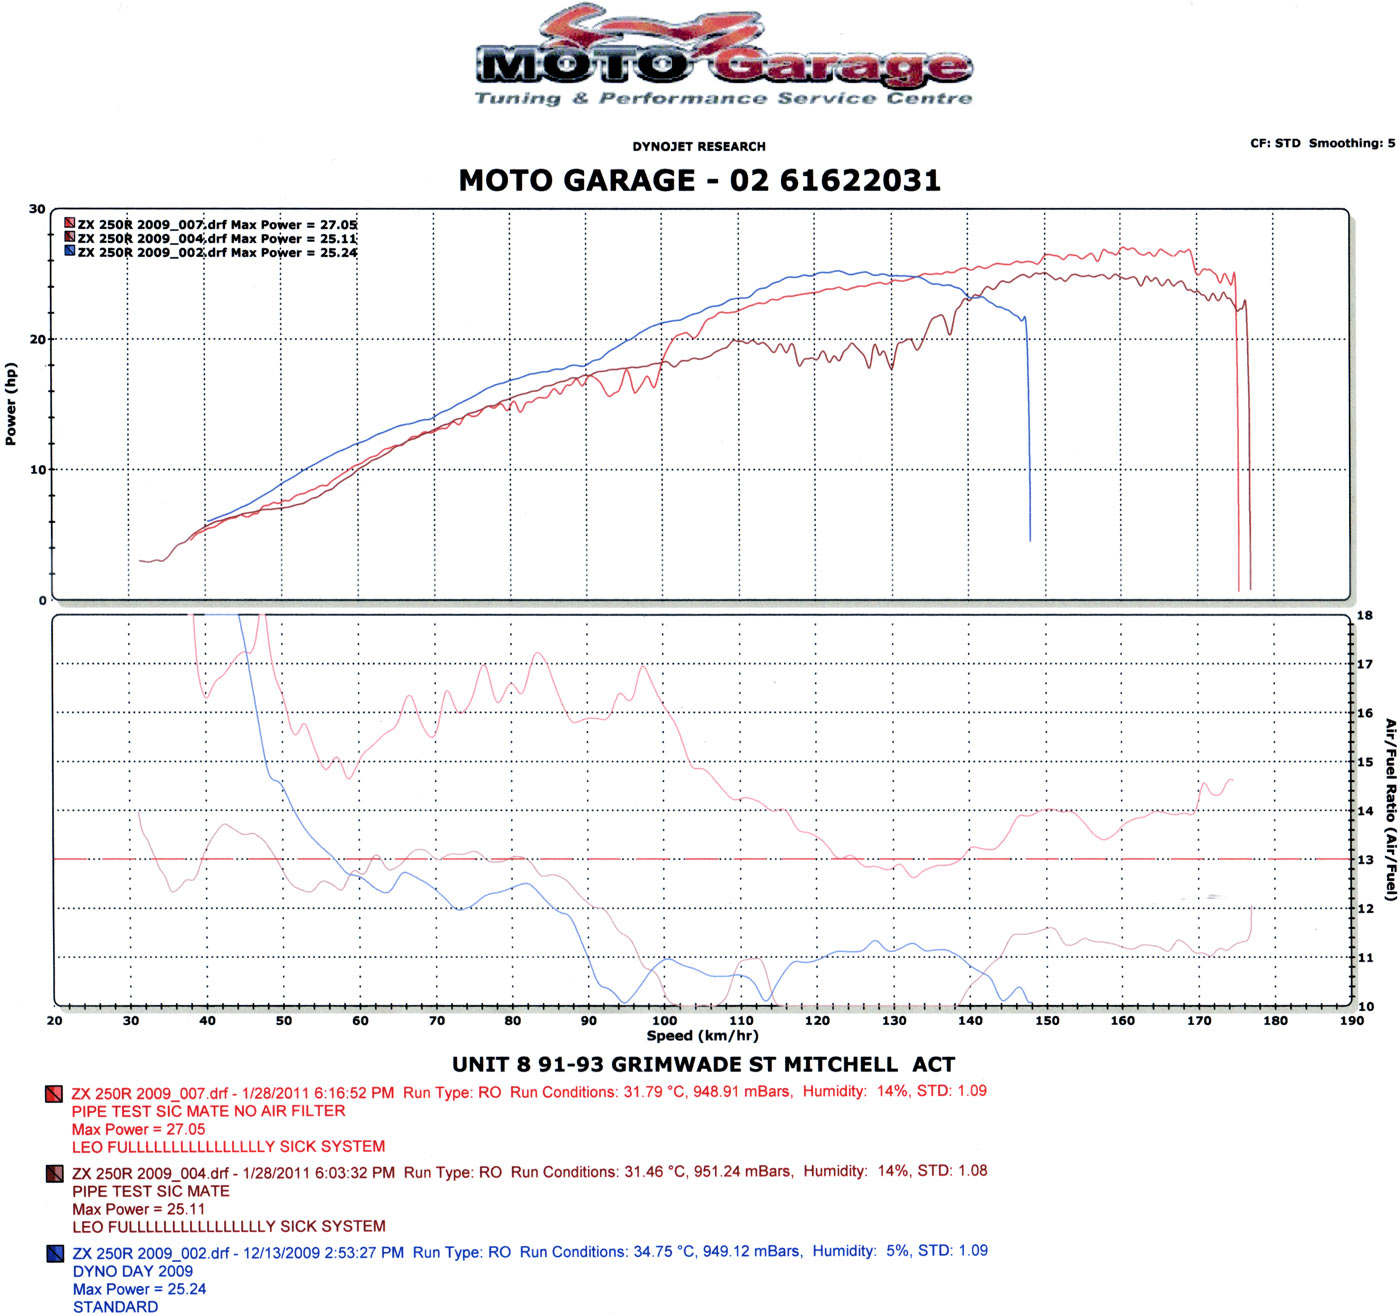 Blue is dyno day, 2009: completely stock, 5000 km on it. Bit rich up top. Dark red is with the exhaust (16000 km) - very rich in the middle. Gains so much more breathing on the overrev though, so it'll make good power when tuned. Light red is with the exhaust and the airbox mostly dismantled to try to lean it out. 27 hp (+2 hp), just through dodgy airbox changes. Tuning will make it so much better. Not running an airbox with the CR31s (though you can). CR31s work well with pods, and they're much easier to tune than a standard set of carbs. They also look awesome! As for the exhaust sound: [video=youtube;lBsZ_Z_QkL8]http://www.youtube.com/watch?v=lBsZ_Z_QkL8[/video] It is SO LOUD! Very loud and obnoxious - just like me! I popped into MotoGarage with the BF to deliver Brett a hearty beverage to fire his spirits after a long week of work, and check out the progress on Buzz. Carbs are fitted! Onto PornV2.0! Carb PornV2.0 that is! 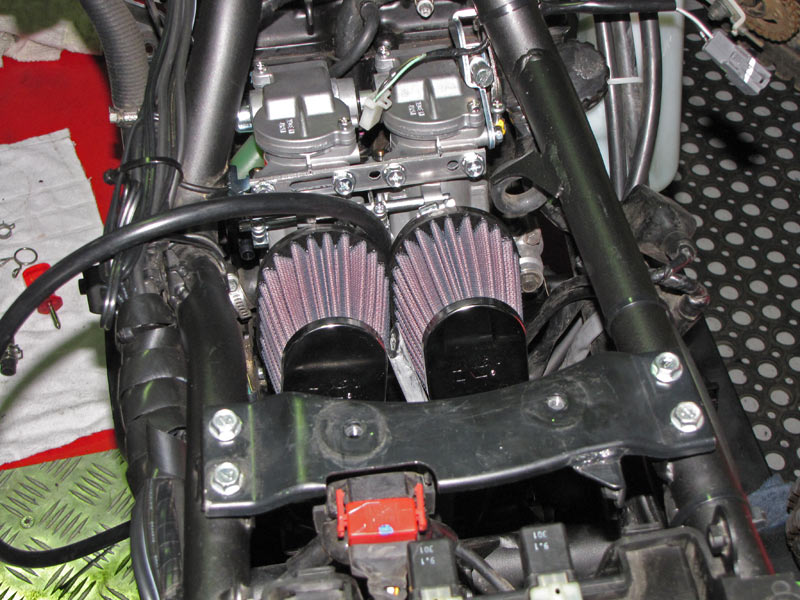 Carbs installed, they clear everything nicely with a bit of <James May>Cocking About</James May>. Apparently you can run these with the stock air box. Air boxes are for suckers. 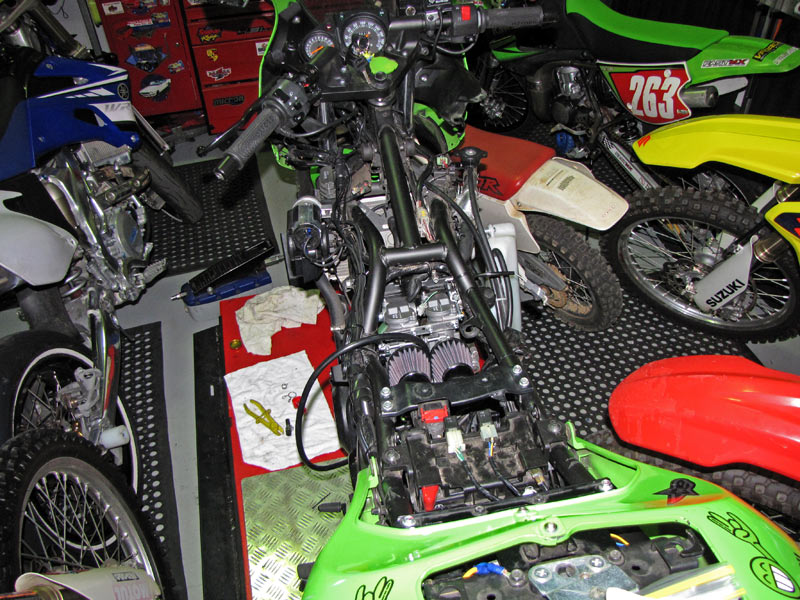 Now that's better! 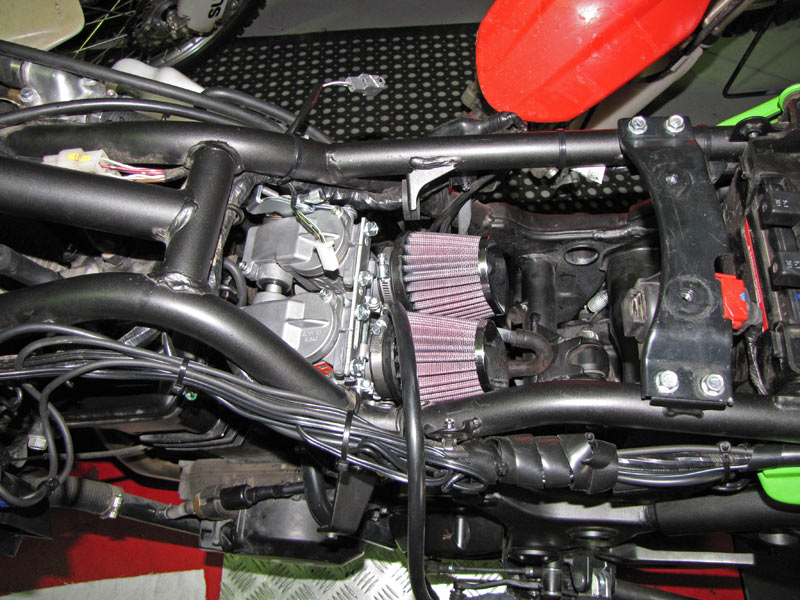 Lots of space with the airbox gone. Don't care about the weight loss but it is cool . Niiiiiiiice.  Not much to her when she's apart! 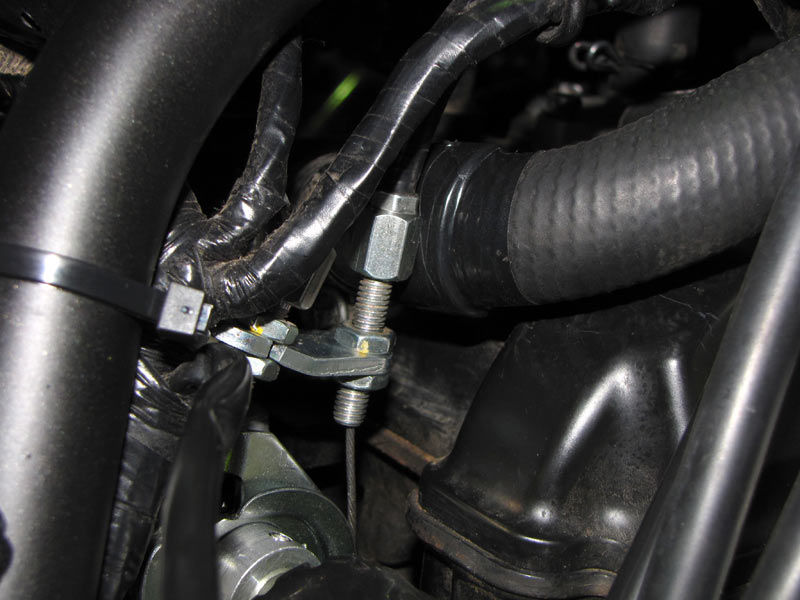 Throttle cable touches the hose, so some protection is needed here. It has a really strong throttle now, much stiffer. One of Brett's offsiders commented that they could just disconnect the throttle return cable, but "CRs... they don't always turn off". So best to live with the stiffer cable from the stiffer throttle spring and use the push-pull throttle cable as Keihin intend .The bike starts and idles, no tuning done yet. Soon!
__________________________________________________
http://canberrariders.org.au "Every garage needs a Ninja, even if it is only a little one" http://mizrx3.livejournal.com/ |
|
|
|
|
March 3rd, 2011, 03:14 PM
|
#36 |
|
Moroccan Gold Imports
Name: RJ
Location: MT
Join Date: Sep 2010 Motorcycle(s): '03 ZX9R, '03 ZX7R & wife's '09 250R Posts: 136
|
Are you using a jet kit with those carbs? Or do they come pre-jetted?
|
|
|
|
|
March 3rd, 2011, 03:18 PM
|
#37 |
|
CVMA #74 WSMC #750
Name: Nemesis
Location: On the track
Join Date: Oct 2009 Motorcycle(s): All of them Posts: A lot.
|
Kinda sad that's all it's making considering all the upgrades.
|
|
|
|
|
March 3rd, 2011, 05:05 PM
|
#38 | |
|
Sexy Beast
Name: Mat
Location: Tampa
Join Date: Mar 2011 Motorcycle(s): 2010 Ninja 250R, 2006 ZX-14, 2012 Ducati Monster Posts: A lot.
|
Quote:
|
|
|
|
|
|
March 5th, 2011, 07:42 PM
|
#39 |
|
Moroccan Gold Imports
Name: RJ
Location: MT
Join Date: Sep 2010 Motorcycle(s): '03 ZX9R, '03 ZX7R & wife's '09 250R Posts: 136
|
The dyno's say stock, exhaust, and exhaust/air filter. So it sounds like they are untuned test runs. Even people who rejet with those mods only see 30-31.
I am excited to see what these upgraded carbs can do! |
|
|
|
|
March 11th, 2011, 12:40 AM
|
#40 |
|
ninjette.org newbie
Name: Michelle
Location: Jacksonville
Join Date: Mar 2011 Motorcycle(s): 09Ninja250 Posts: 7
|
I want to replace my airbox, but some people are telling me know to. I hate the thing b/c it makes it so hard to work on anything inside the bike especially getting the carbs out. I finally got them out after removing the battery, moving the air box back (b/c I still can't get the thing out) I think I might have to take off the back tire to get the air box out? I removed the back fender and still cant get the darn thing out. Any ways it just looks a lot nicer with an after market air filter... I just need to figure out where to buy one. It looks like we have the same bike. 2009 ninja 250
|
|
|
|
 |
 Similar Threads
|
||||
| Thread | Thread Starter | Forum | Replies | Last Post |
| [superbikeplanet.com] - From The Archives: Re-Cycle Buzz Buzzelli | Ninjette Newsbot | Motorcycling News | 0 | December 23rd, 2012 07:40 AM |
| [superbikeplanet.com] - Sorry Goose, but it's time to buzz a tower | Ninjette Newsbot | Motorcycling News | 0 | October 19th, 2012 05:40 PM |
| Buzz, buzz, buzz . . . (handlebar vibration) | gfloyd2002 | 2008 - 2012 Ninja 250R Farkles | 22 | February 4th, 2011 10:18 AM |
| [motorcyclistonline] - The Buzz From X Games 16 | Ninjette Newsbot | Motorcycling News | 0 | July 28th, 2010 04:50 PM |
| fairing / windshield (???) buzz | chess | 2008 - 2012 Ninja 250R Tech Talk | 27 | May 17th, 2009 04:34 PM |
|
|


